Welcome to the IPcook user guide. Whether you are just getting started with proxies or already running large-scale automation, this guide will walk you through every step. From creating your account and choosing a plan to configuring proxies, assigning access, monitoring usage, and setting IPcook as your system proxy, everything you need is here.
New to proxy tool? This section shows you how to create an IPcook account and choose a proxy plan that fits your needs. After signing up, you can manage your plans, proxies, and usage directly from the dashboard.
Tip: New users can start a free trial with 100 MB of residential proxy traffic.
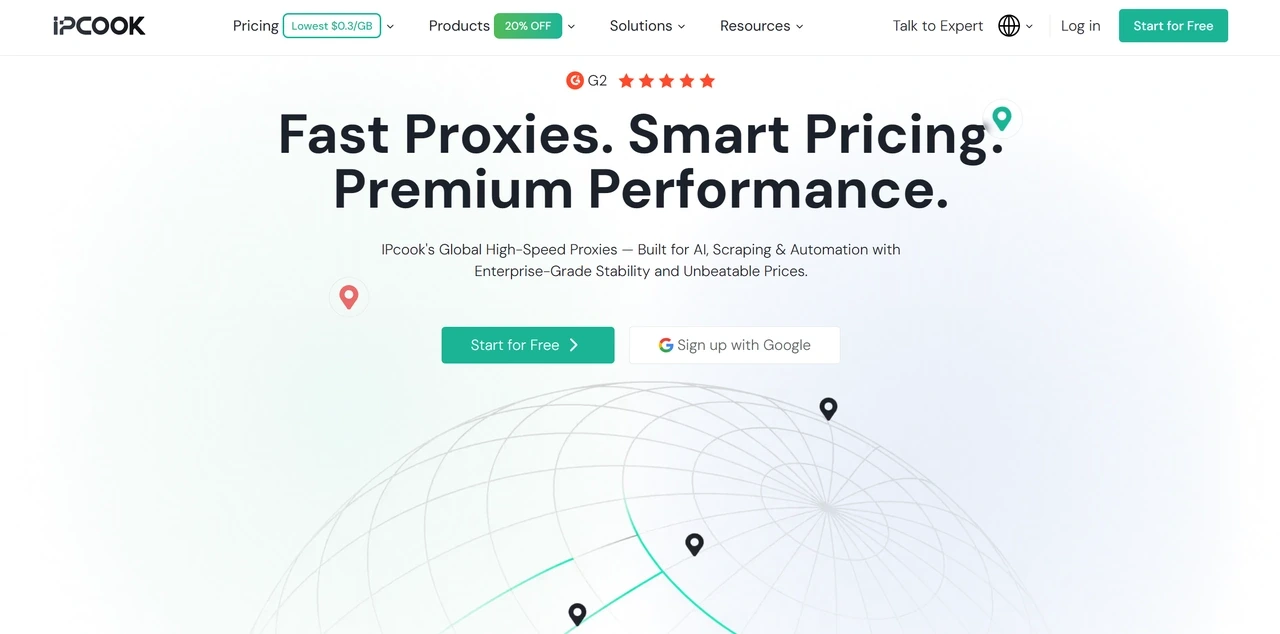
Go to IPcook. If you are a new user, click Start for Free. Otherwise, click Log in at the upper right. Create an account with your email address or Google account, then verify your email using the confirmation link sent to your inbox.
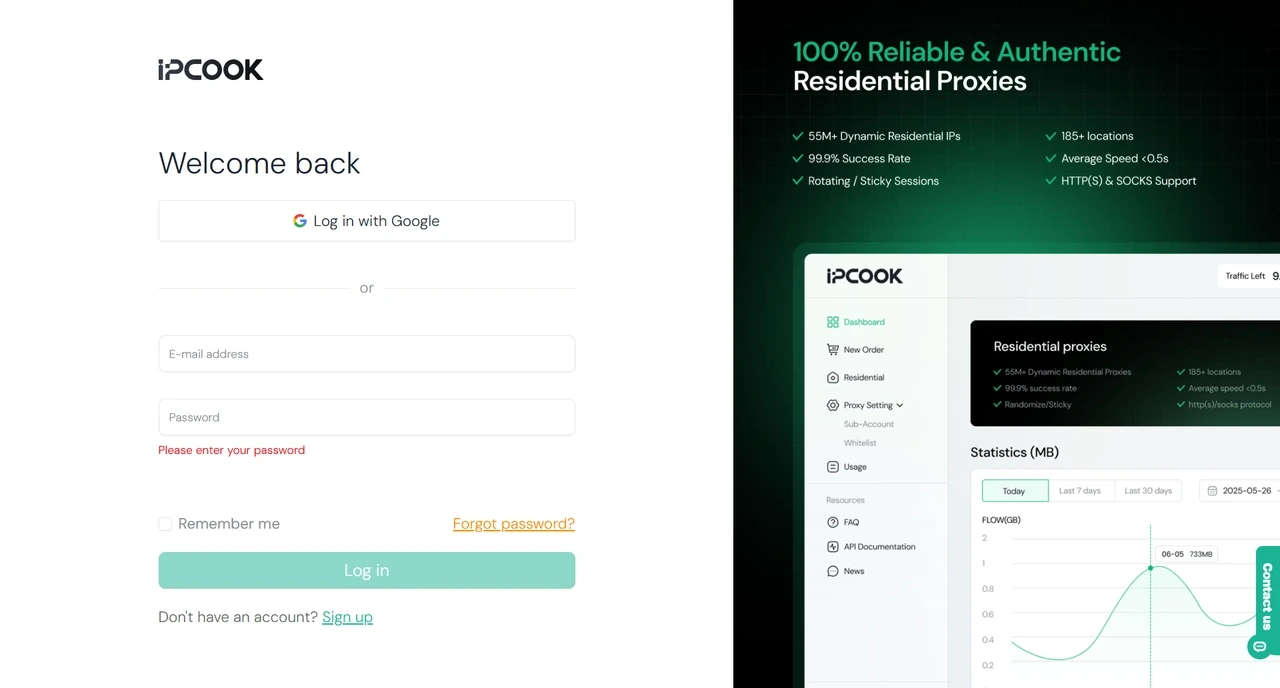
Log in to your account and open the dashboard to start managing your proxies.
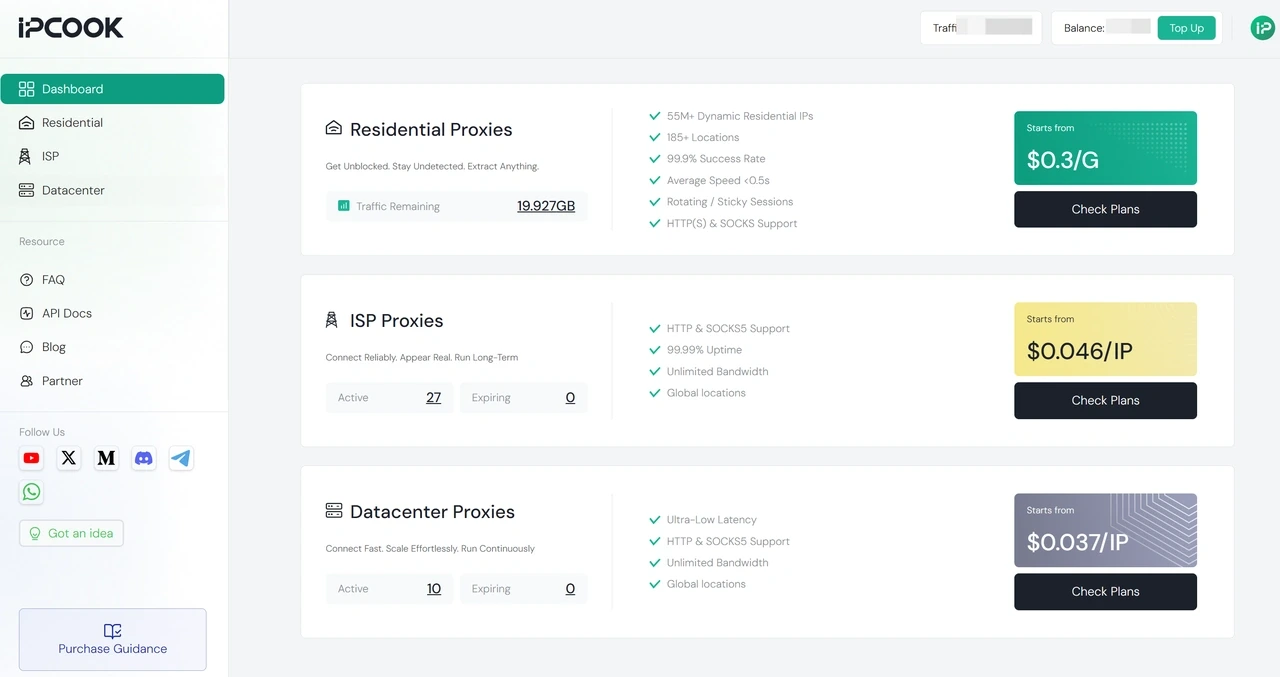
The dashboard is your main control center. From here, you can check your traffic and account balance, top up your account, and access each proxy product.
At the top right, you can view your current Traffic and Balance, as well as the Top Up button.
The main dashboard includes cards for Residential Proxies, ISP Proxies, and Datacenter Proxies. Each card summarizes the product's main features and shows your current usage or available resources. To get started, select a proxy type from the sidebar or click Check Plans on the relevant card.
Follow the steps below to purchase and configure Residential Proxies with IPcook.
Select Residential from the left-hand menu. On the Plan Pricing page, choose your plan that best fits your needs. Each plan includes sticky sessions of up to 24 hours, free geo-targeting, and 10 free sub-accounts.
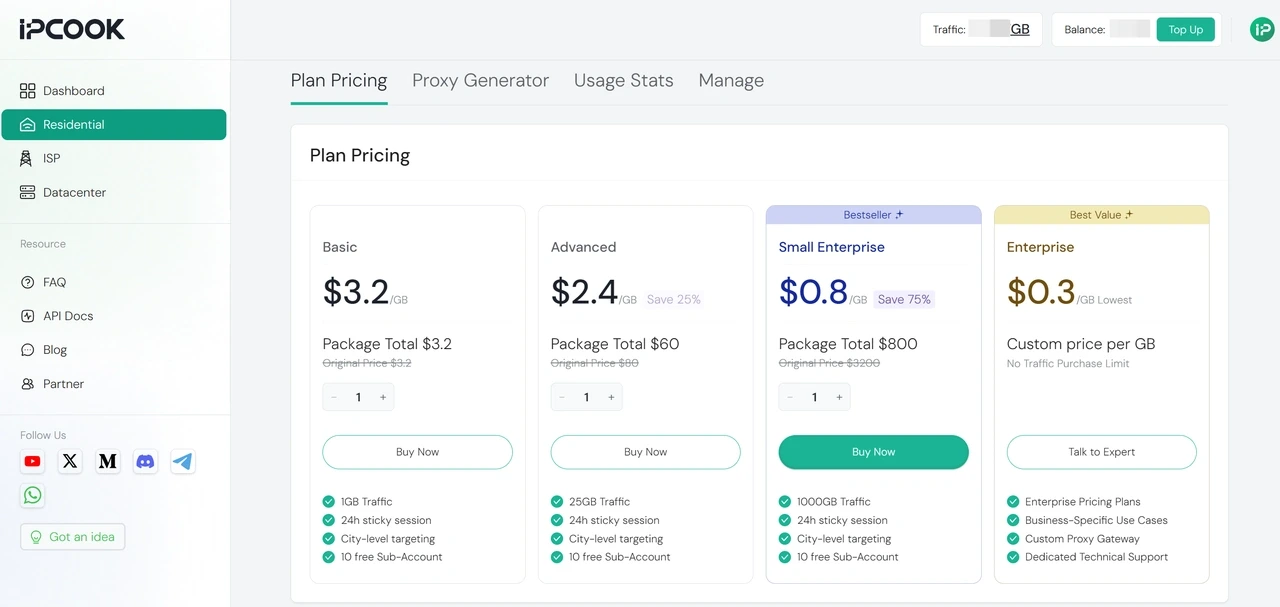
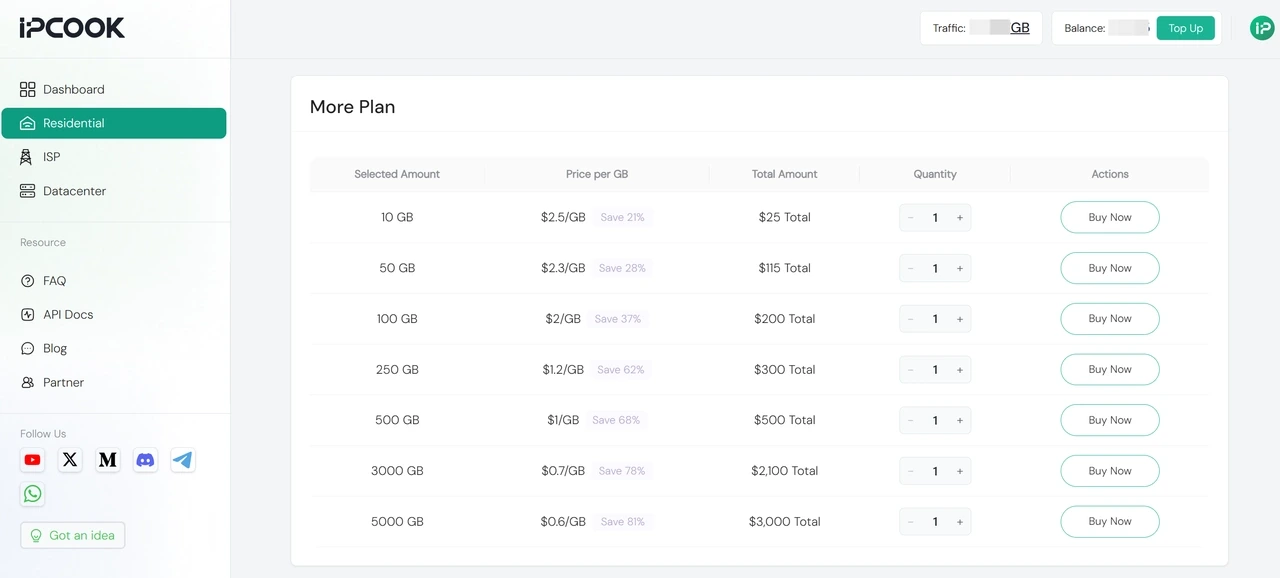
IPcook also offers additional plans with 10GB, 50GB, 100GB, 250GB, 500GB, 3000GB, and 5000GB of traffic. Larger plans include higher volume discounts. For high-volume projects or custom requirements, contact our live chat team for help.
🛒 Complete Your Purchase in a Few Clicks
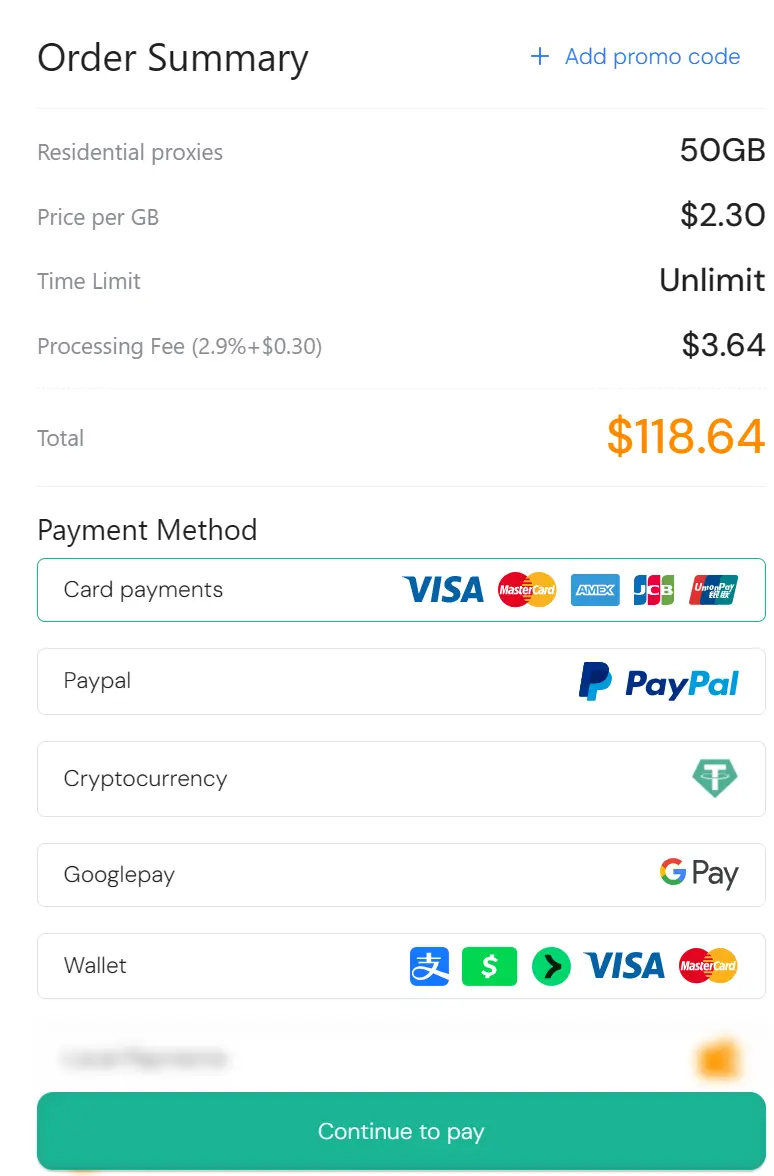
After selecting a plan, review the Order Summary before confirming your purchase. Available payment methods may include credit or debit card, PayPal, cryptocurrency, Google Pay, wallet balance, account balance, and local payment options.
Click Continue to pay to complete the purchase. Your traffic balance should appear on the dashboard after payment is processed. If it does not appear immediately, refresh the page or contact live chat support.
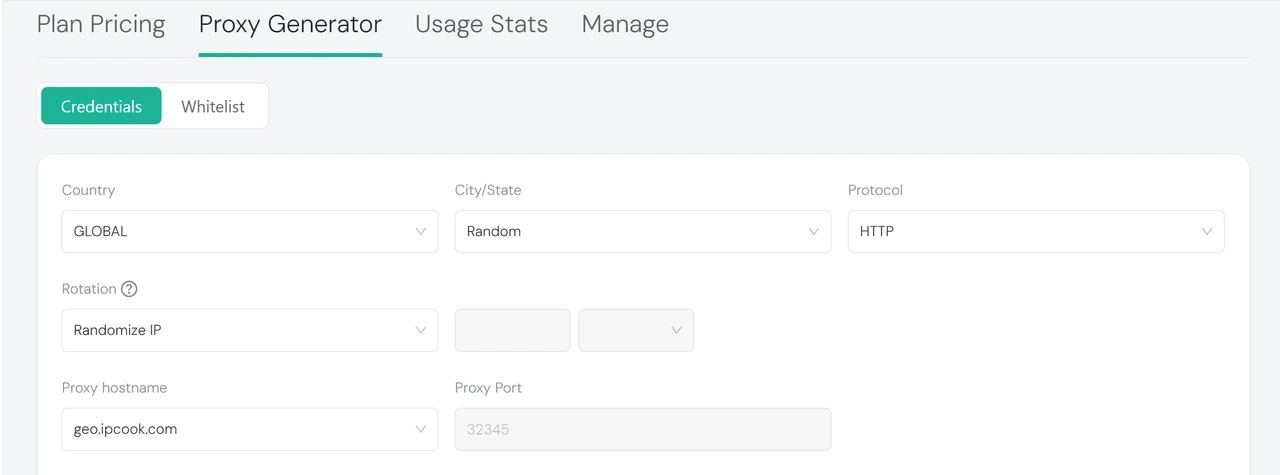
Open Proxy Generator. You can generate residential proxies using either Credentials or Whitelist authentication.
Select the Country, City/State, Protocol, and Rotation settings for your proxy.
Choose Random for City/State when you do not need a specific location. HTTP works for most websites and browser-based tasks. Use SOCKS5 only when your application specifically requires it.
For Rotation, choose Randomize IP to rotate IP addresses frequently or Sticky IP to keep the same IP address for a longer session. Sticky sessions can last from 1 minute to 24 hours.
The default proxy hostname and port are displayed on the page.
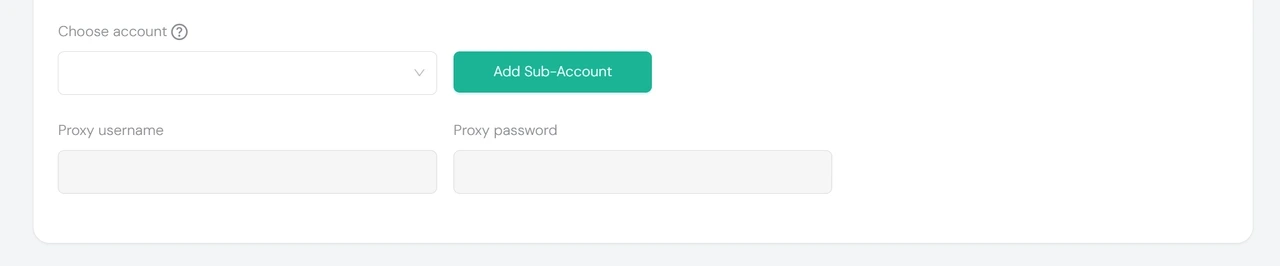
Credentials-based authentication uses a sub-account. Before generating a proxy list, create at least one sub-account and allocate traffic to it.
To add a sub-account:
Click Add Sub-Account next to the Choose account dropdown.
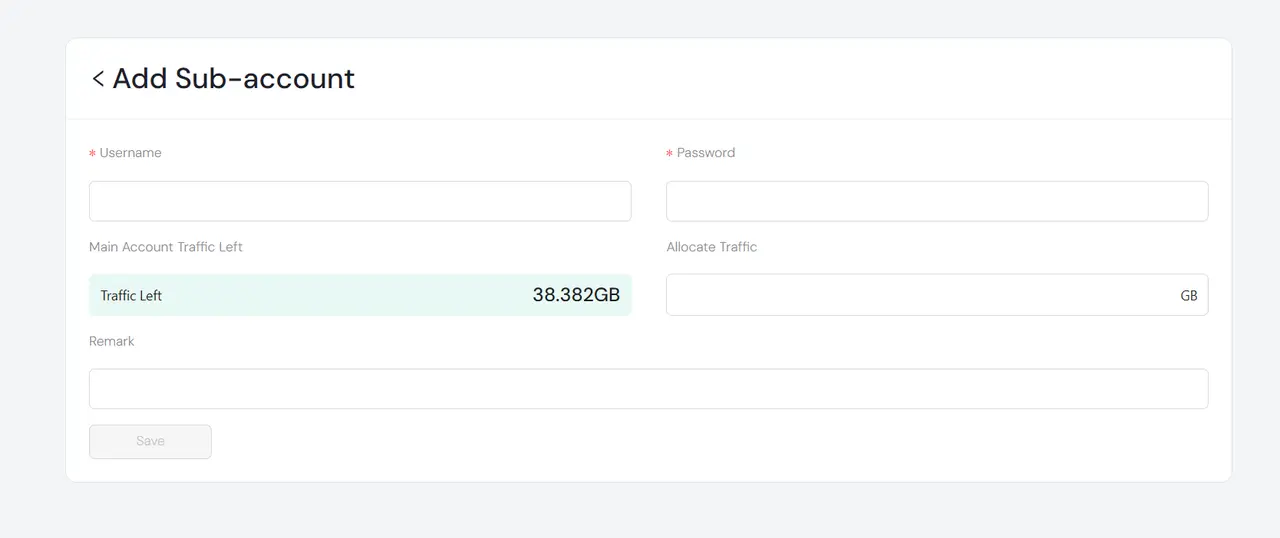
On the Add Sub-Account page, enter a username and password, specify the amount of traffic to allocate, and add an optional remark.
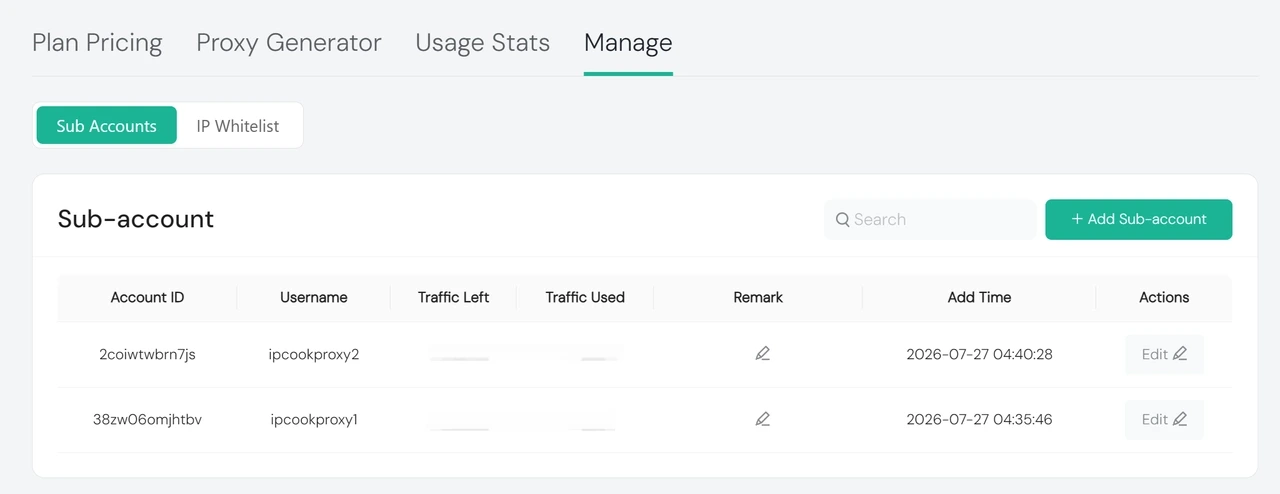
Click Save. The new sub-account will appear in the list and can be used in the Proxy Generator.
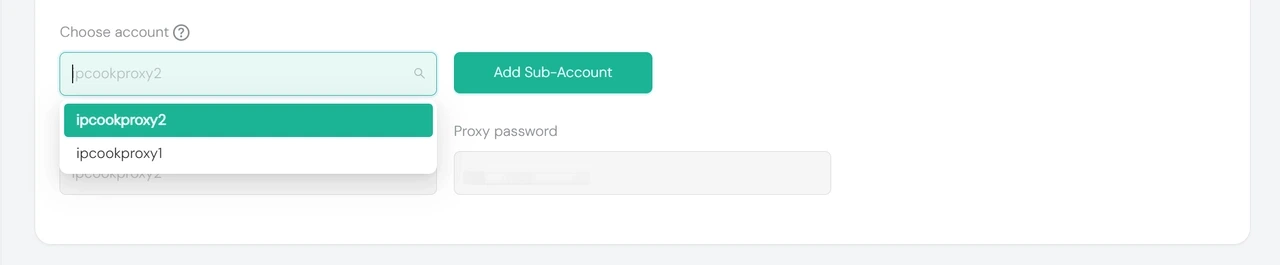
Return to Proxy Generator and select the sub-account from the dropdown. Its username and password will be filled in automatically.
Tip: If you need to make changes later, open Sub Accounts under Manage and click Edit next to any sub-account to update its credentials, adjust traffic, recycle unused traffic, or delete it.
Next, enter the required Quantity and choose the Generate Format supported by your application, such as HOST:PORT:USER:PASS.
Click Generate to create the proxy list. You can copy the list or download it as a file.
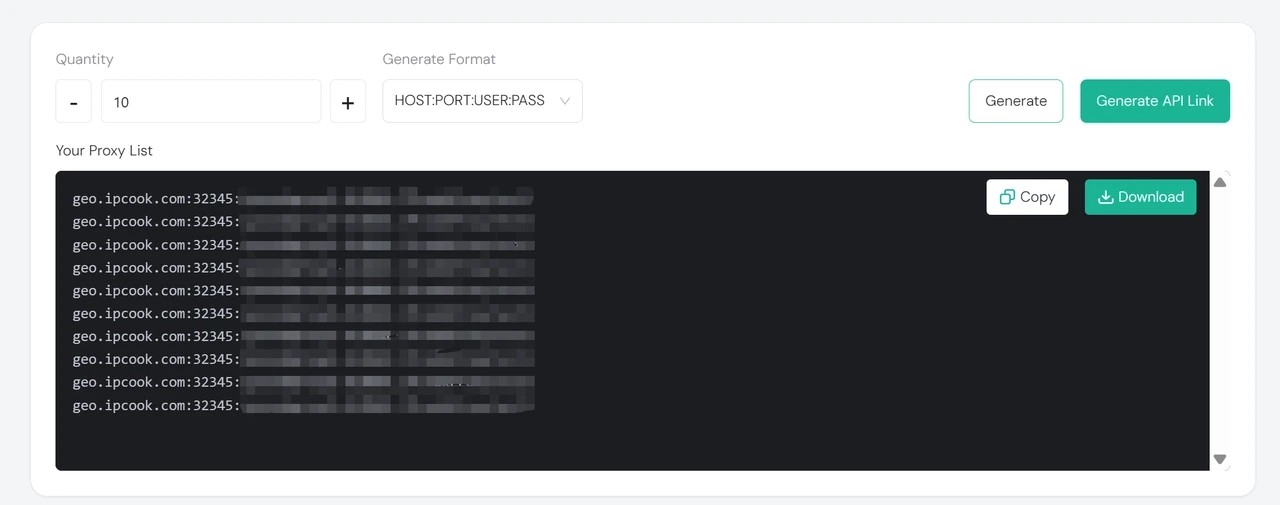
For larger projects or automated workflows, click Generate API Link instead. This creates a signed API URL that retrieves a fresh proxy list whenever it is called.
For passwordless authentication, switch to Whitelist. This method allows requests from an approved public IP address to access the proxies without a username or password.
Before generating proxies, add your public IP address to the whitelist.
To add an IP address to the whitelist:
Open IP Whitelist under Manage.
Enter your public IP in the Add IP field.
Click Add IP to save it.
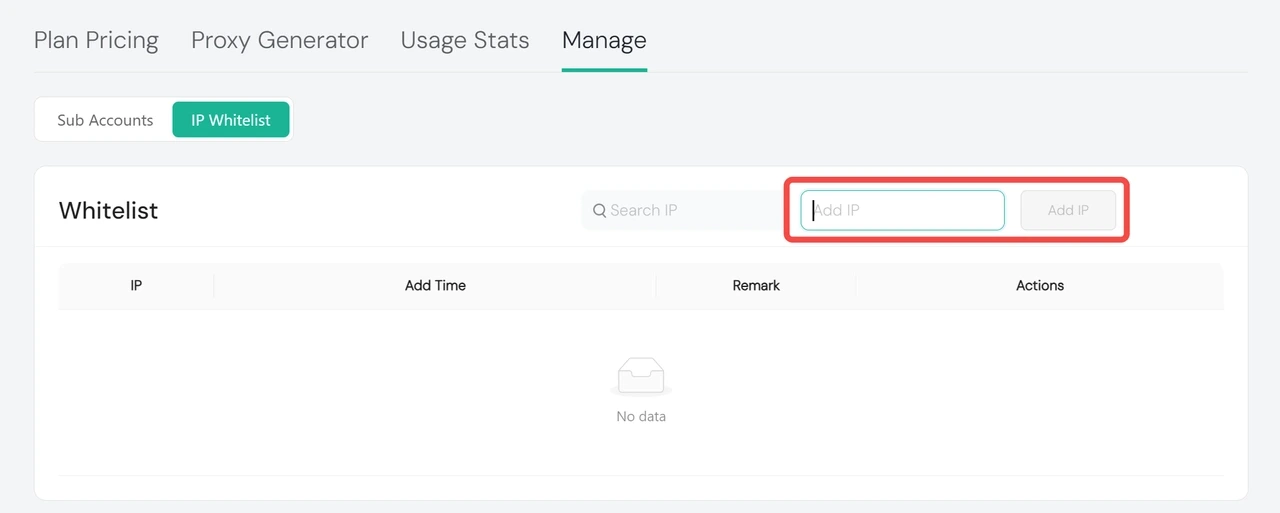
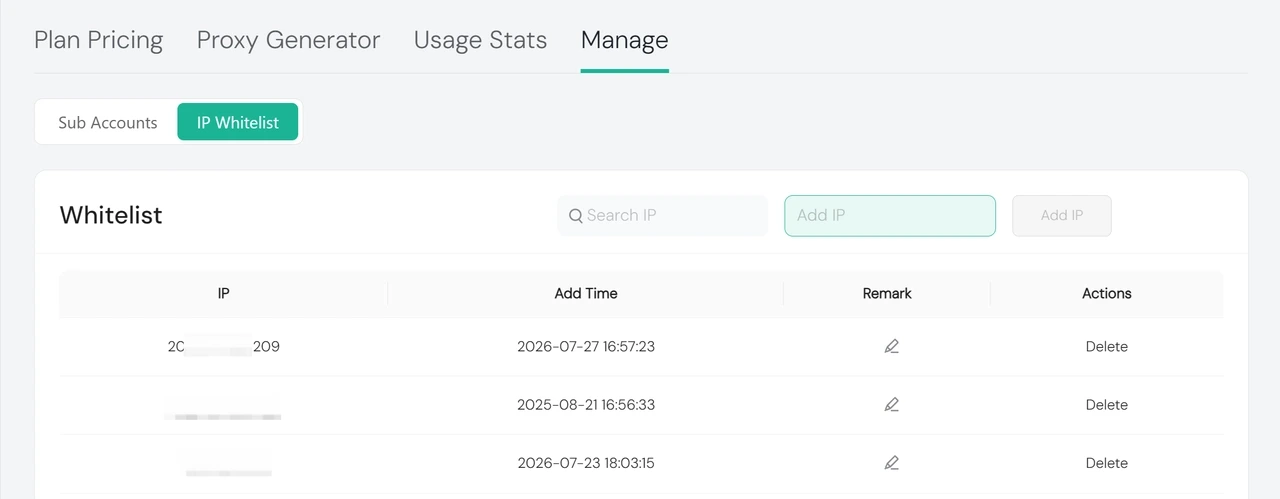
Once added, the IP appears in the list below, where you can review the Add Time, add a Remark, search existing entries, or delete it when no longer needed.
Return to Proxy Generator and select the Country, Protocol, and Quantity. You can then generate a proxy list or an API link for access from a whitelisted IP address.
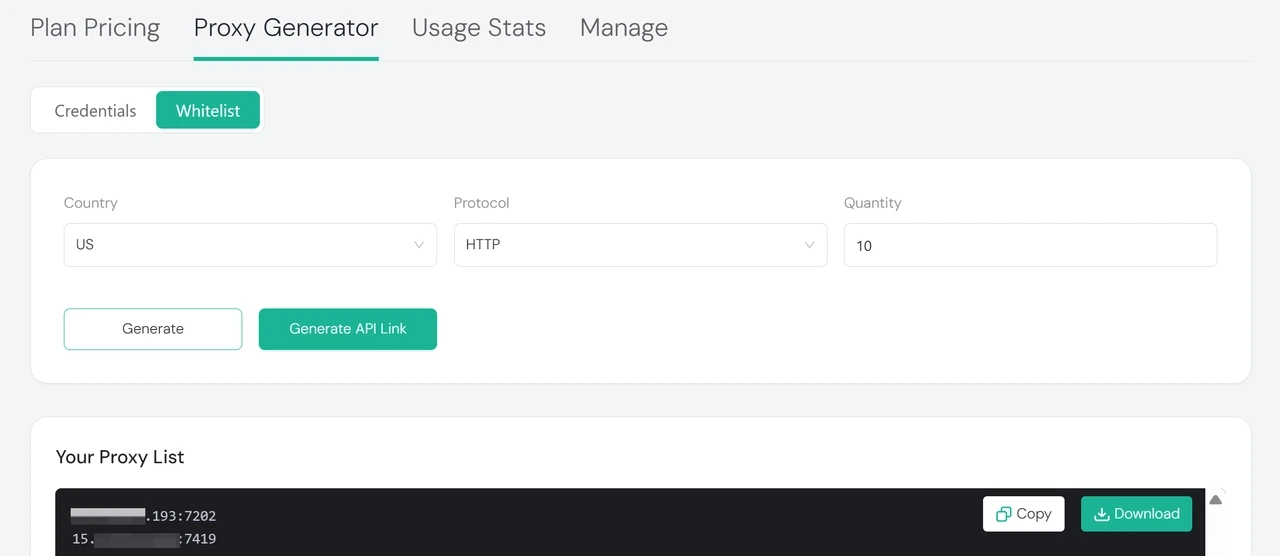
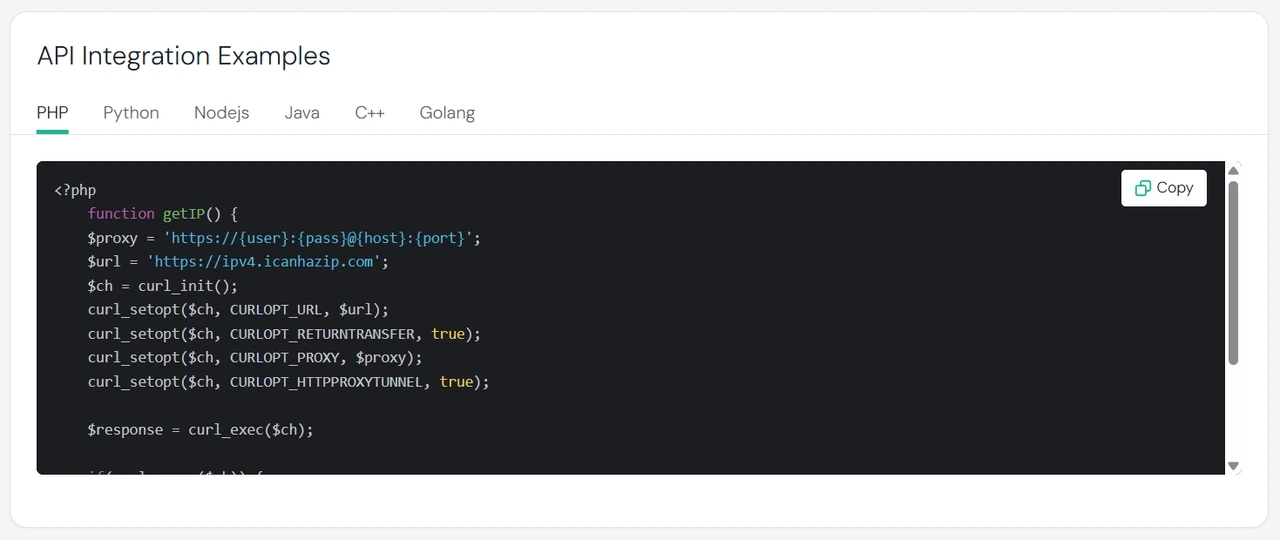
Below the generator, IPcook also provides ready-to-use API integration examples in PHP, Python, Node.js, Java, C++, and Golang.
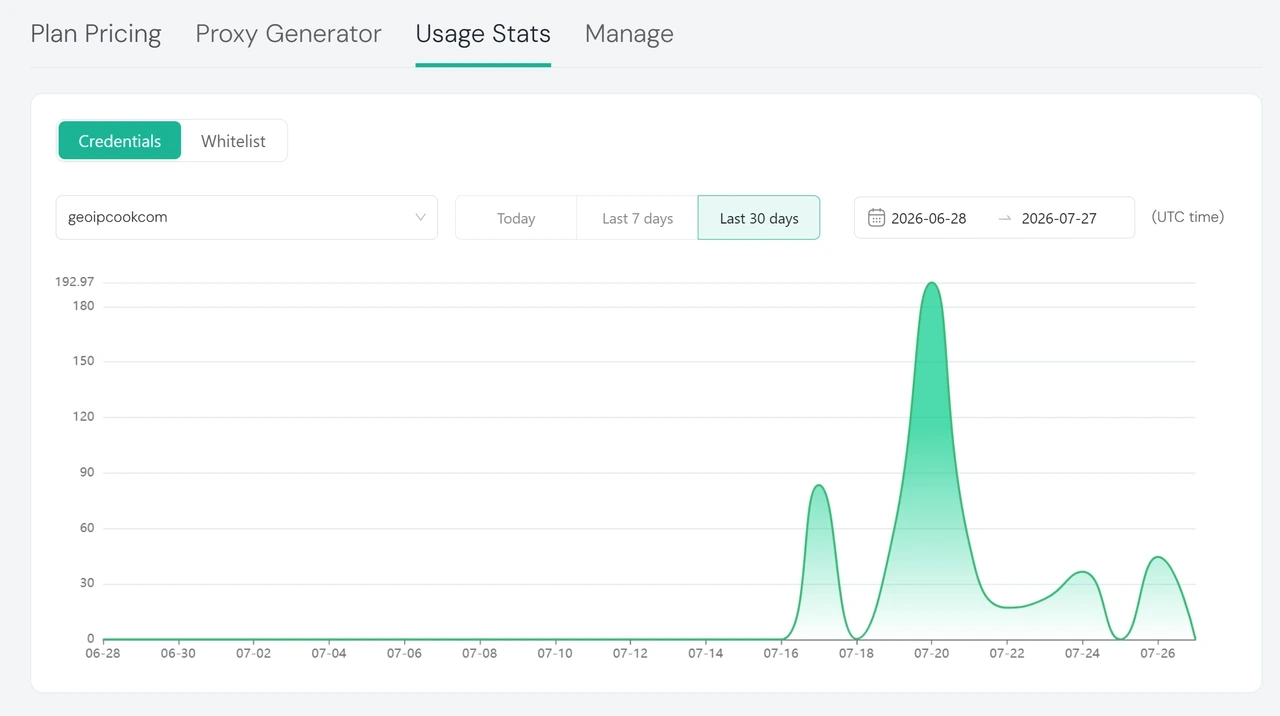
Navigate to Usage Stats to track how your residential proxy traffic is being used.
You can switch between Credentials and Whitelist to review traffic for each authentication method. Under Credentials, you can select a specific sub-account from the dropdown to review its usage.
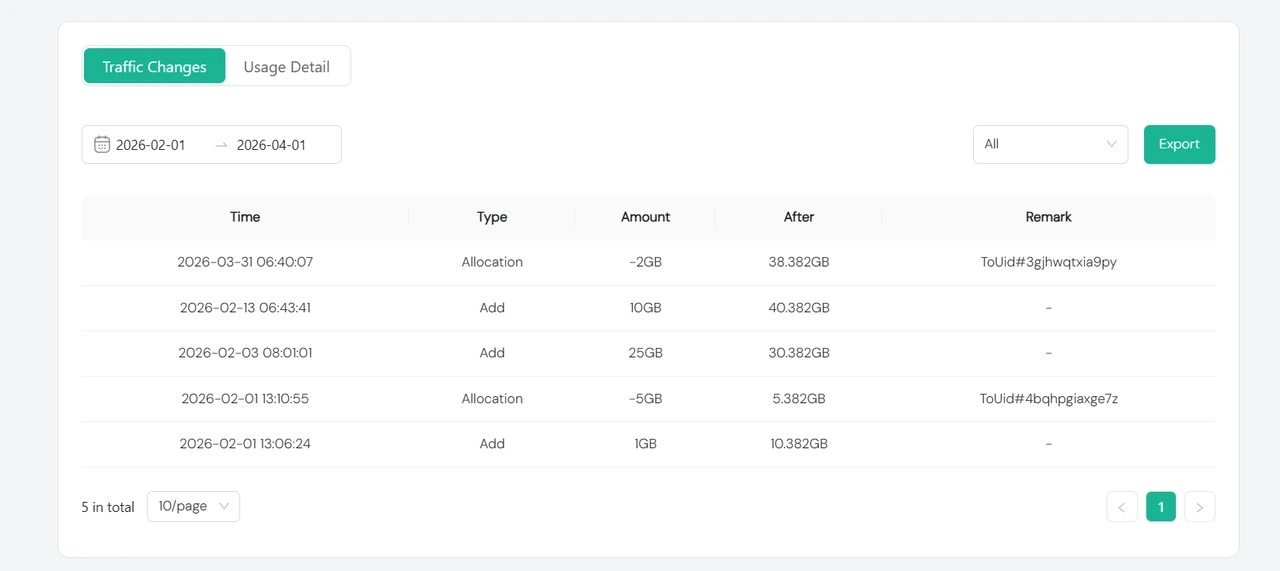
Traffic Changes records updates to the traffic balance, such as adding traffic or allocating traffic to a sub-account.
Each record shows the Time, Type, Amount, After, and Remark. You can filter the records by date and change type, then export the results when needed.
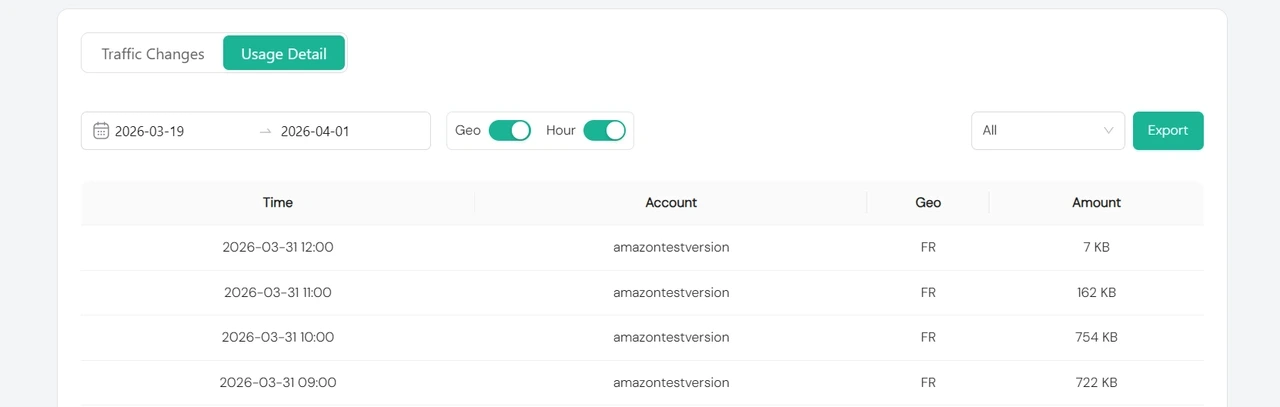
Usage Detail shows how much traffic has been used during the selected period. You can filter the data by date and account, use the Geo and Hour switches to adjust the level of detail, and export the data for analysis.
📚 Need More Residential Proxy Use Cases? Read These
Follow these steps to buy and manage ISP Proxies with IPcook.
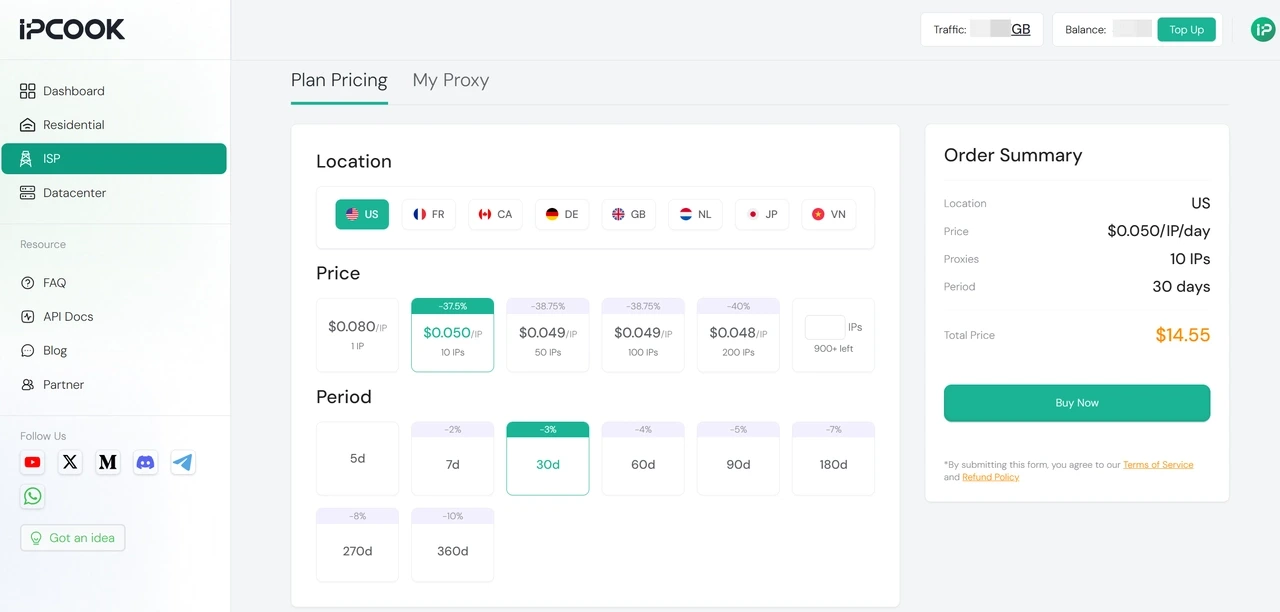
Navigate to ISP in the left menu. On Plan Pricing, choose the Location, number of IPs, and period you need. Review the Order Summary on the right, then click Buy Now.
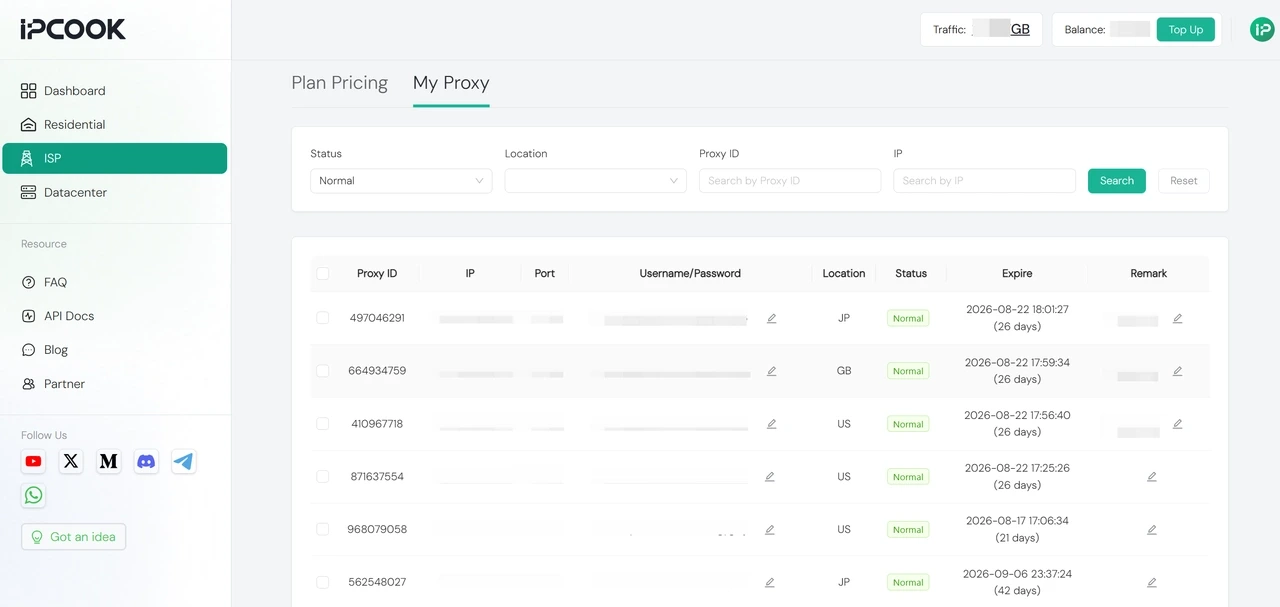
After purchase, open My Proxy to view your ISP proxies. Here, you can search and filter proxies by Status, Location, Proxy ID, or IP.
The list shows your purchased ISP proxies, along with their connection details, status, and expiration time.
You can also select multiple proxies for batch actions. After selecting them, use the buttons at the bottom to Download, Batch Renew, Change User/Password, or add a Remark.

📚 Need More ISP Proxy Use Cases? Read These
How to Safely Warm Up Multiple Facebook Accounts: Best Strategies
How to Create Bulk Instagram Accounts: Tools & Tips for Growth
Follow these steps to buy and manage Datacenter Proxies with IPcook.
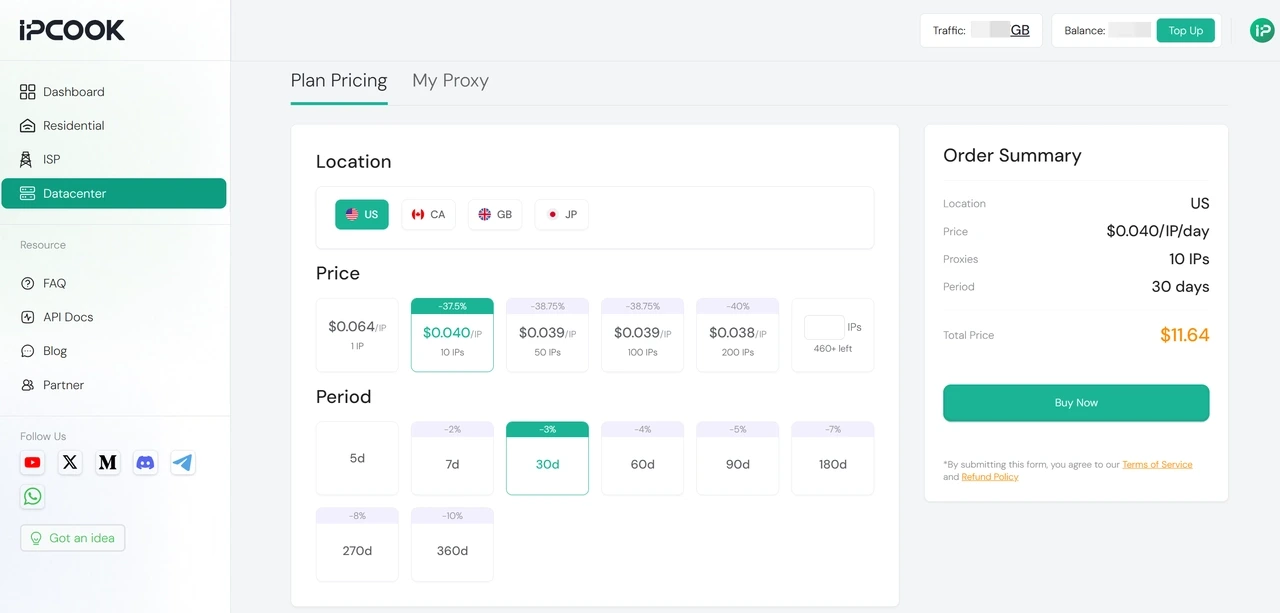
Navigate to Datacenter in the left menu. On Plan Pricing, choose the Location, number of IPs, and period you need. Review the Order Summary on the right, then click Buy Now.
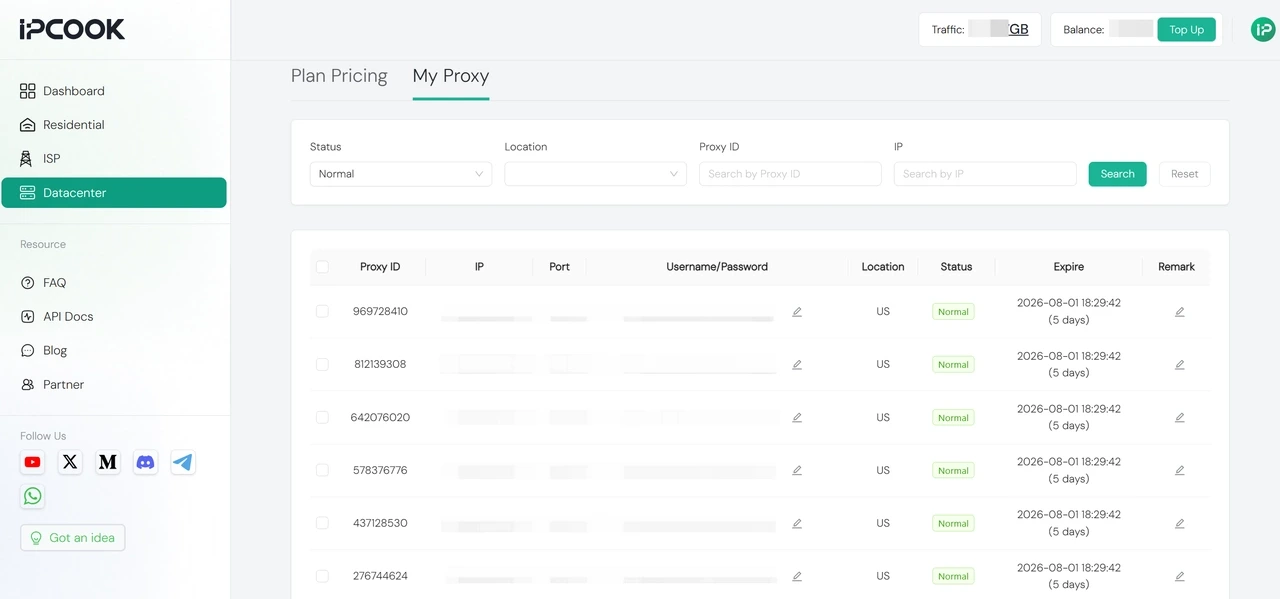
After purchase, open My Proxy to view your datacenter proxies. Here, you can search and filter proxies by Status, Location, Proxy ID, or IP.
The list shows your purchased datacenter proxies, along with their connection details, status, and expiration time.
You can also select multiple proxies for batch actions. After selecting them, use the buttons at the bottom to Download, Batch Renew, Change User/Password, or add a Remark.

Your proxies are ready to use. It's time to put them into action. IPcook proxies work with a wide range of external apps and tools, including antidetect browsers, proxy managers, and scraping tools. Visit our Integration page for specific setup guides.
You can set IPcook as your system proxy on Windows or macOS for full coverage, or use a browser extension if you only need a proxy inside the browser. The following sections will show you how.
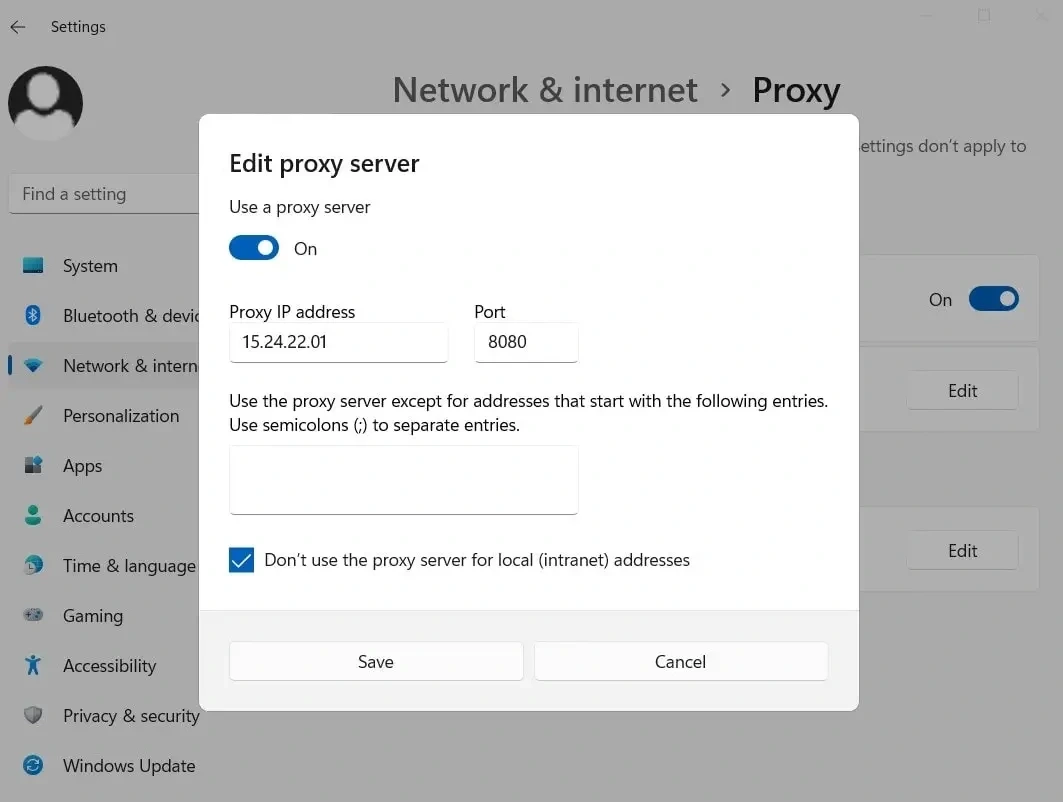
Open Settings → Network & Internet → Proxy
Under Manual proxy setup, turn on Use a proxy server
Enter the IPcook server address (e.g., geo.IPcook.com) and port (e.g., 33123)
When prompted, enter your username and password
Click Save
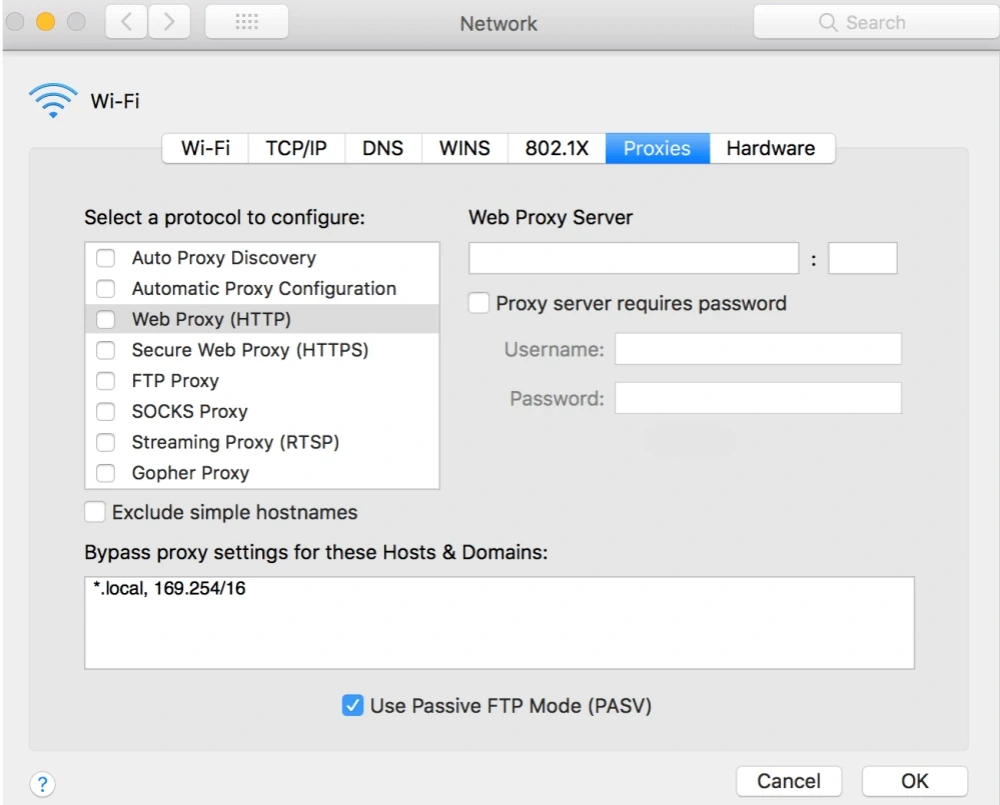
Open System Settings → Network
Select your active network (e.g., Wi-Fi), then click Details
Go to the Proxies tab
Enable Web Proxy (HTTP) or SOCKS Proxy
Enter the IPcook proxy server and port, then check "Proxy server requires password" and enter your username and password if needed.
Click OK and Apply
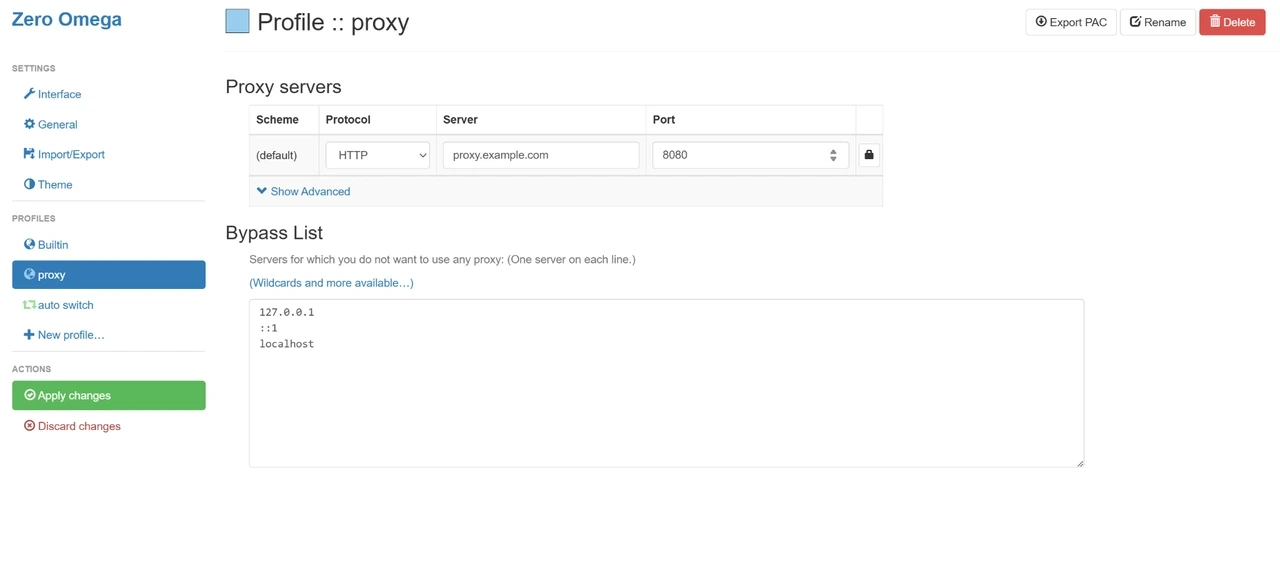
Install a proxy manager like ZeroOmega from the Chrome Web Store.
Create or select a proxy profile, then choose the Protocol. Enter the IPcook server address, the correct port, and your login credentials.
Click Apply changes to activate the proxy. From now on, Chrome will route your browsing traffic through IPcook.
Tip: A browser-only setup is great for quick testing, account management, or scraping directly in tabs. It gives you flexibility without touching your system-wide settings.
You've now completed the full IPcook setup process. From creating your account and choosing a plan to generating proxies and managing usage, you're ready to get started with confidence.
If you haven't tried IPcook yet, now's the perfect time to explore your first plan. Our no-expiry packages let you set up proxies at your own pace. Click below to launch your first proxy in minutes.