
Want to set proxy in Android to browse privately, unlock content, or improve streaming and gaming? It’s easier than you think. When enabled, your traffic is routed through a separate server, hiding your real IP and making you appear as if browsing from another location.
In this guide, you’ll learn step by step how to set up a proxy on Android, choose a right proxy, and fix common errors during . By the end, you’ll be able to configure proxy settings on your Android device as easily as connecting to Wi-Fi.
A proxy server works like a middleman between your Android device and the internet. Instead of connecting directly to websites or apps, your traffic goes through the proxy, which hides your real IP address and replaces it with another one, often from a different region.
By using a proxy on your Android device, you can enjoy several advantages:
Stay private online: A proxy hides your real IP, making it harder for apps, websites, or even public Wi-Fi providers in places like cafés to track your activity.
Access blocked content: Traveling abroad but missing your Netflix shows or local apps? A proxy can help bypass some region locks and let you access content as if you were back home.
Better gaming performance: In some cases, connecting through a proxy server closer to the game server can reduce lag and improve response time.
More stable browsing: If your internet provider blocks certain sites or routes traffic poorly, a proxy may reroute your connection and make browsing smoother.
So, which proxy type should you pick for your Android? Each type has its own strengths and trade-offs. To make it easy, here’s a quick comparison:
Proxy Type | Best For | Pros | Cons |
|---|---|---|---|
Streaming, private browsing | Real-user IPs, harder to detect, stable | Slightly higher cost | |
ISP Proxy (Static Residential) | Long-term accounts, e-commerce, social media | Very stable, low ban risk | Not as fast as datacenter |
Datacenter Proxy | High-speed bulk tasks | Very fast, affordable | Easier to detect and block |
Before setting up a proxy on Android, make sure the proxy server details come from a trusted source. Always use secure protocols such as HTTPS or SOCKS5 to keep your traffic encrypted and private. If you rely on sticky sessions, rotate them regularly, since using the same IP for too long can reduce anonymity and increase the risk of blocks. For a safer and smoother experience, choose a provider that complies with privacy standards and offers real-time monitoring.
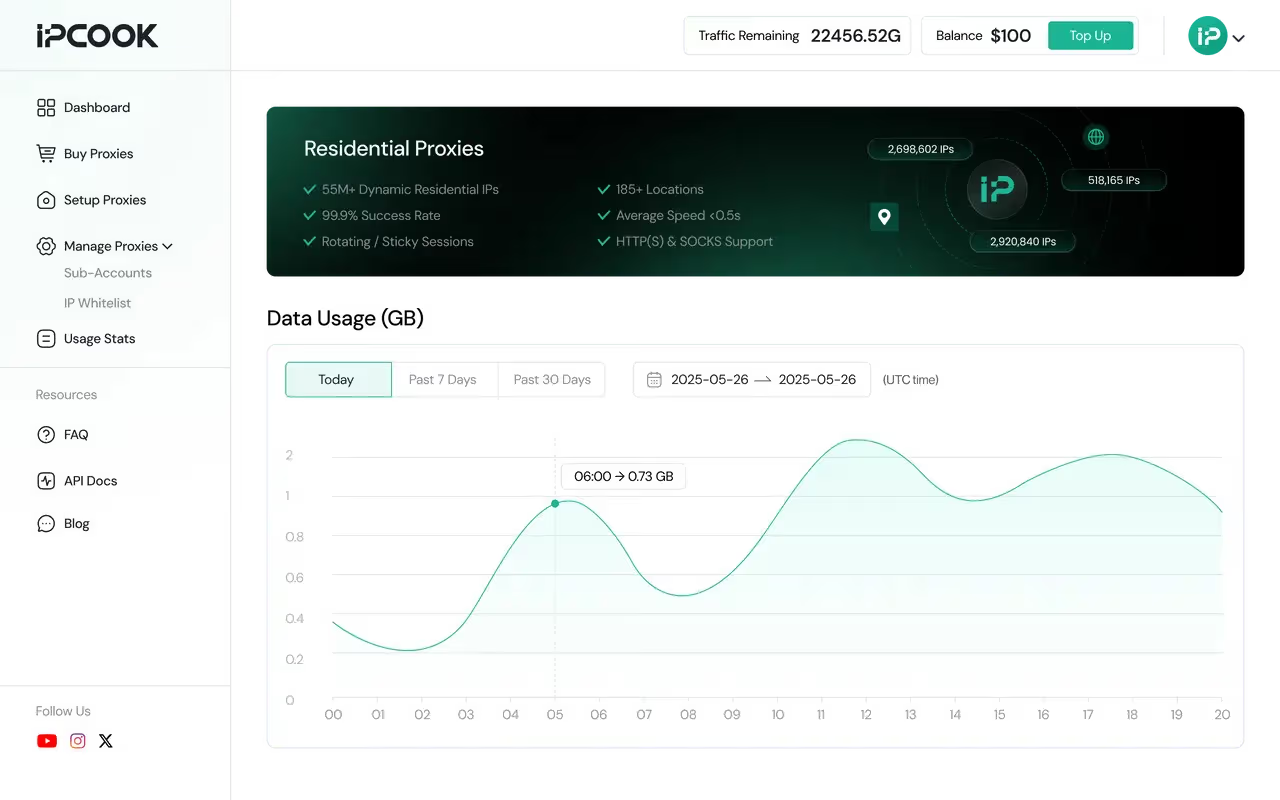
For instance, IPcook provides real residential IPs, operates under GDPR-compliant standards, and offers a live dashboard for tracking traffic. With more than 55 million IPs in 185 countries, it ensures security, privacy, and stability for Android users. It also supports flexible sticky sessions, giving you full control over how long to keep the same IP. On top of that, setup is simple, so you can easily set proxy in Android or configure proxy settings in just a few quick steps.
You don’t need extra apps to configure a proxy on Android. This can be done directly in your Wi-Fi settings by following these steps:
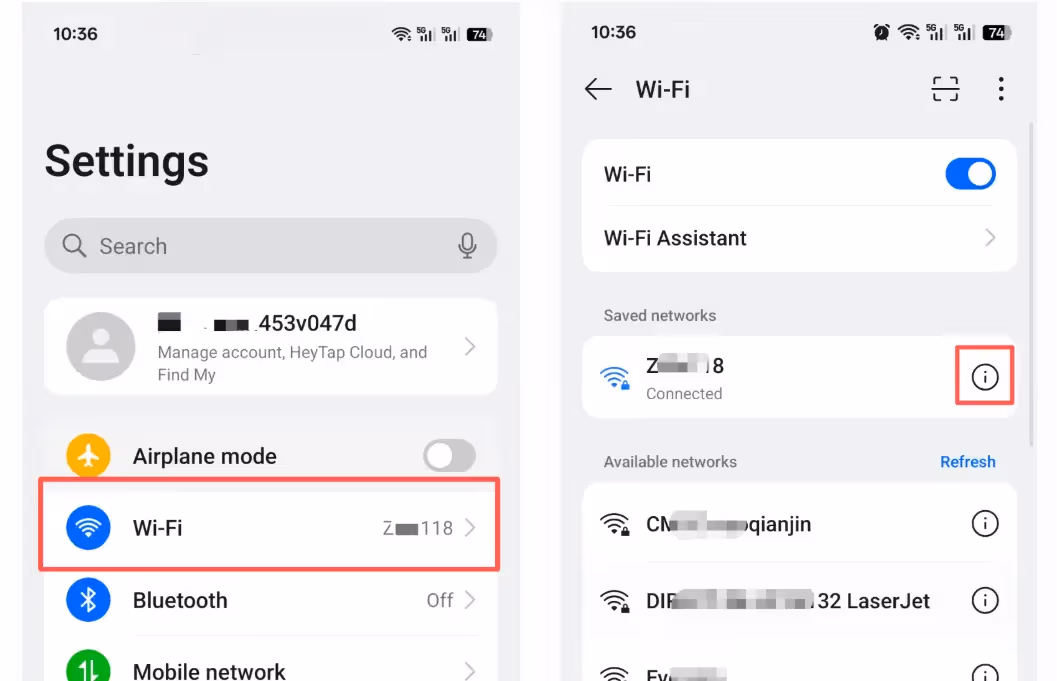
On your Android device, open Settings and tap Wi-Fi.
In the Wi-Fi list, find the network you are connected to and tap the info (i) icon, the gear icon (⚙️), or the arrow ( > ), depending on your phone model.
Scroll down to Advanced settings (on some phones it may be Advanced options).
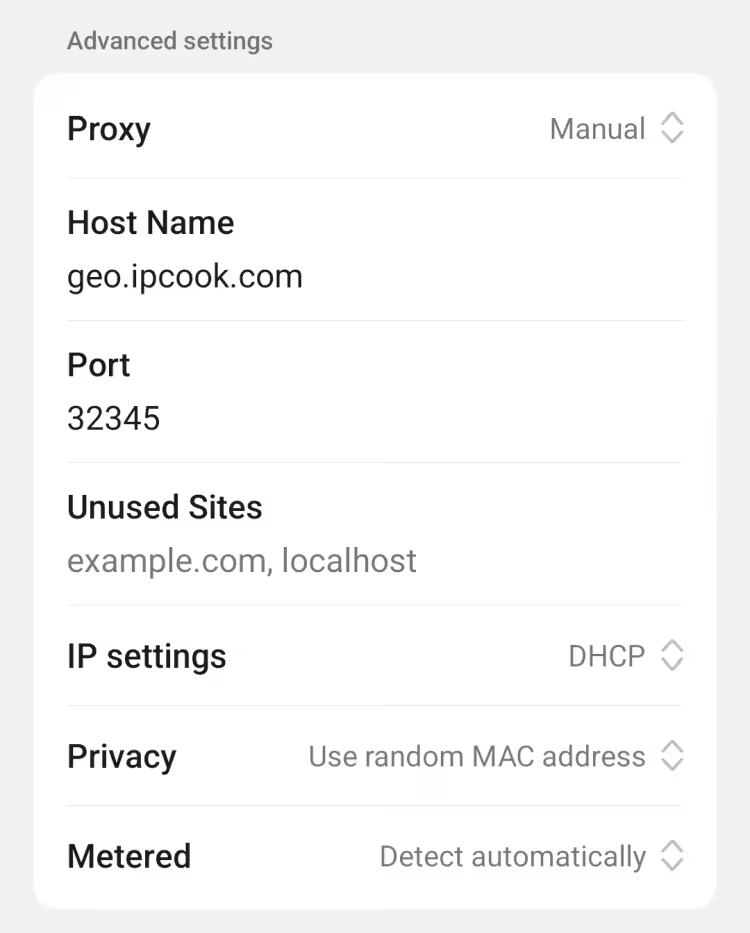
Find the Proxy section and change it from None to Manual.
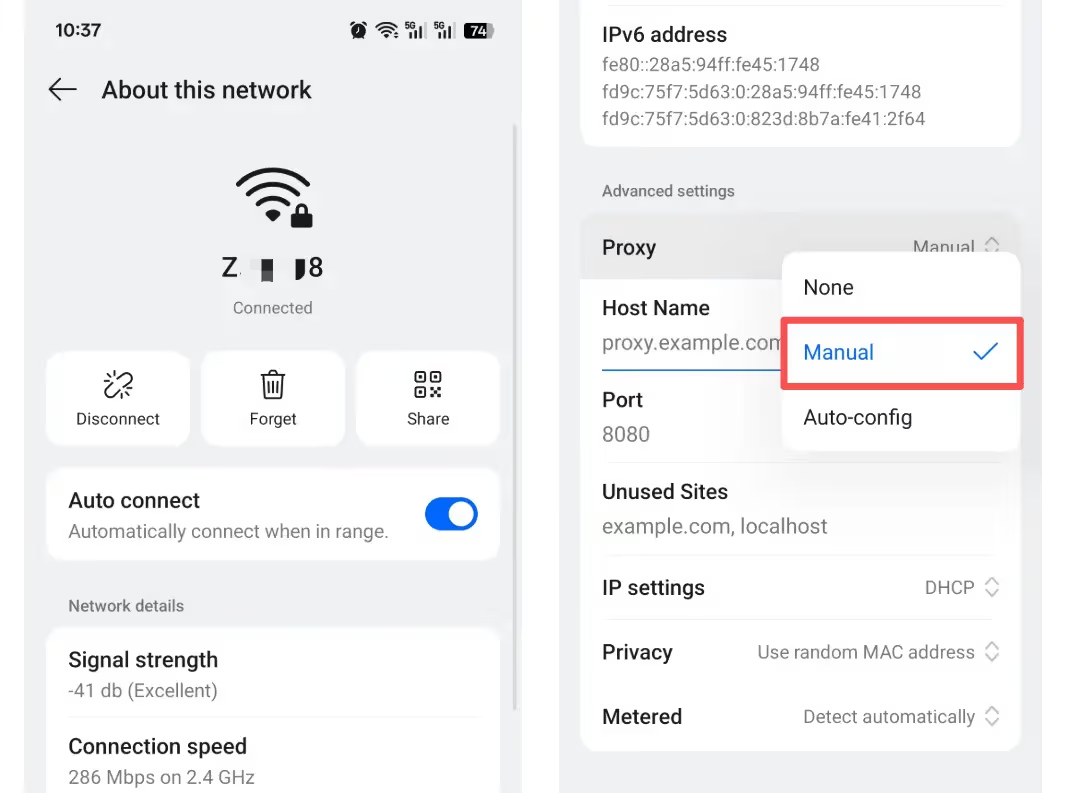
In the Host name field, enter the proxy server address provided by your provider.
In the Port field, enter the corresponding port number. (e.g., Host name:geo.ipcook.com, Port: 32345)
If your provider requires authentication, also enter your Username and Password.
Tap Save or Apply, then reconnect to your Wi-Fi network.
Open a browser and go to whatismyip.com to confirm your IP address has changed.
💡 Note: If the page doesn’t load, double-check that the server address, port, and login details are correct.
Even with the right configuration, Android proxy connections don’t always work as expected. Below are the four most common problems users face, along with step-by-step fixes.
Some apps ignore system-wide proxy rules and connect directly, making it seem like your global proxy isn’t working.
✅ How to fix it:
Use a proxy-aware browser such as Firefox.
Install a VPN-style proxy client to force all traffic through the proxy.
For better compatibility, residential proxies reduce the risk of being bypassed.
This issue occurs when Android simply won’t store your proxy details after you enter them.
✅ How to fix it:
Always tap Save/Apply, not just the back button.
Remember: proxy settings apply to the current Wi-Fi network only.
Reset network settings if the system still refuses to save.
Here, the settings are saved, but Android still shows “Proxy not set” because the details are invalid or incomplete.
✅ How to fix it:
Make sure you edited the active Wi-Fi network.
Re-enter the correct hostname.
If your provider requires authentication, enter your username and password.
Sometimes Android connects to Wi-Fi but shows “Proxy internet may not be available,” meaning the proxy blocks connectivity.
✅ How to fix it:
Switch to a closer server location for better speed.
Disable battery optimization, which may restrict proxy background activity.
A reliable residential proxy provider like IPcook helps reduce such errors.
Setting up a proxy on Android is actually quite simple once you know where to look in your Wi-Fi settings. The real key is not just configuring the proxy, but making sure you choose the right proxy type and a reliable provider that values security and performance.
If you’re looking for a trusted option, IPcook offers more than 55 million residential IPs across 185 countries, all backed by GDPR compliance and real-time monitoring. Setup is quick and easy, making it a safe way to configure proxy settings on Android and enjoy a smoother, more secure online experience.

