
Chrome proxy settings let you route browser traffic through a proxy server, helping hide your IP address and location, improve privacy, and access region-restricted websites. This guide shows you how to set up, change, and disable Chrome proxy settings on Windows, macOS, Android, and iPhone, as well as how to use extensions for faster proxy switching.
Before you change Chrome proxy settings, make sure you have a working proxy, including the proxy host and port.
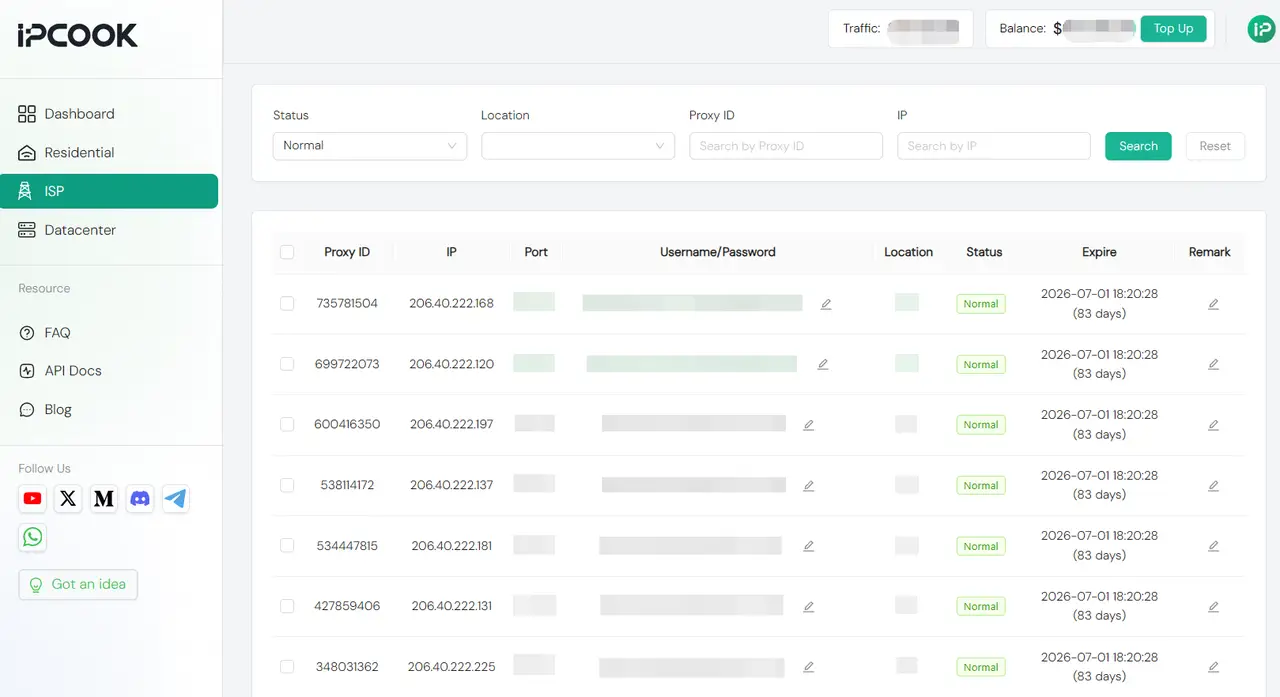
If you do not have a proxy yet, you can get one from a high-quality proxy provider like IPcook. IPcook supports both HTTP(S) and SOCKS5 protocols, offers free geo-targeting across countries and cities worldwide, and provides fast and stable connections.
🎁 Start with a 100 MB free residential proxy trial and limited-time coupons. Don’t miss out!
You’ll be up and running in moments. Log in to the IPcook Dashboard, choose your proxy type, select your desired location and session mode, and generate your dedicated proxy details. For example, you will receive details such as IP Address, port, username, and password. Simply copy these details and paste them into your Chrome system proxy settings.
If you want to configure proxy settings in Chrome on a desktop, Chrome will not ask you to enter the proxy directly inside the browser. Instead, it opens your computer’s system proxy settings. The first few steps are the same on both Windows and macOS. After that, the setup screen will depend on your operating system.
If you want more flexibility, such as switching between multiple proxies or setting rules for specific websites, you can scroll down to explore the extension method.
To open Chrome proxy settings:
Step 1. Open Chrome and click the three-dot menu in the top-right corner.
Step 2. Select Settings.
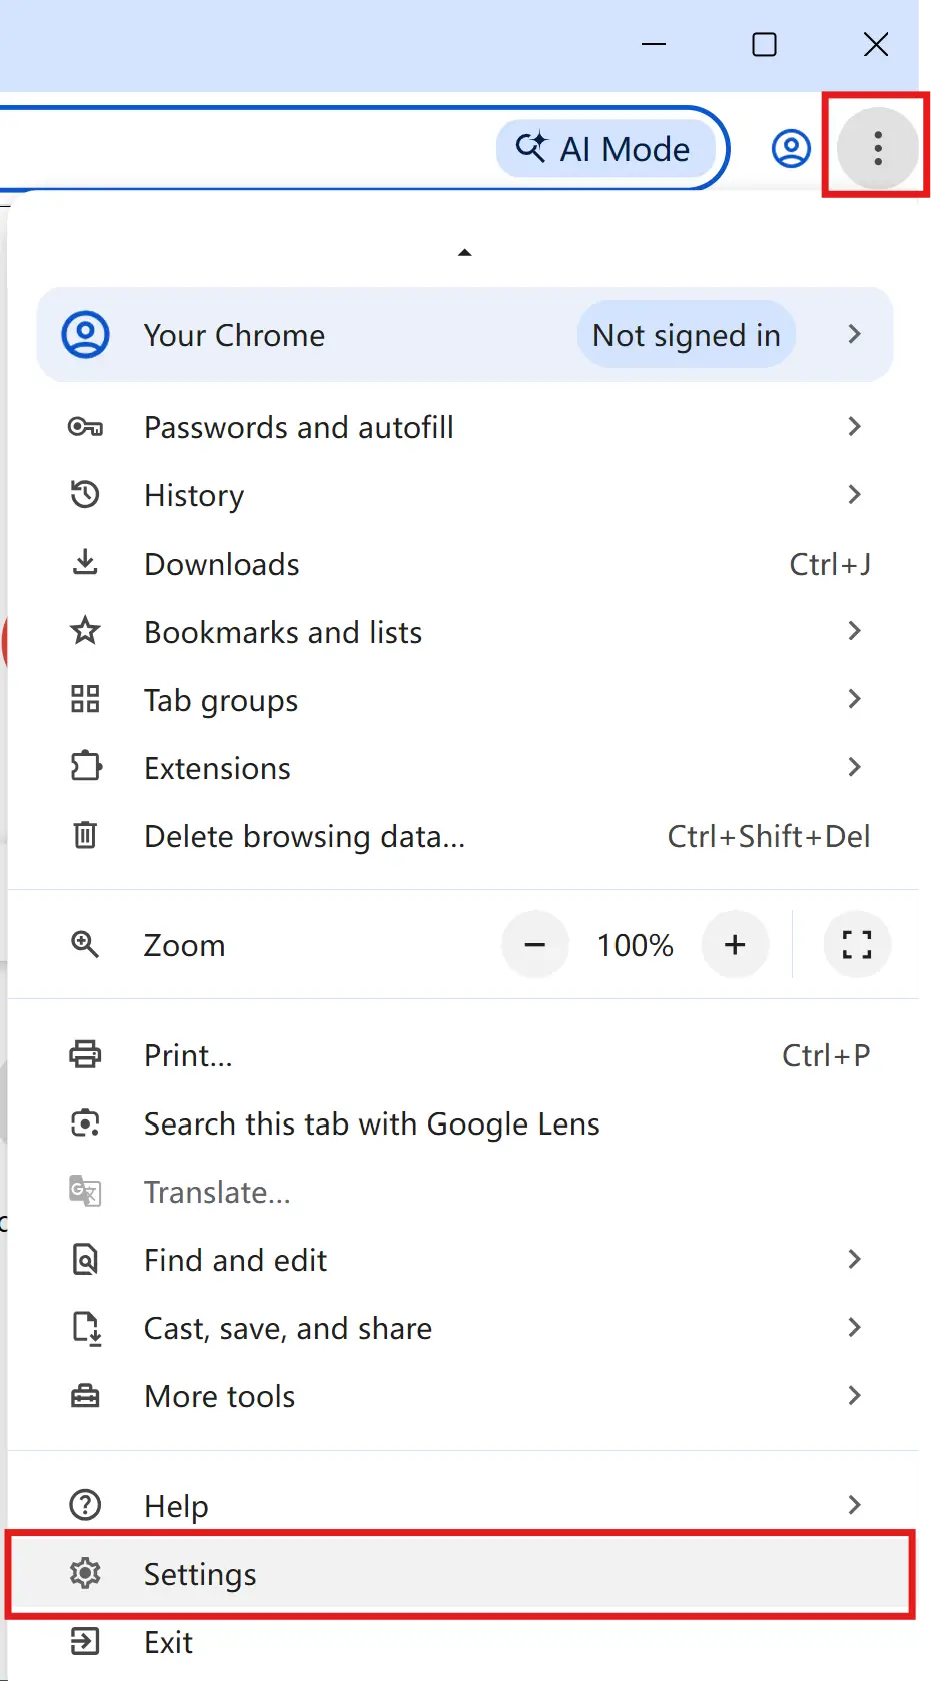
Step 3. Go to System and click Open your computer’s proxy settings.
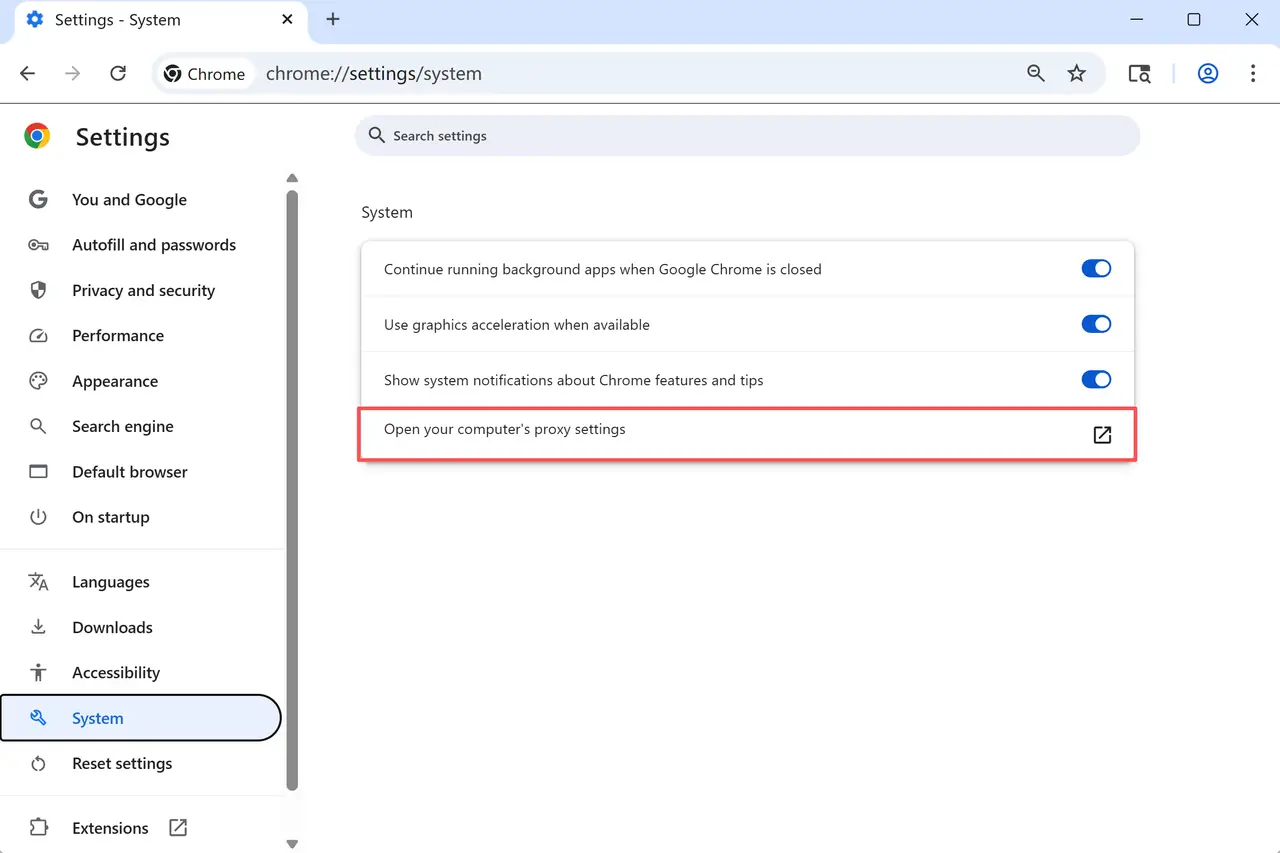
From here, Chrome hands over control to your operating system. The next step is to configure the proxy on Windows or macOS, depending on your device.
To set up a Google Chrome proxy on Windows 10 or 11, follow the steps below:
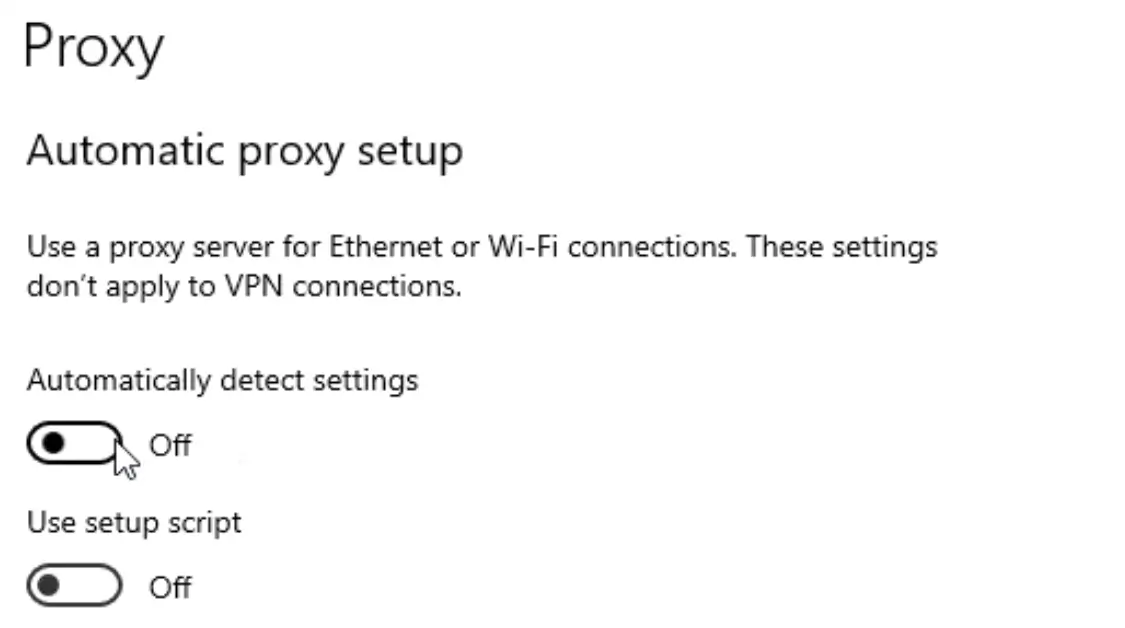
Step 1. With Chrome proxy settings already open on your screen, scroll down to the Proxy page. If needed, turn off Automatically detect settings under Automatic proxy setup.
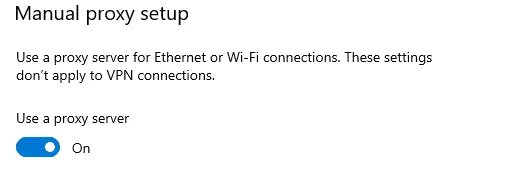
Step 2. Under Manual proxy setup, turn on Use a proxy server.
Step 3. Enter the Address and Port from your proxy provider. You can find these details in your IPcook dashboard.
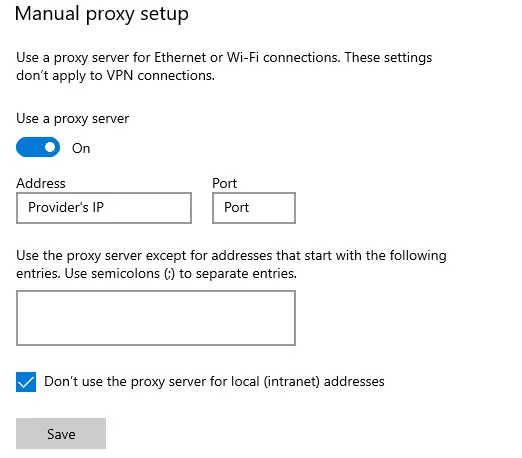
Step 4. Check Don’t use the proxy server for local (intranet) addresses if needed, then click Save to apply the changes.
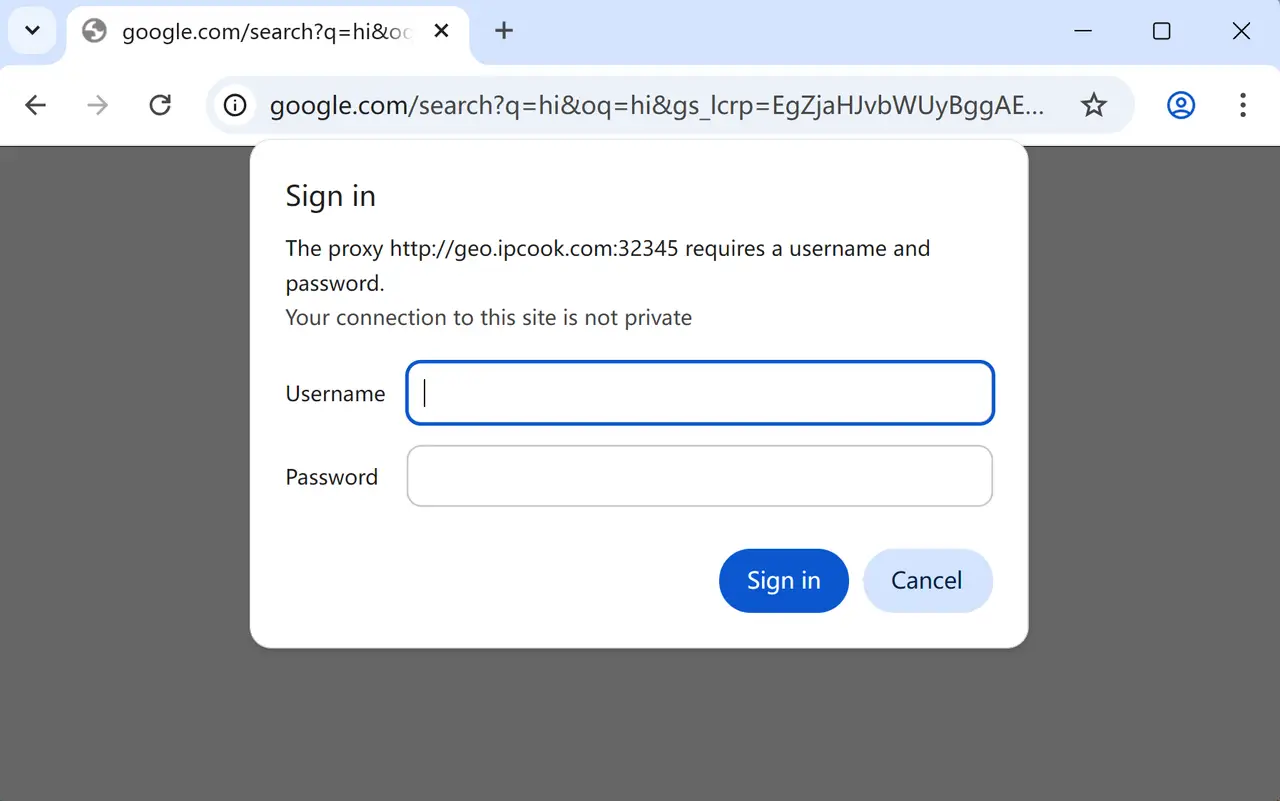
If your proxy requires a username and password, Chrome will ask for them when you start browsing with the proxy enabled. See detailed Windows 10 & Windows 11 proxy configuration for more information.
👀 Stuck on a proxy error in Windows? Get step-by-step fixes for common issues like "Windows could not detect proxy settings" and ERR_PROXY_CONNECTION_FAILED.
To change proxy settings for Chrome on macOS:
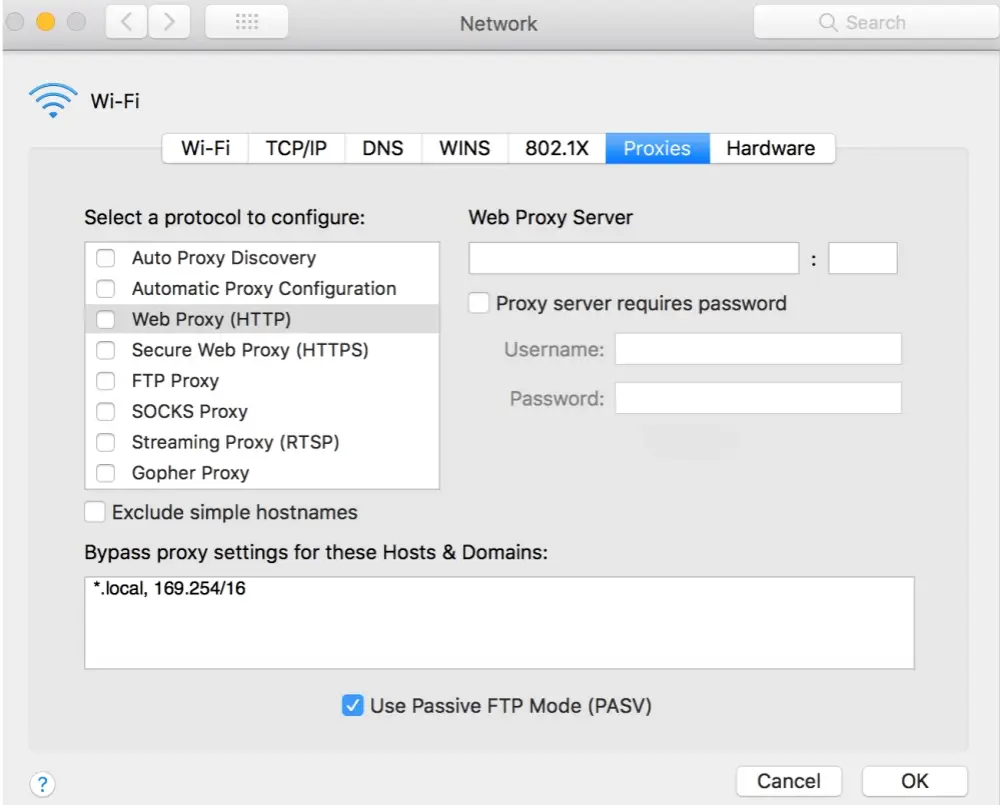
Step 1. In the macOS network settings window, choose your active connection and open the Proxies tab.
Step 2. Check the protocol you want to use, such as Web Proxy (HTTP), Secure Web Proxy (HTTPS), or SOCKS Proxy.
Step 3. Enter the Server and Port from your proxy provider.
Step 4. Click OK, then Apply to save the changes.
If your proxy requires authentication, check Proxy server requires password and enter your username and password.
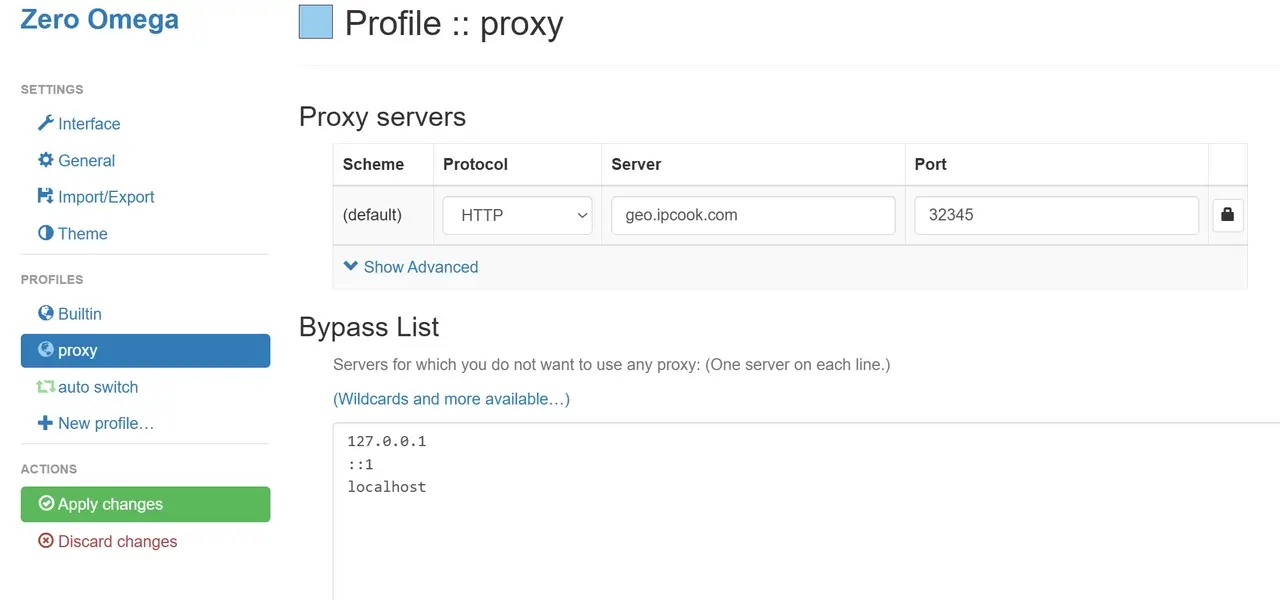
If you need more flexibility in Chrome on desktop, extensions can make proxy management much easier. Tools like ZeroOmega let you add multiple proxies, switch between them quickly, or create rules so only certain websites use a proxy. With extensions, you don't need to adjust system settings each time.
To change proxy settings in Chrome with an extension:
Step 1. Install a proxy extension from the Chrome Web Store.
Step 2. Open the extension's settings page.
Step 3. Create a new proxy profile with the server and port details.
Step 4. Save the profile and enable it when you want Chrome to use that proxy.
Chrome does not have built-in proxy settings on mobile, so you need to set up the proxy through your phone’s network settings instead. In most cases, this means changing the proxy settings for the Wi-Fi network you are using. Keep reading for a step-by-step guide on how to do it.
To set a proxy for Chrome on Android (steps may vary slightly by device version):
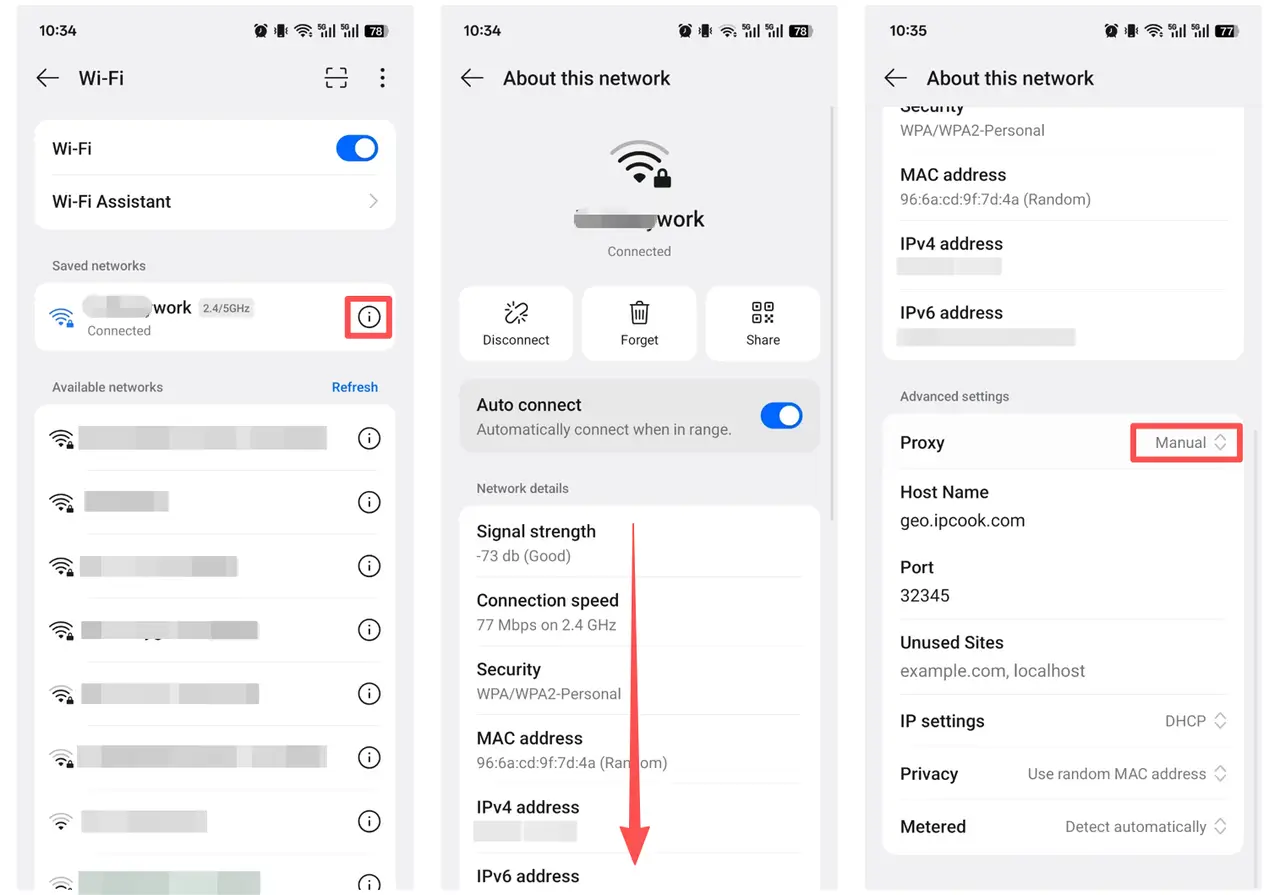
Step 1. On your Android device, open Settings and tap Wi-Fi.Step 2. In the Wi-Fi list, find the network you are connected to and tap the info (i) icon, the gear icon (⚙️), or the arrow ( > ) next to it.
Step 3. Scroll down to Advanced settings or Advanced options.Step 4. Find the Proxy section and change it from None to Manual.
Step 5. Enter the Proxy hostname and Port. If your device supports proxy authentication, enter your username and password as well.
Step 6. Tap Save to apply the changes. Chrome on Android will now use the proxy for this Wi-Fi network.
>> Android proxy setup failing? See our full Android proxy configuration guide for solutions.
To set up a Chrome proxy on iOS:
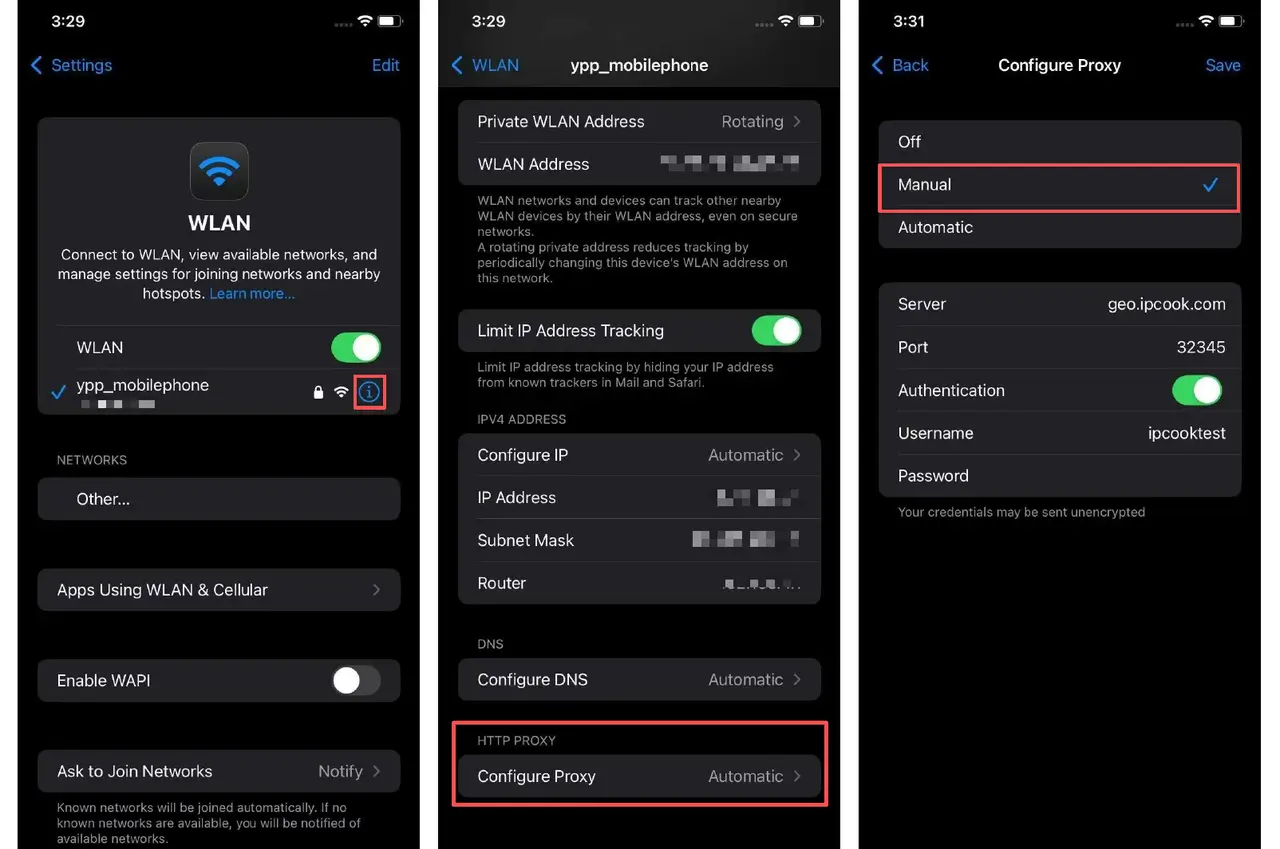
Step 1. Go to Settings → Wi-Fi and tap the (i) icon next to your connected network.
Step 2. Scroll down and tap Configure Proxy.
Step 3. Select Manual.
Step 4. Enter the server address and port. If required, enter the username and password.
Step 5. Tap Save to finish.
Chrome on iPhone will now route traffic through the proxy whenever you use that Wi-Fi network.
Not sure if your proxy in Chrome is actually active? Here are two quick ways to check.
Online Check
The simplest way is to visit a site like ipinfo.io. If the IP shown is different from your actual one, a proxy is active.
Manual Check
Windows: Control Panel → Internet Options → Connections → LAN settings. If a proxy server is listed, a proxy is enabled.
macOS: System Preferences → Network → Advanced → Proxies. If any protocol boxes are checked, a proxy is enabled.
👉 For a detailed guide on testing proxy speed, anonymity, and geo-restrictions, see: How to Test Proxy Connections: A Complete Step-by-Step Guide.
If you want Chrome to stop using a proxy, turn it off in the same place where you enabled it. In most cases, you can do this by reversing the setup steps above. On desktop, Chrome follows your computer’s proxy settings, so disabling the proxy in Windows or macOS will also disable it for Chrome.
On Windows, go to Settings → Network & Internet → Proxy, then turn off Use a proxy server under Manual proxy setup. If you enabled any automatic proxy options earlier, turn those off as well.
On macOS, open System Settings → Network, choose your active connection, and open the Proxies tab. Uncheck the proxy protocol you enabled earlier, then click OK and Apply.
If you are using a Chrome proxy extension instead of system settings, open the extension and turn the proxy profile off there.
On Android and iPhone, go back to the Wi-Fi network settings you configured earlier and change the proxy from Manual to None or Off.
You've learned how to configure Chrome proxy settings on Windows, macOS, Android, iOS, and through extensions. With the right setup, Chrome can route your traffic securely and give you more control over your browsing.
For a smoother experience, start with a reliable provider. IPcook makes this simple by offering clean, stable IPs on demand, so you can spend less time troubleshooting and more time focusing on what matters, whether it's private browsing, app testing, or managing cross-border work.
Explore IPcook and start building smarter proxy workflows today. Claim your free trial now and get a free residential 100MB.

