
Windows 10 and Windows 11 proxy settings improve online privacy, security, and flexibility. With the right configuration, a proxy lets you access region-restricted content, hide your real IP address, and resolve common connection issues. This guide explains proxy settings in Windows 10 and 11, provides step-by-step setup instructions, and shows how to fix the most frequent proxy errors.
A proxy server is like a middleman between your computer and the internet. Instead of going straight to a website, your connection first passes through the proxy. The proxy forwards your request, fetches the content, and delivers it back to you. This hides your real IP address, helps bypass regional restrictions, and adds an extra layer of security when you browse online.
If you need a reliable proxy provider, IPcook makes setup easy by giving you ready-to-use server addresses, ports, and login credentials for Windows 10 and 11. For more about different proxy types and when to use them, see our complete Proxy Types guide.
Windows 10 and Windows 11 allow you to configure proxy settings in two main ways:
Automatic proxy setup using a PAC script or automatic detection.
Manual proxy setup by entering the server address, port number, and authentication details provided by your proxy service.
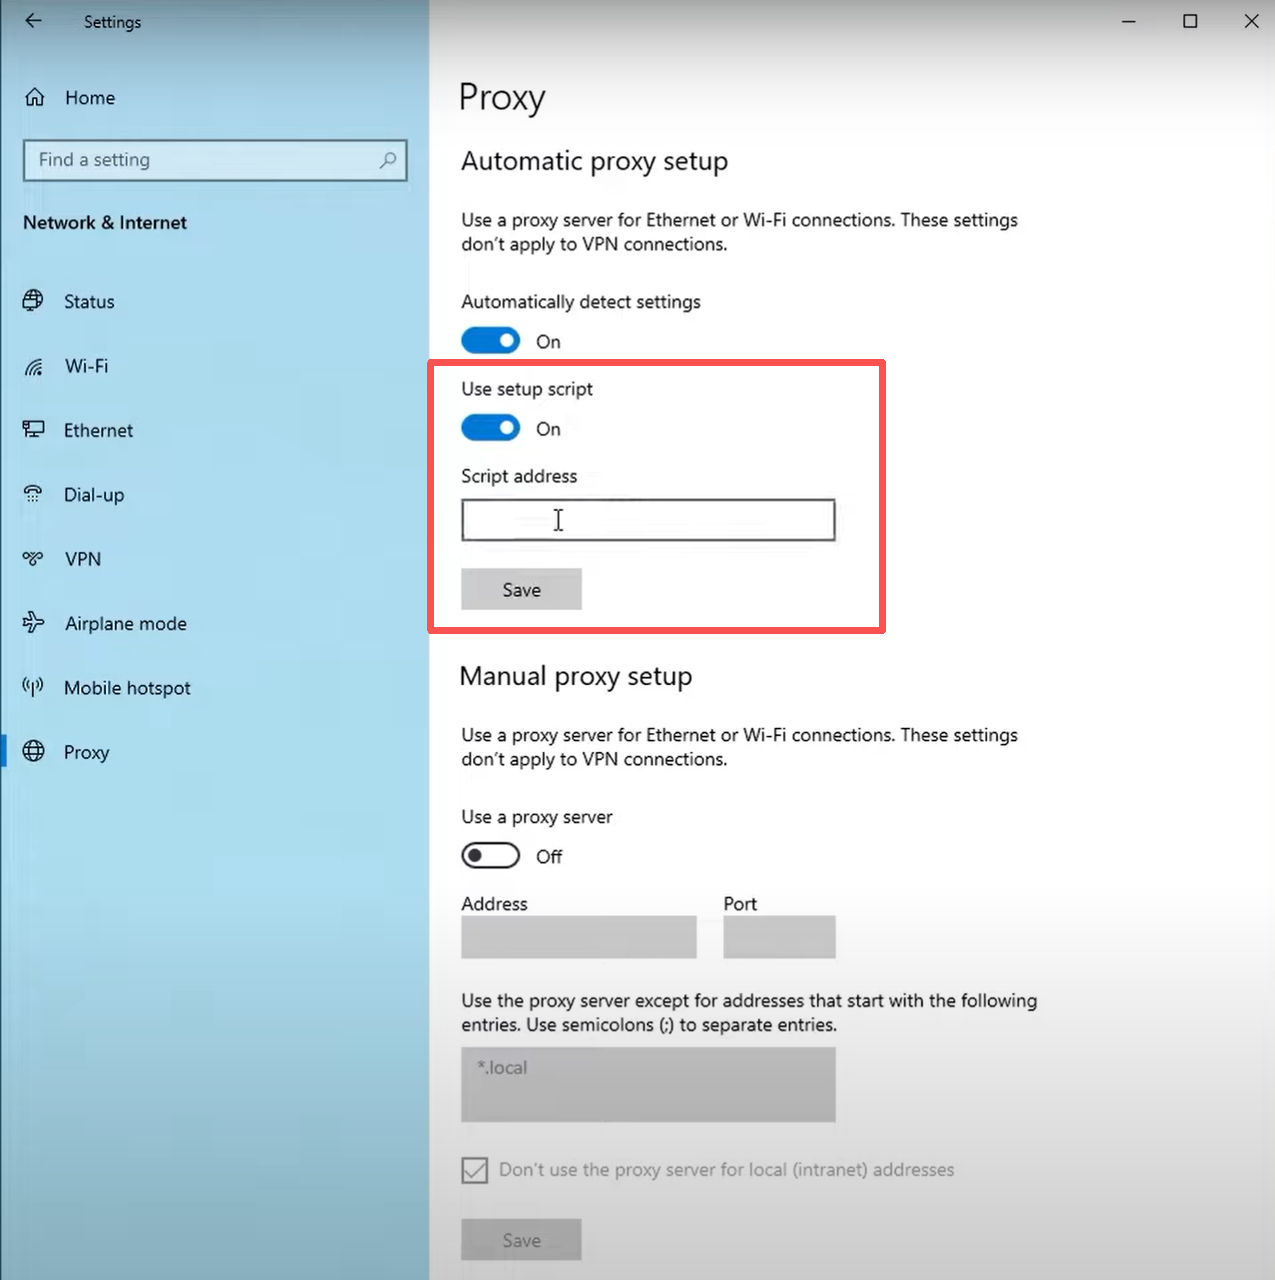
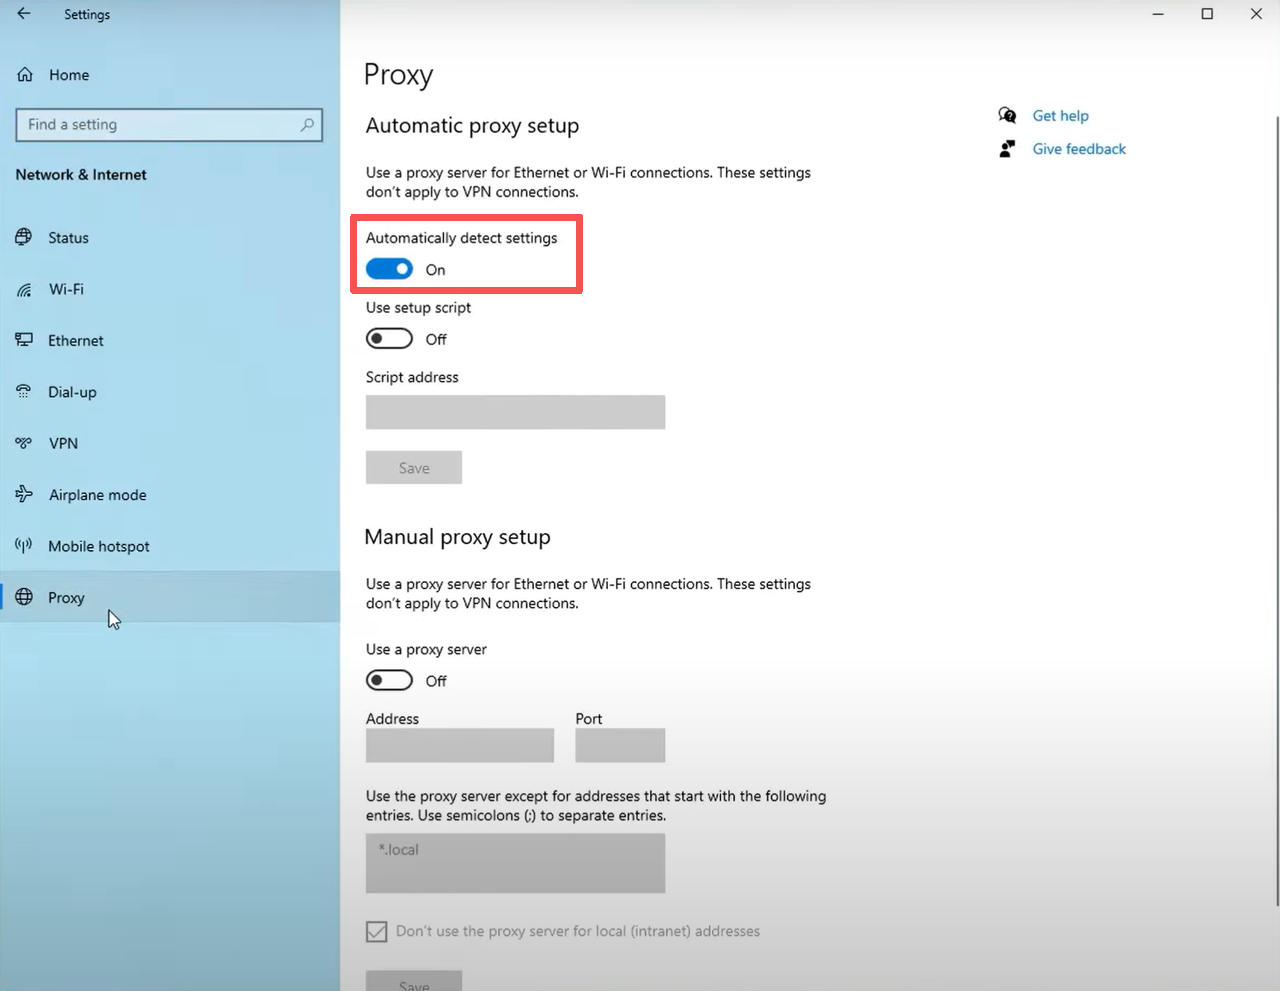
Step 1: Open Settings → Network & Internet → Proxy.

Step 2: Under Automatic proxy setup, switch on Automatically detect settings.
Windows will try to detect proxy settings automatically using WPAD (Web Proxy Auto-Discovery Protocol, a method that automatically provides proxy details on some networks).+-

Some networks use a configuration file called a PAC script (for example, http://example.com/proxy.pac). If your network administrator has provided one, enable Use setup script and enter the address. Most home users can skip this step.
Step 3: Save the changes (Windows 10) or simply close the window (Windows 11 saves automatically).
Step 4: Open a browser and check if your IP has changed to confirm the proxy is active. You can use an online tool like WhatIsMyIP.com to see your current IP address.
Step 1: Open Settings → Network & Internet → Proxy.

Step 2: Under Manual proxy setup, toggle on Use a proxy server.
Step 3: Enter the Server address and Port provided by your proxy provider. For example, with IPcook you might enter server: geo.ipcook.com and port: 32345. (Example only. Please use your assigned server and port.)

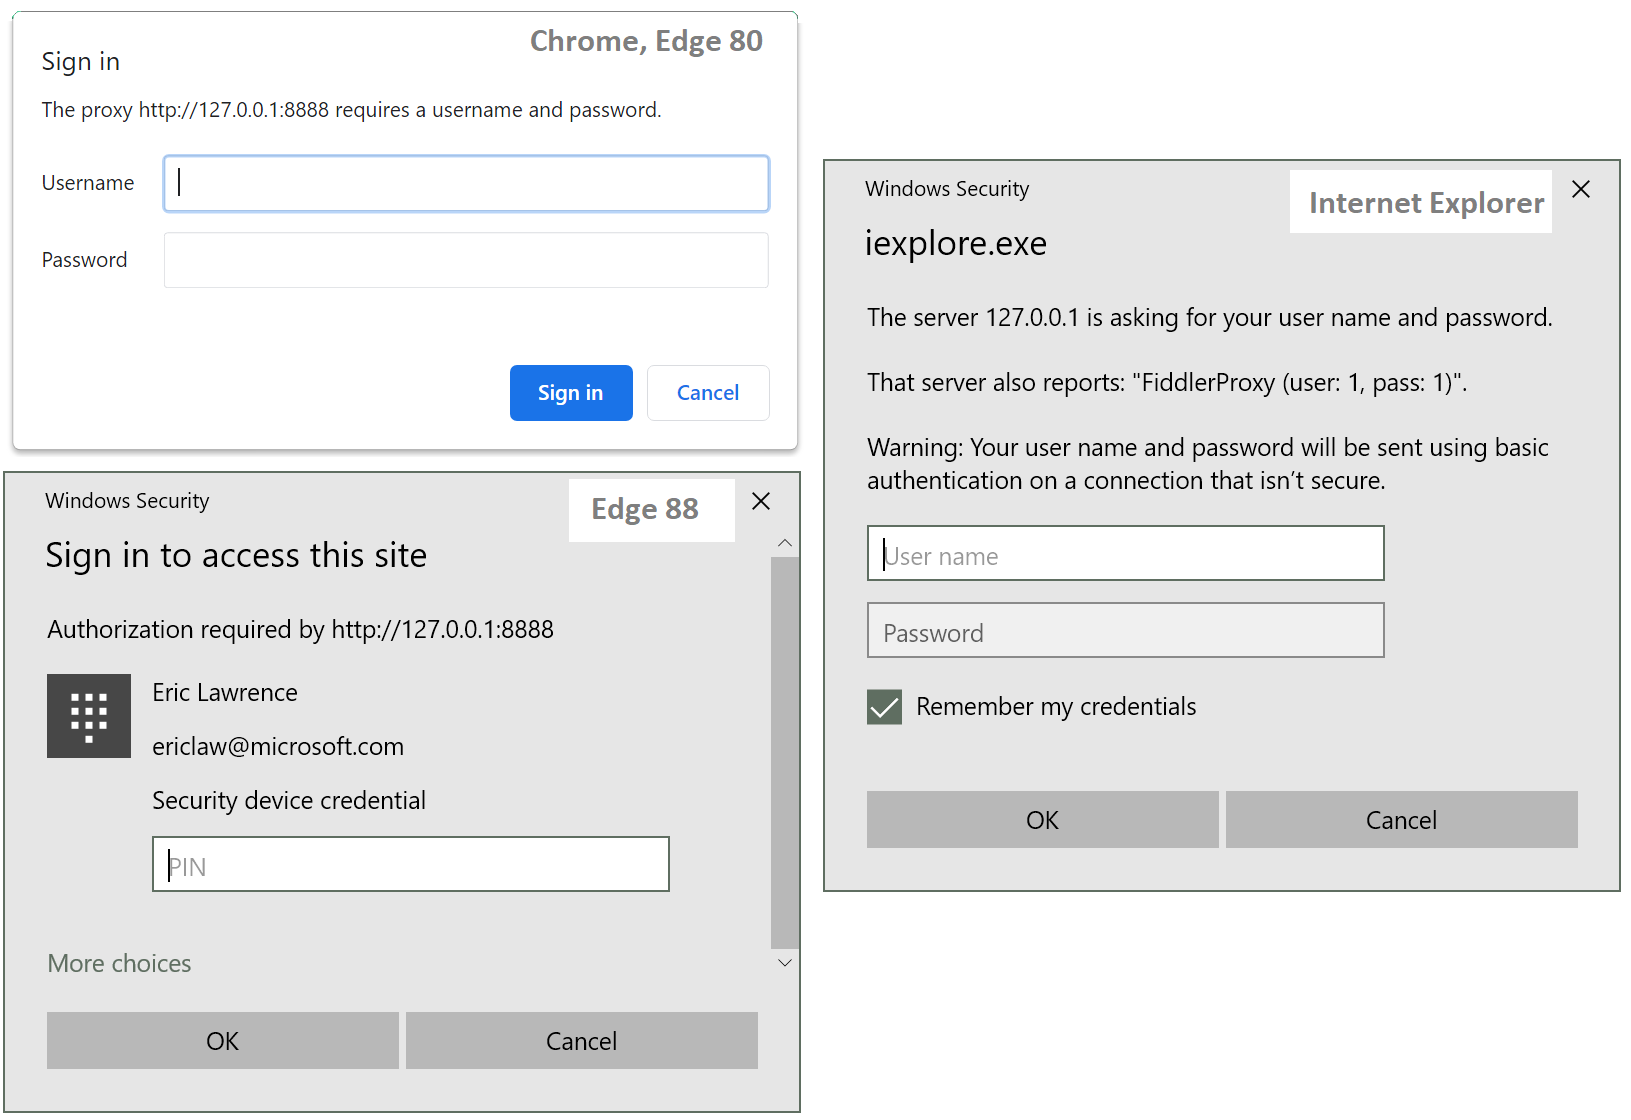
Step 4: If your proxy requires login details, Windows will prompt you for your username and password the first time you connect.
Step 5: Save the settings (Windows 10) or simply close the window (Windows 11 applies changes automatically).
Step 6: Open a browser and check if your IP has changed to confirm the proxy is active. You can use an online tool like WhatIsMyIP.com to see your current IP address.
Even with the correct setup, proxy connections in Windows may sometimes fail. The most frequent issues include problems with automatic detection, the proxy server not responding, or needing to disable proxy settings to restore a direct connection.
This error usually appears when Windows fails to configure the proxy automatically.
Steps to fix:
Restart your computer and router to refresh the network connection.
Open Settings → Network & Internet → Proxy and make sure Automatically detect settings is turned on.
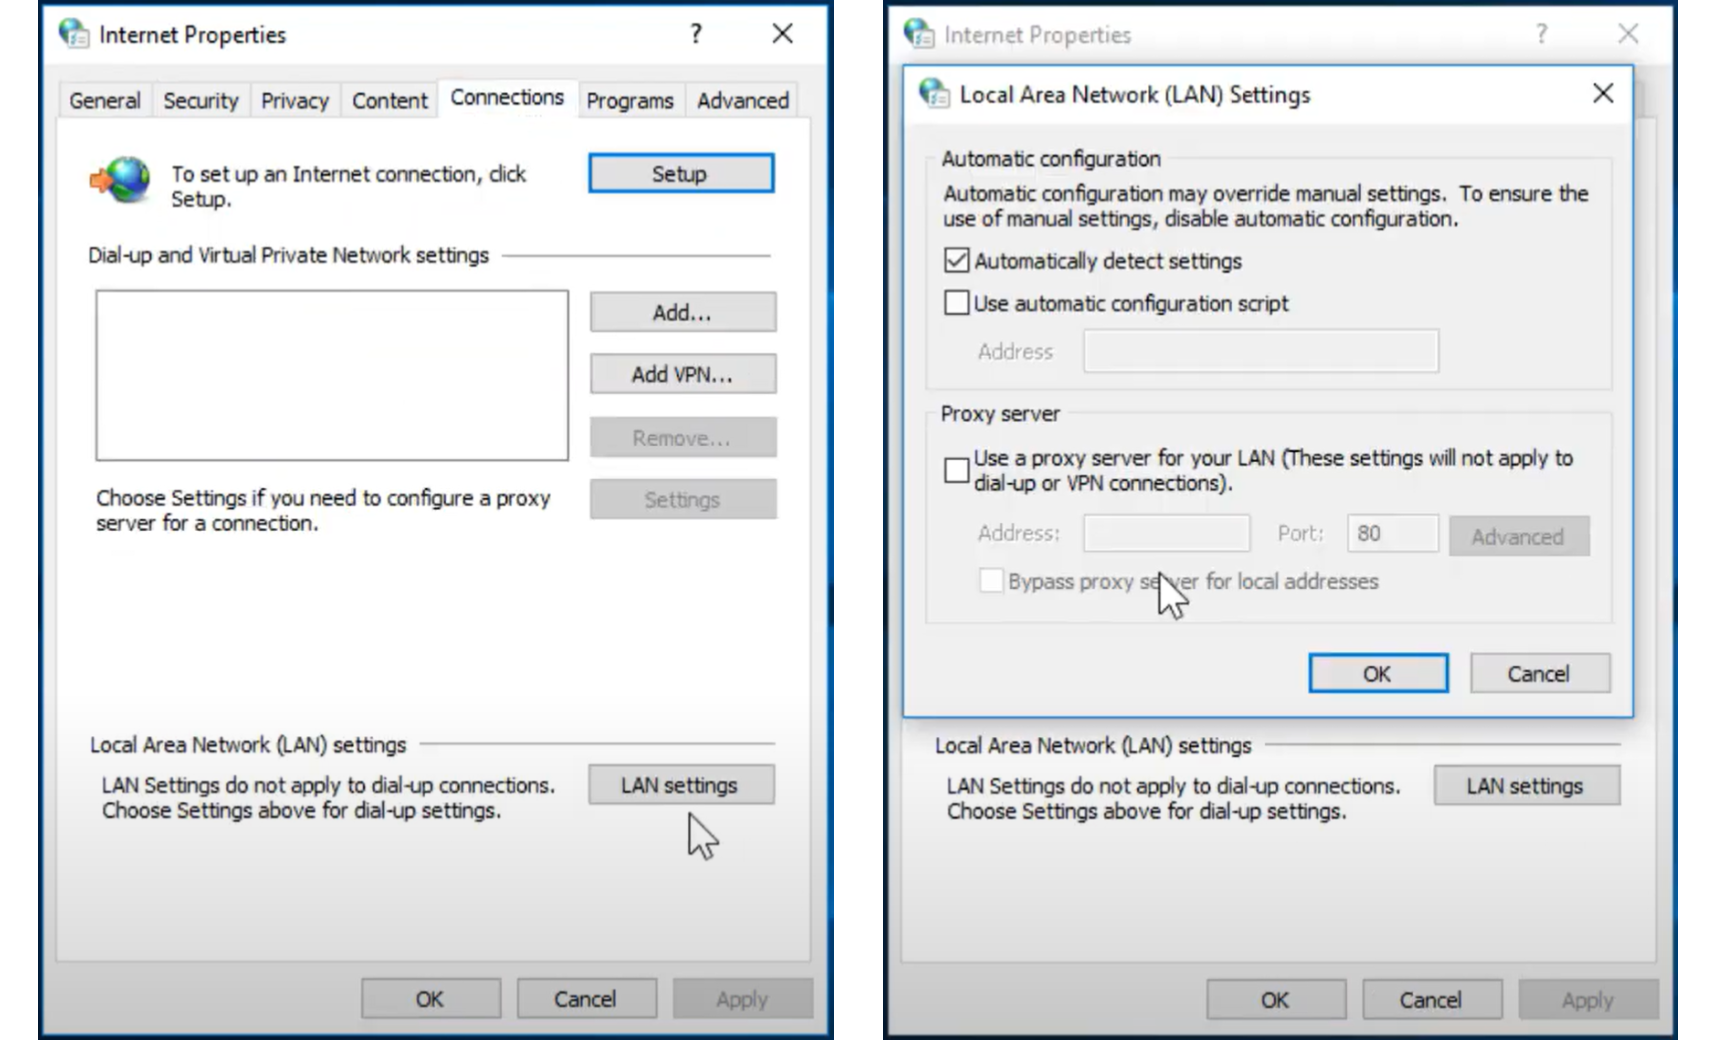
(Optional for Windows 10 users) Open Control Panel → Internet Options → Connections → LAN settings and check that Automatically detect settings is enabled there as well.
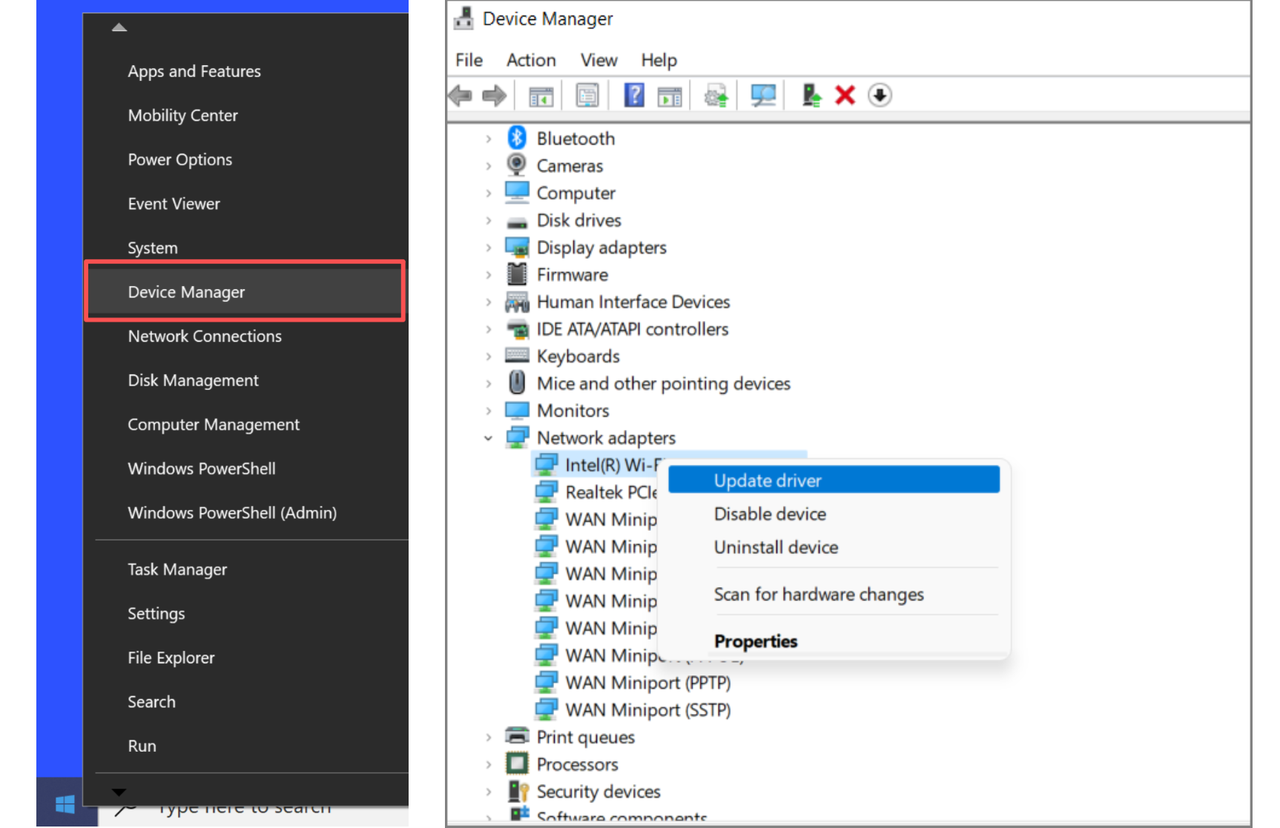
Update your network adapter drivers via Device Manager (Right-click Start → Device Manager → Network adapters → Update driver), then reconnect.
💡 For a more detailed walkthrough on this issue, see our dedicated guide: Quick Fix: Windows Could Not Automatically Detect Proxy Settings.
This error means Windows cannot connect to the proxy server you entered.
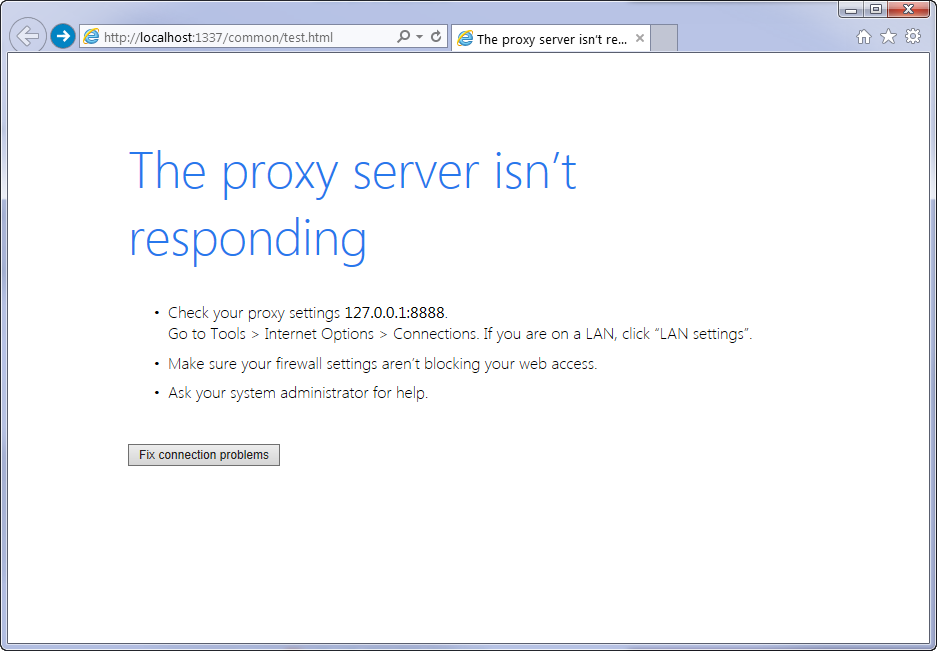
Steps to fix:
Go to Settings → Network & Internet → Proxy and confirm the Server address and Port are entered correctly (for example: geo.ipcook.com : 32345).
If you are using IPcook, check your dashboard for the latest server and port details.
Make sure your proxy subscription is active and the server is online.
Temporarily disable antivirus or firewall software to ensure they are not blocking the proxy connection.
Test your internet connection without the proxy to confirm whether the issue is proxy-related.
👀You may also want to know:
How to set a proxy in curl (command-line testing)
How to fix ERR_PROXY_CONNECTION_FAILED
How to fix “error occurred while proxying request”
How to fix “received HTTP code xxx from proxy after connect”
If you no longer need a proxy or suspect it’s causing issues, disabling proxy settings will restore a direct internet connection.
Steps to disable:
Go to Settings → Network & Internet → Proxy.
Under both Automatic proxy setup and Manual proxy setup, turn off all switches.
Reconnect to your network and open a browser to confirm you are back online without a proxy.
This guide showed you how to configure proxy settings in Windows 10 and Windows 11, from automatic setup with PAC scripts to manual configuration with server details. It also showed how to fix common errors to keep your connection stable.
For a smoother and more reliable experience, IPcook provides ready-to-use servers, ports, and credentials that integrate seamlessly with Windows, ensuring secure and consistent access every time you go online.

