
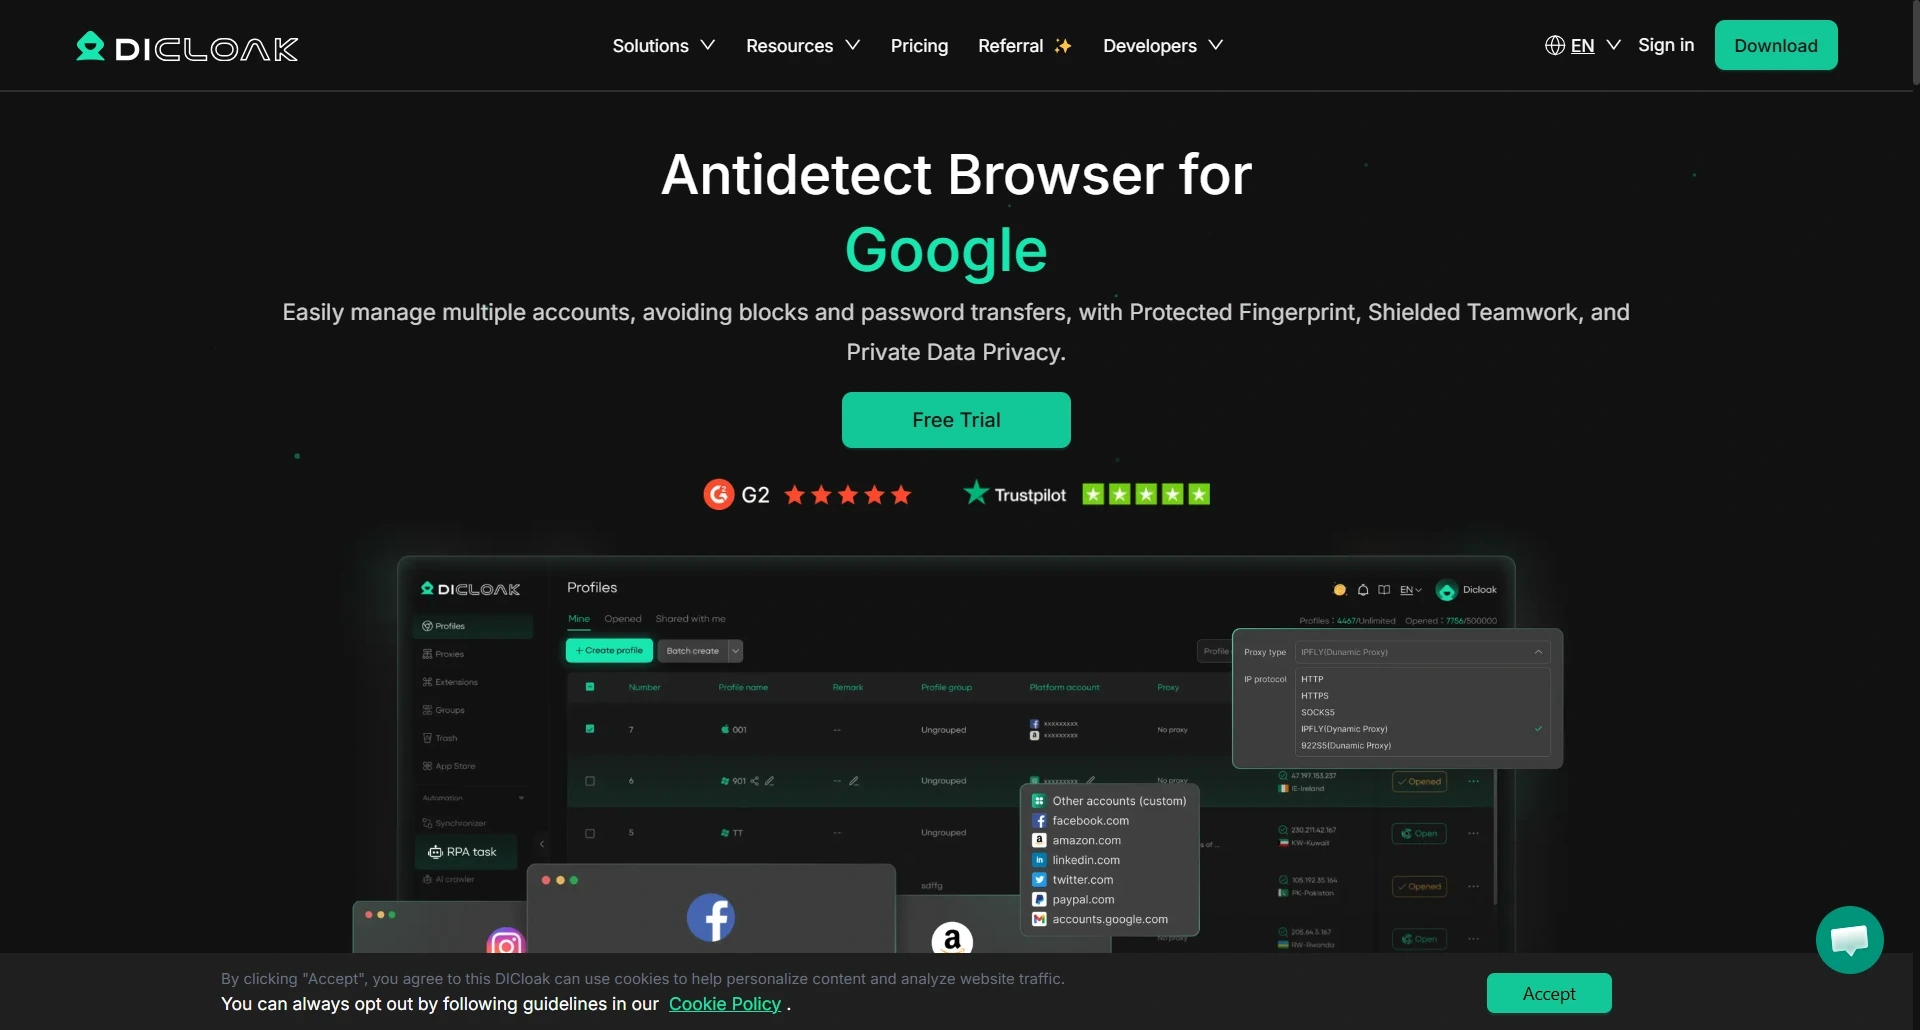
DICloak is an anti-detect browser designed specifically to mask digital fingerprints and simulate a genuine browsing environment. It is widely used for multi-account management across social media, e-commerce, and advertising verification platforms, including TikTok, Facebook, Amazon, LinkedIn, and Shopee.
To minimize the risk of account association, each profile must be assigned a separate and independent online identity. This guide provides an overview of DICloak’s features and pricing plans, and step-by-step instructions for setting up proxies within DICloak. Let's dive in.
Managing multiple accounts across social media, e-commerce, and advertising platforms often requires a stable and consistent online identity. Static ISP proxies stay fixed over time, which makes them a good fit for long-term use in DICloak, especially for tasks like warming up multiple Facebook accounts or managing multiple Facebook accounts.
Here’s how to configure a static IP in DICloak.
Before adjusting your proxy settings in DICloak, ensure you already have a dedicated proxy at hand, including its host address and port number. If you don’t have a proxy service yet, you can obtain one from a premium provider like IPcook. High-quality IPs start at just $0.05/IP.
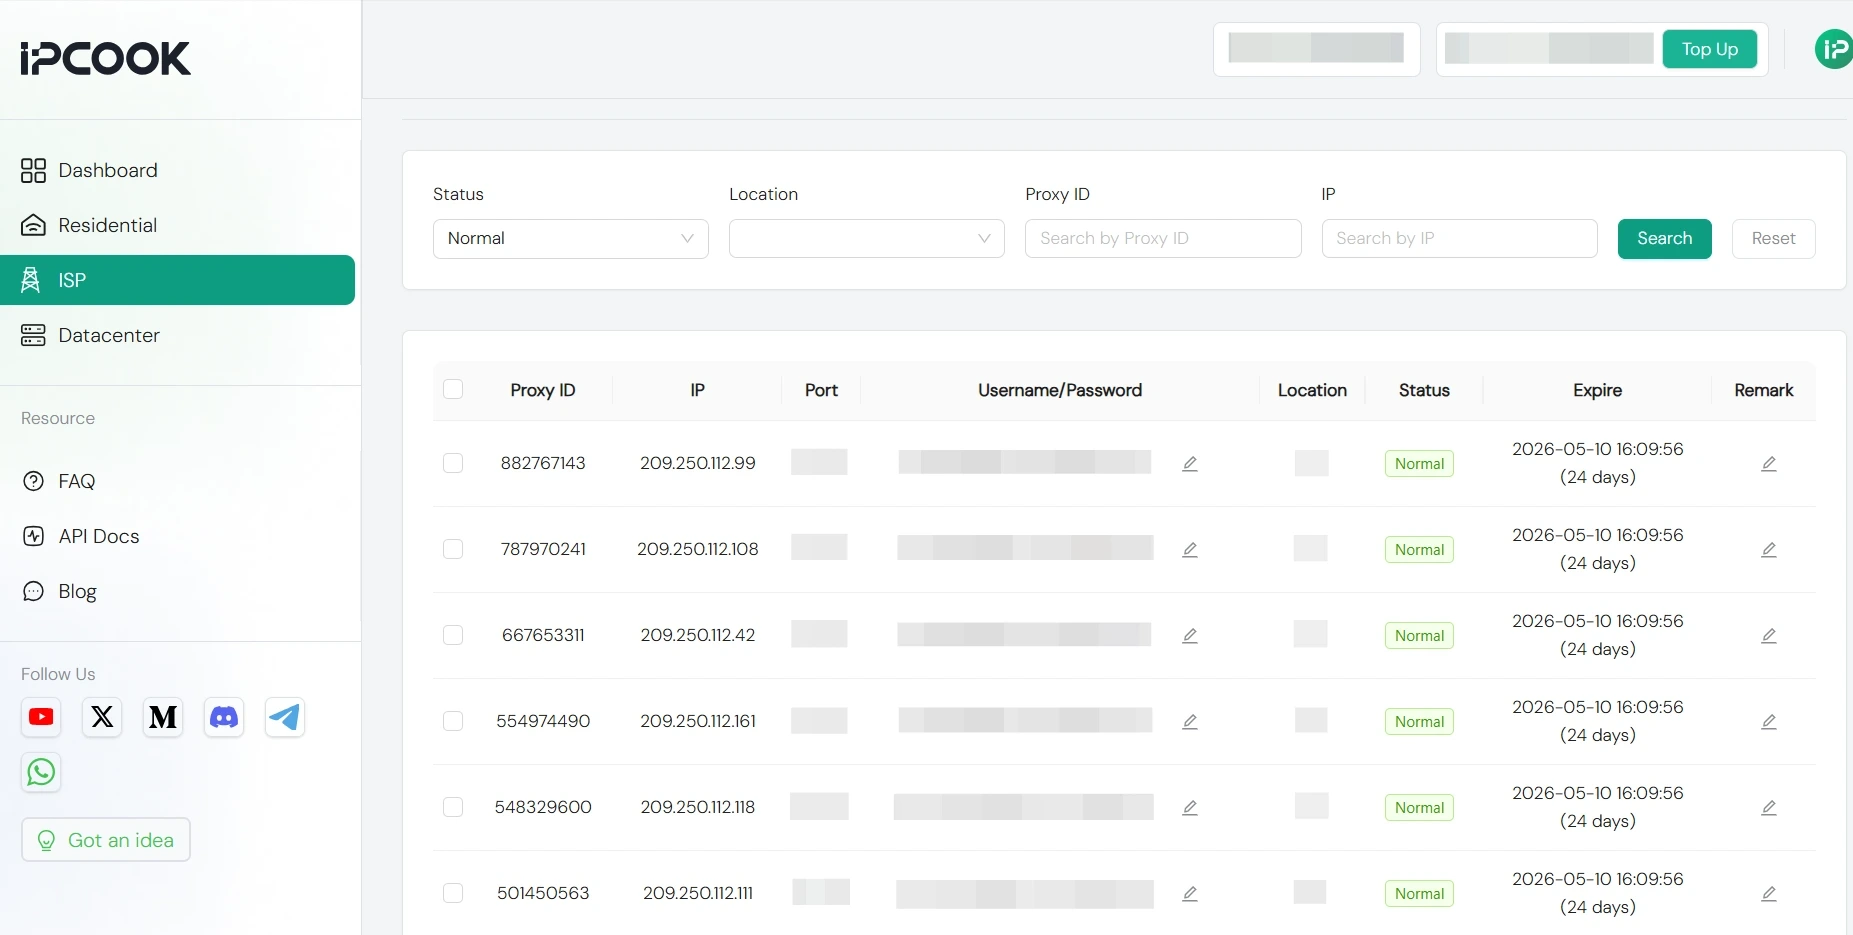
Simply sign up or log in to your IPcook account, choose a plan that fits your needs, and finalize your purchase. Then head to your dashboard, and copy your full proxy details: host/IP, port, username, and password.
Open the DICloak software and log in to your account.
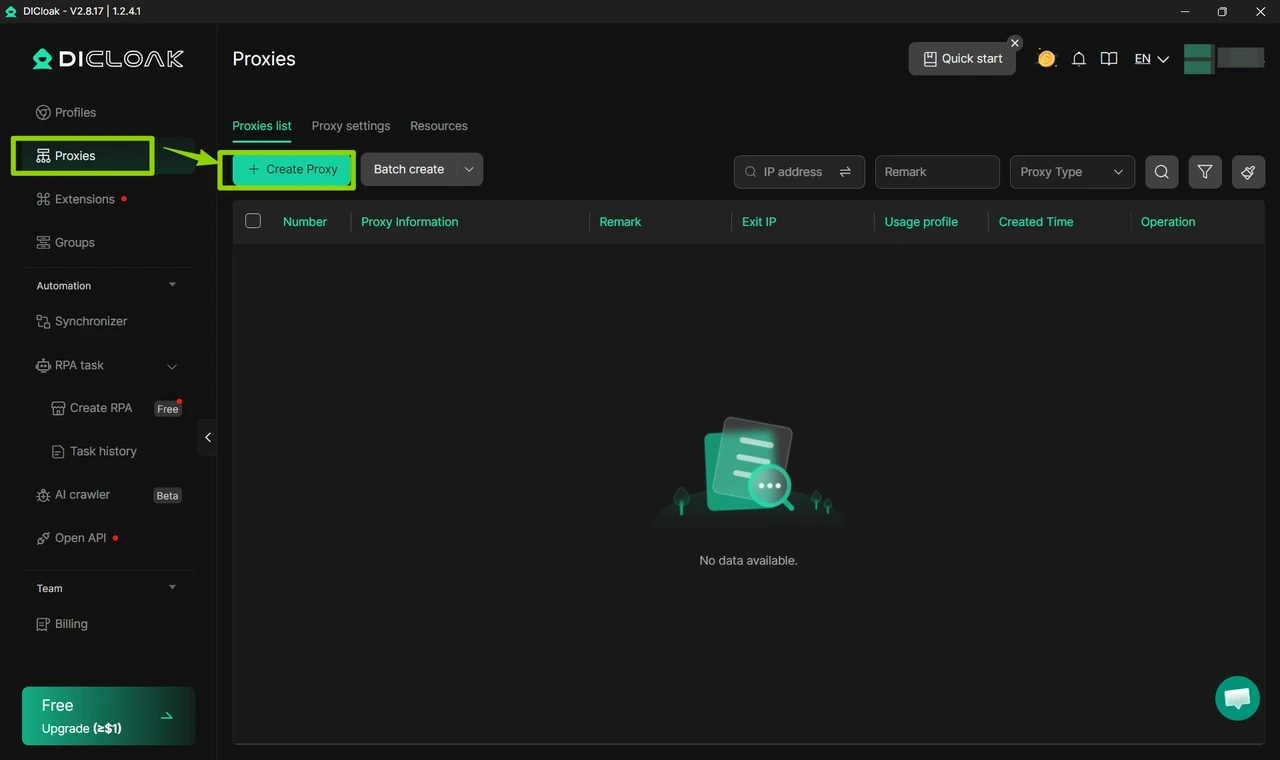
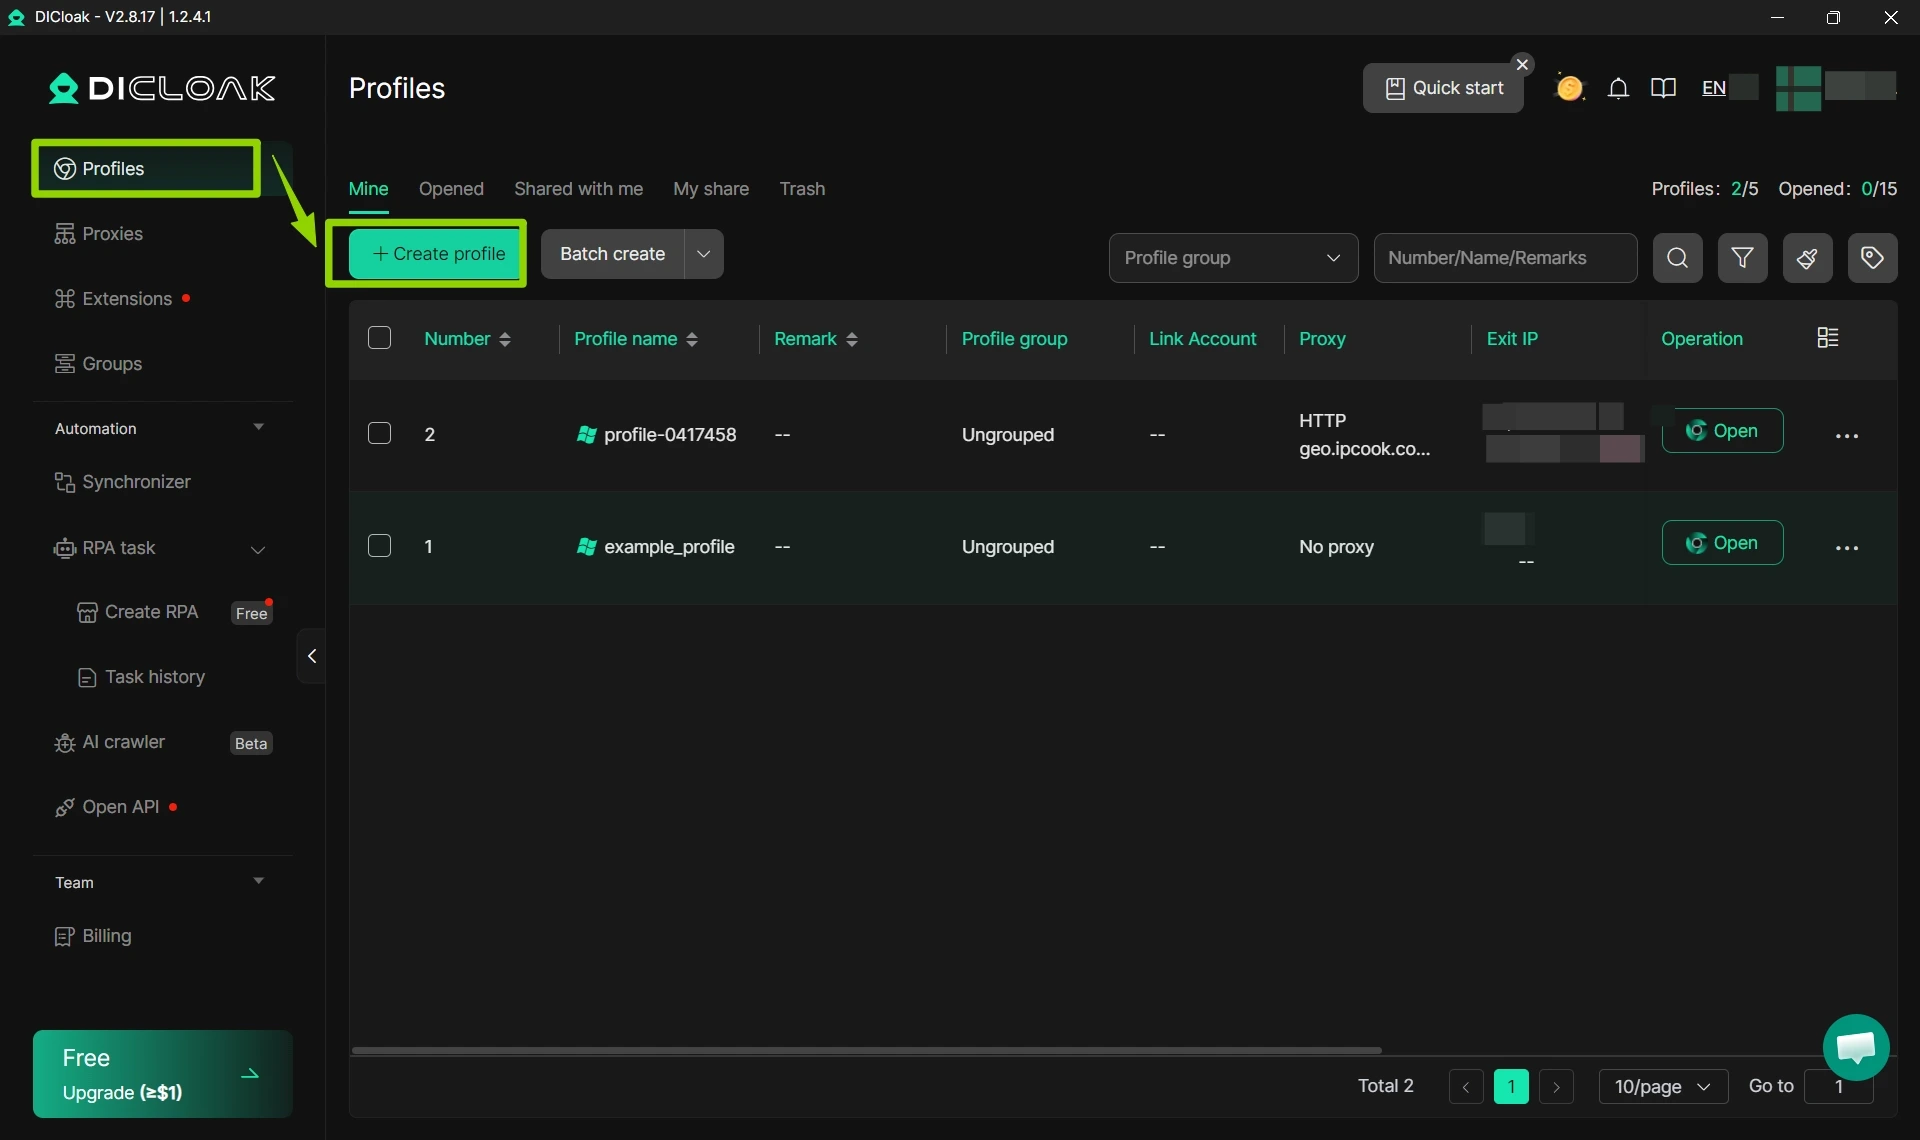
Click the “Proxies” button and select “Create Proxy”.
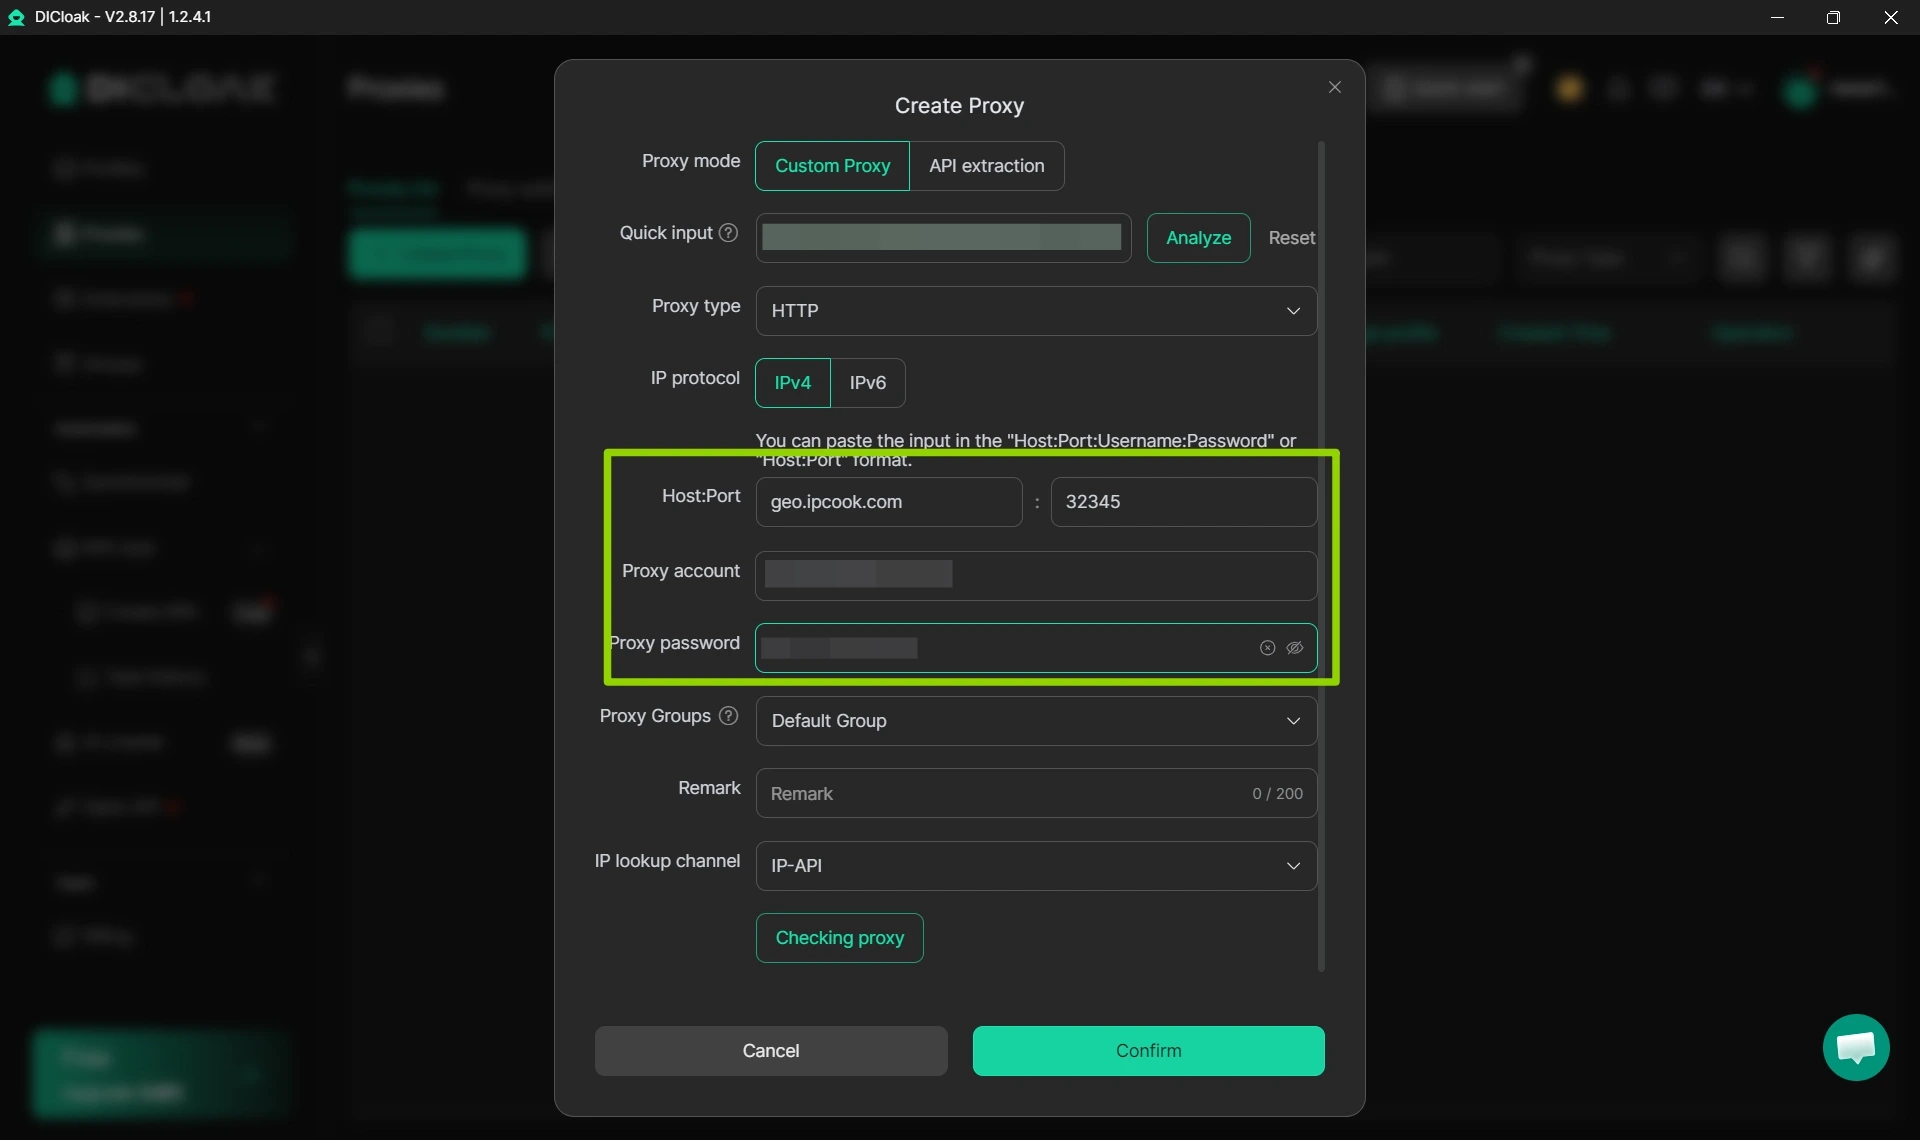
Pick your proxy protocol (HTTP, HTTPS, or SOCKS5), then fill in the proxy information and login credentials provided by IPcook.
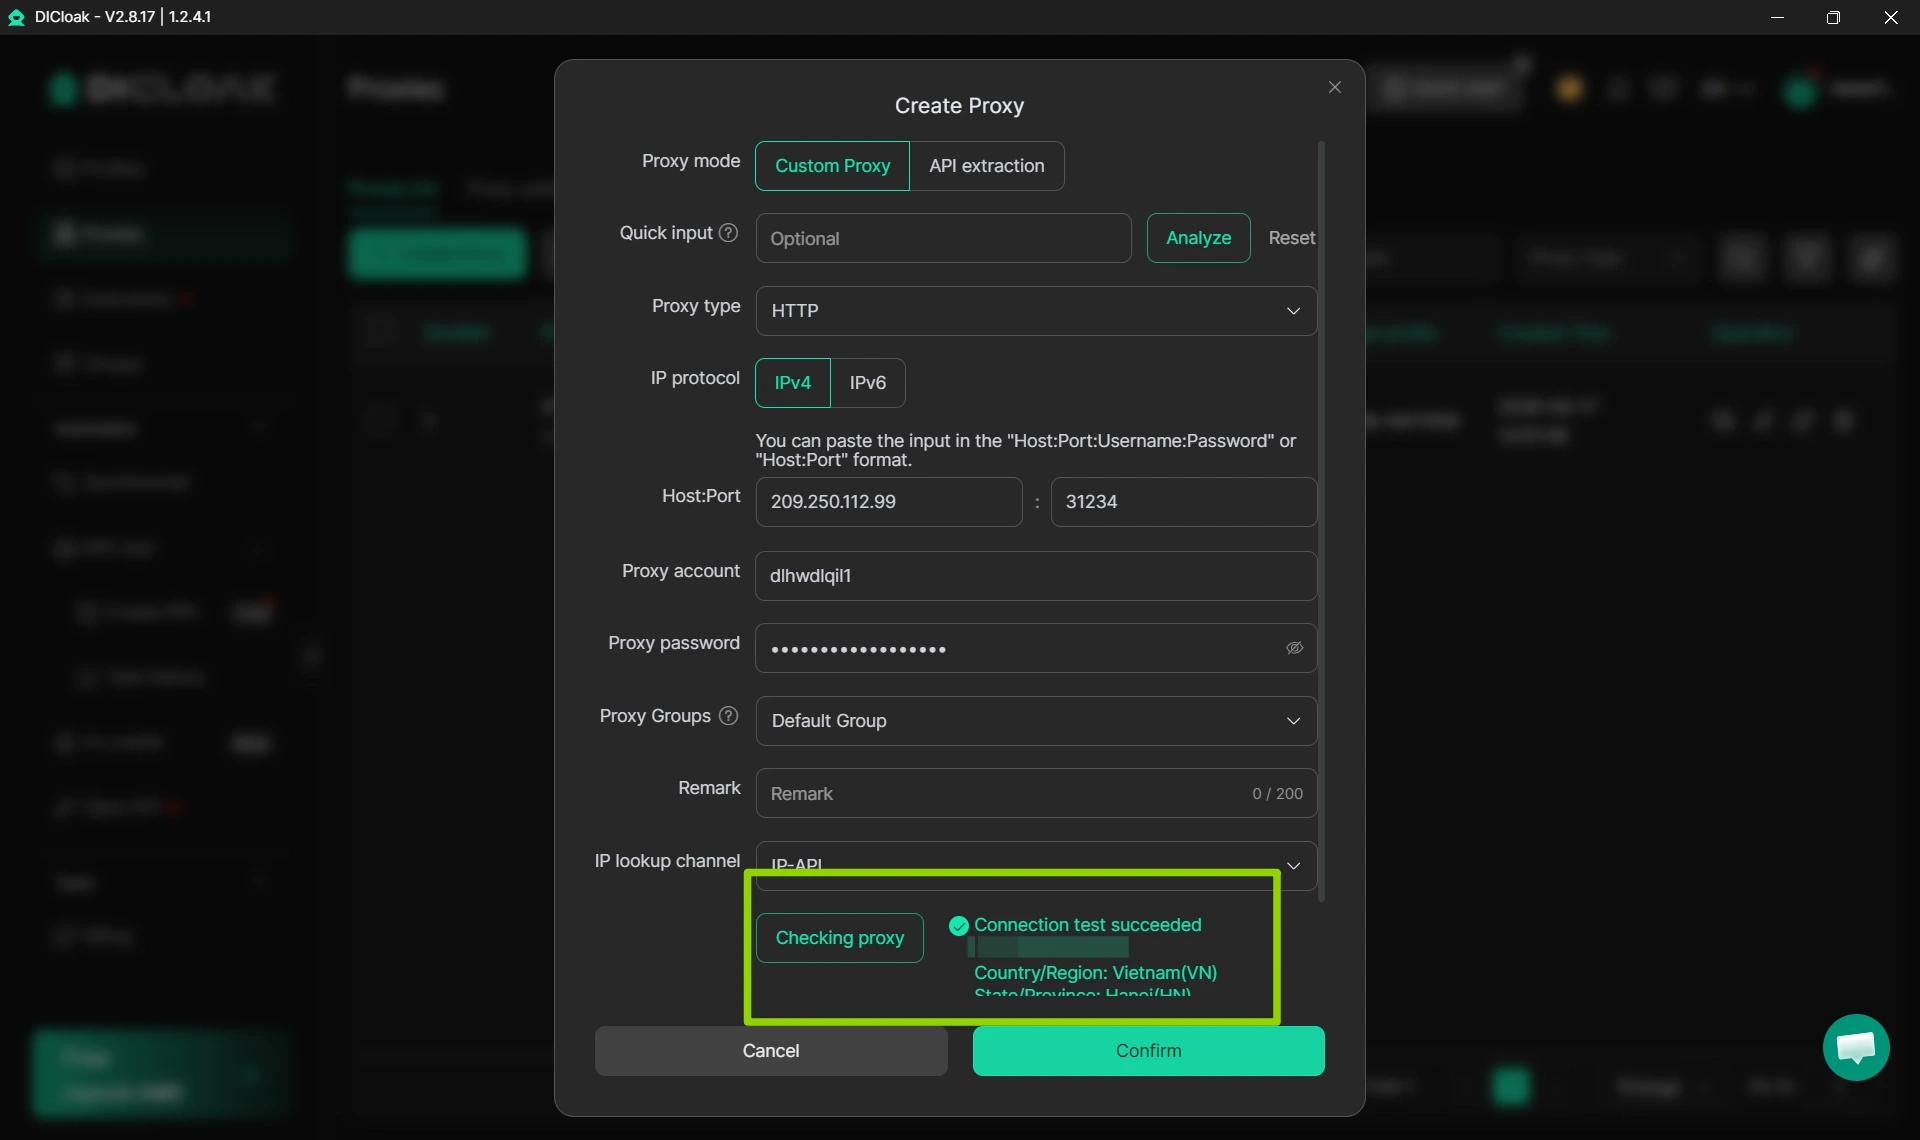
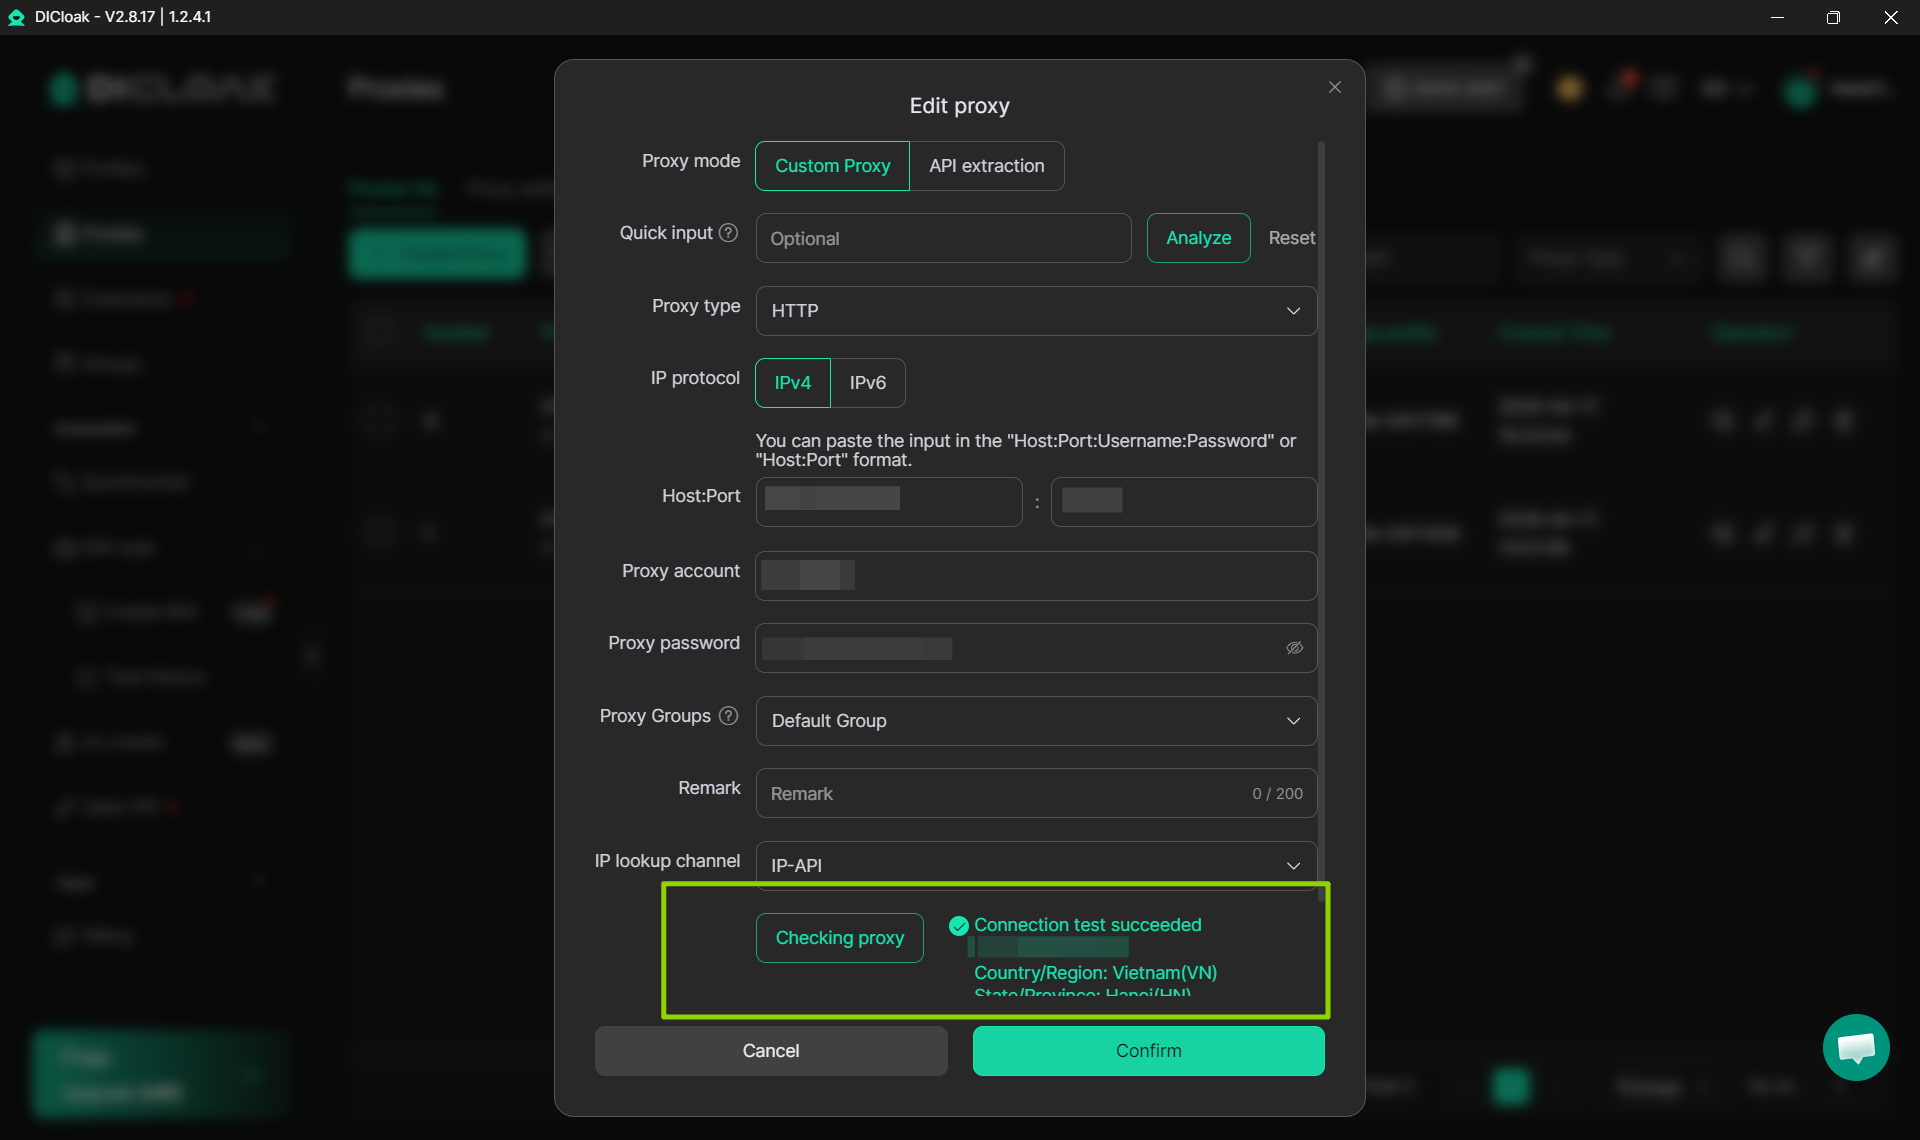
Verify your proxy connection by selecting an IP lookup tool (IP-API or IP2Location) and clicking “Checking proxy”. If the test succeeds, your proxy’s valid IP address will appear.
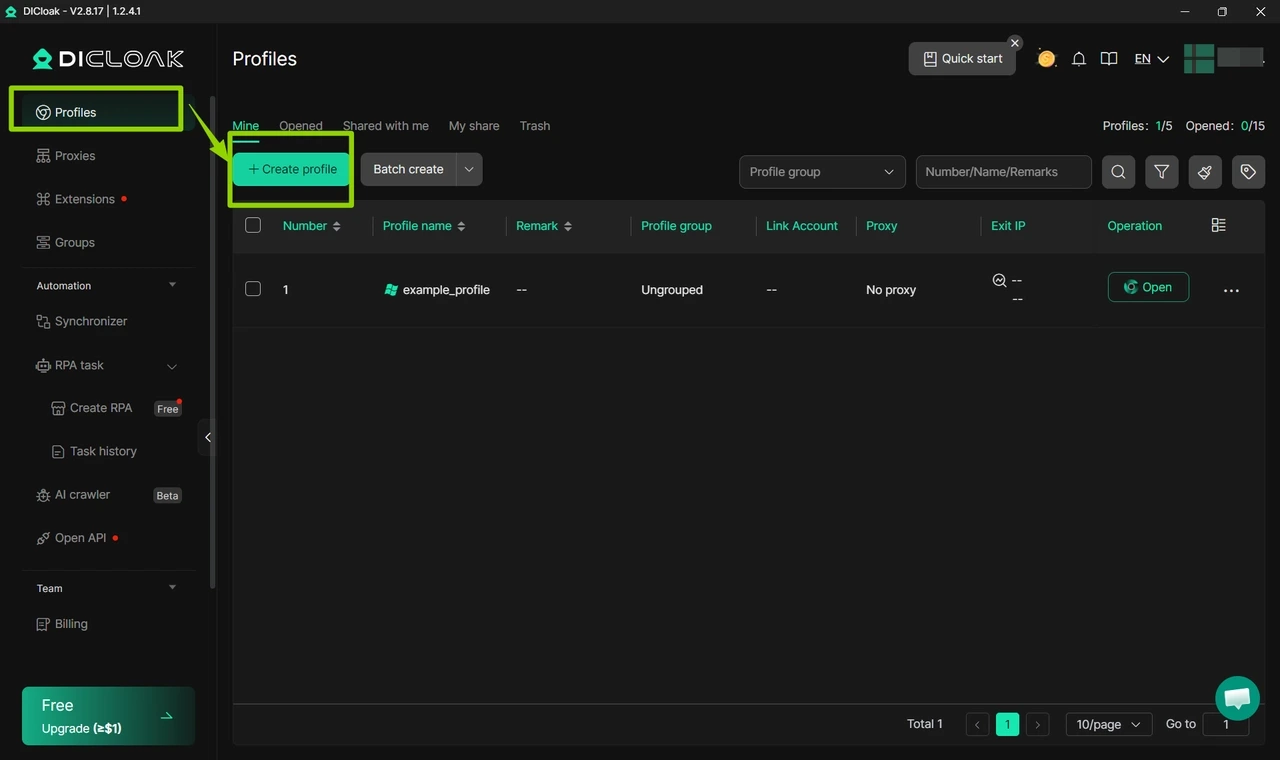
Go to the “Profiles ” and select “Create profile”.
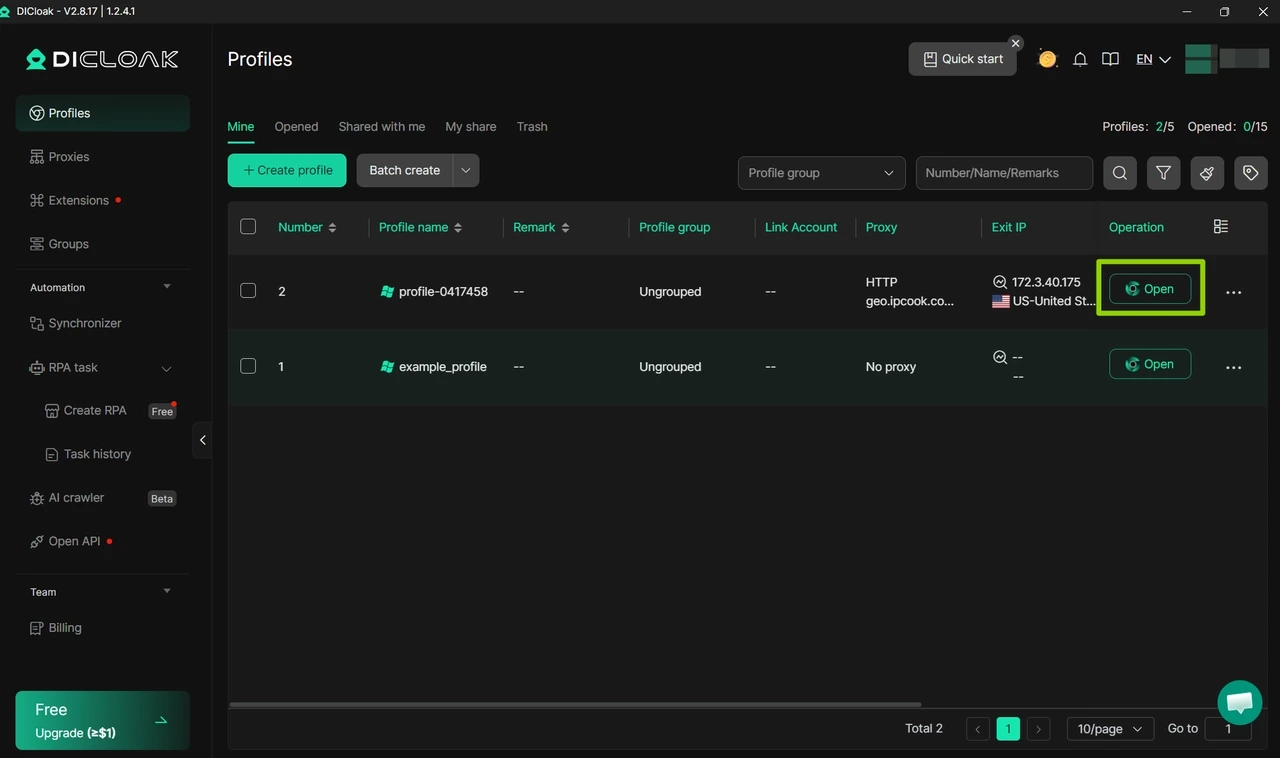
Select “Open” from the profile’s Operation column to launch the private browser and begin your activities. This completes the integration process, confirming that your IPcook residential proxies are now operational with the DICloak anti-detect browser.
Rotating residential proxies change IPs over time, making them ideal for ad verification, SEO monitoring, market research, and bulk data collection. Here's how to set them up in DICloak.
Likewise, if you do not yet have a proxy service, you can get one from IPcook.
🔥IPcook offers a 100 MB free residential proxy trial. Do not miss out. Get started today!
Simply log in to your IPcook dashboard, select your preferred proxy type, choose your desired location, and session mode. Scroll down and click “Generate” to obtain your exclusive proxy details. These typically include an IP address, port, username, and password. Copy these details and paste them directly into the system proxy settings in DICloak.
Start up DICloak and log in to your registered account.
Navigate to the “Proxies” and select “Create Proxy” to set up a new proxy entry.

Select your proxy type, then input your proxy information and the login credentials for your IPcook proxy account.
To confirm whether your proxy is working properly, choose an IP lookup service such as IP-API or IP2Location and click “Checking proxy”. If the test passes, a valid proxy IP will be shown on the screen.

Go to the “Profiles ” and select “Create profile”.
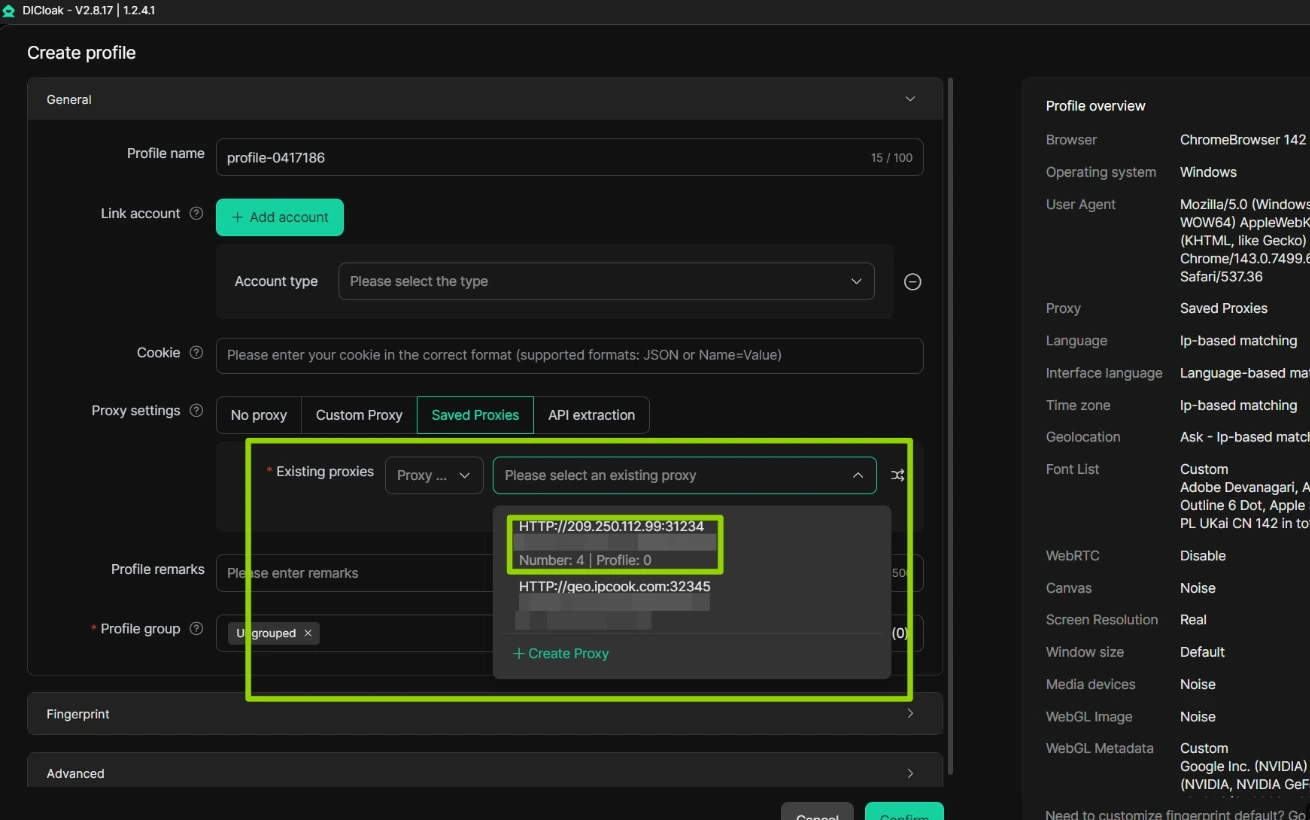
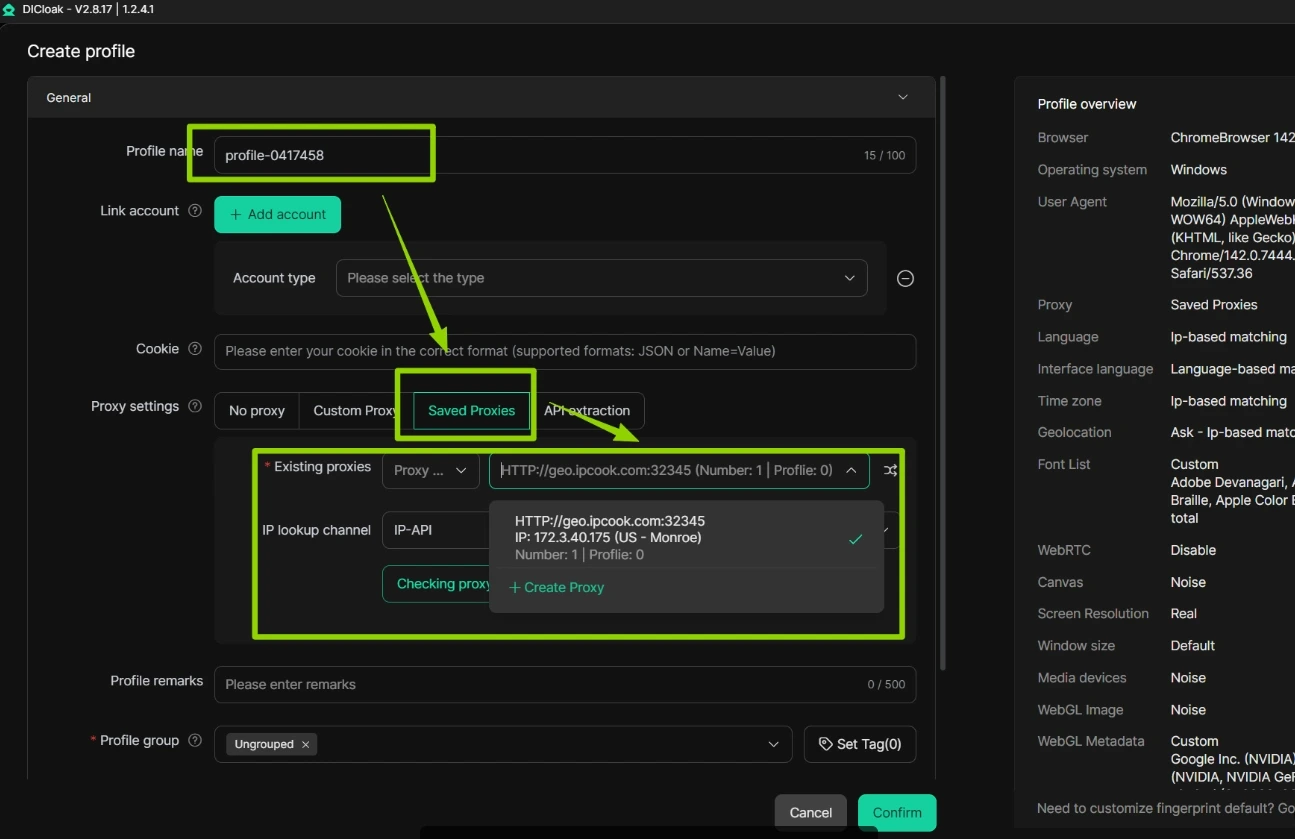
Next, enter your preferred profile name and choose the proxy you just created from the Saved Proxies list. After completing the proxy setup, simply click the “Confirm” button at the bottom of the window to save your settings.
Simply click “Open” in the Operation column of your profile to launch a private browser and continue with your tasks. That’s all, you have successfully connected your IPcook residential proxies to the DICloak anti‑detect browser.
And that’s it. You’ve successfully integrated your IPcook rotating residential proxies with DICloak browser.
DICloak is a professional anti-detect browser built for secure, scalable multi-account management. Its main function is creating isolated browser profiles with separate fingerprint settings, including user agents, device settings, and geolocation parameters. When used with proxy IP configurations, it can be useful for tasks such as creating bulk Instagram accounts, creating bulk Facebook accounts, or reducing the risk of Facebook account IP bans.
Importantly, DICloak does not include built-in proxy services. So you need to add external proxies before launching browser profiles. This is different from Multilogin, which promotes built-in residential proxies as part of its offering. To fully utilize its anonymity features, users must obtain reliable external proxies from IPcook before setting up and launching browser profiles.
Here’s how DICloak helps with multi-account management:
DICloak allows users to generate fully independent browser environments for each account, effectively eliminating the risks caused by overlapping cookies, device parameters, and browser fingerprints. Each profile runs in complete isolation, ensuring secure and stable operations without detection or association between accounts. This makes it an ideal tool for managing multiple social media accounts, e-commerce stores, and advertising platforms.
DICloak can simulate real human behavior to perform repetitive browser tasks automatically. It supports batch account registration, automated posting, liking, following, product data scraping, and form filling. These smart automation features greatly improve efficiency, reduce manual workload, and help users operate more safely without triggering platform anti-bot systems, making it perfect for social media marketers and e-commerce sellers.
DICloak is perfectly designed for cross-border e-commerce and social media marketing teams. It allows team members to manage separate accounts or projects collaboratively without sharing sensitive login credentials directly. Administrators can assign distinct proxy environments to different users, account groups, or projects, minimizing errors, account overlap, and environment conflicts. This makes it an ideal solution for secure and efficient multi-team account management.
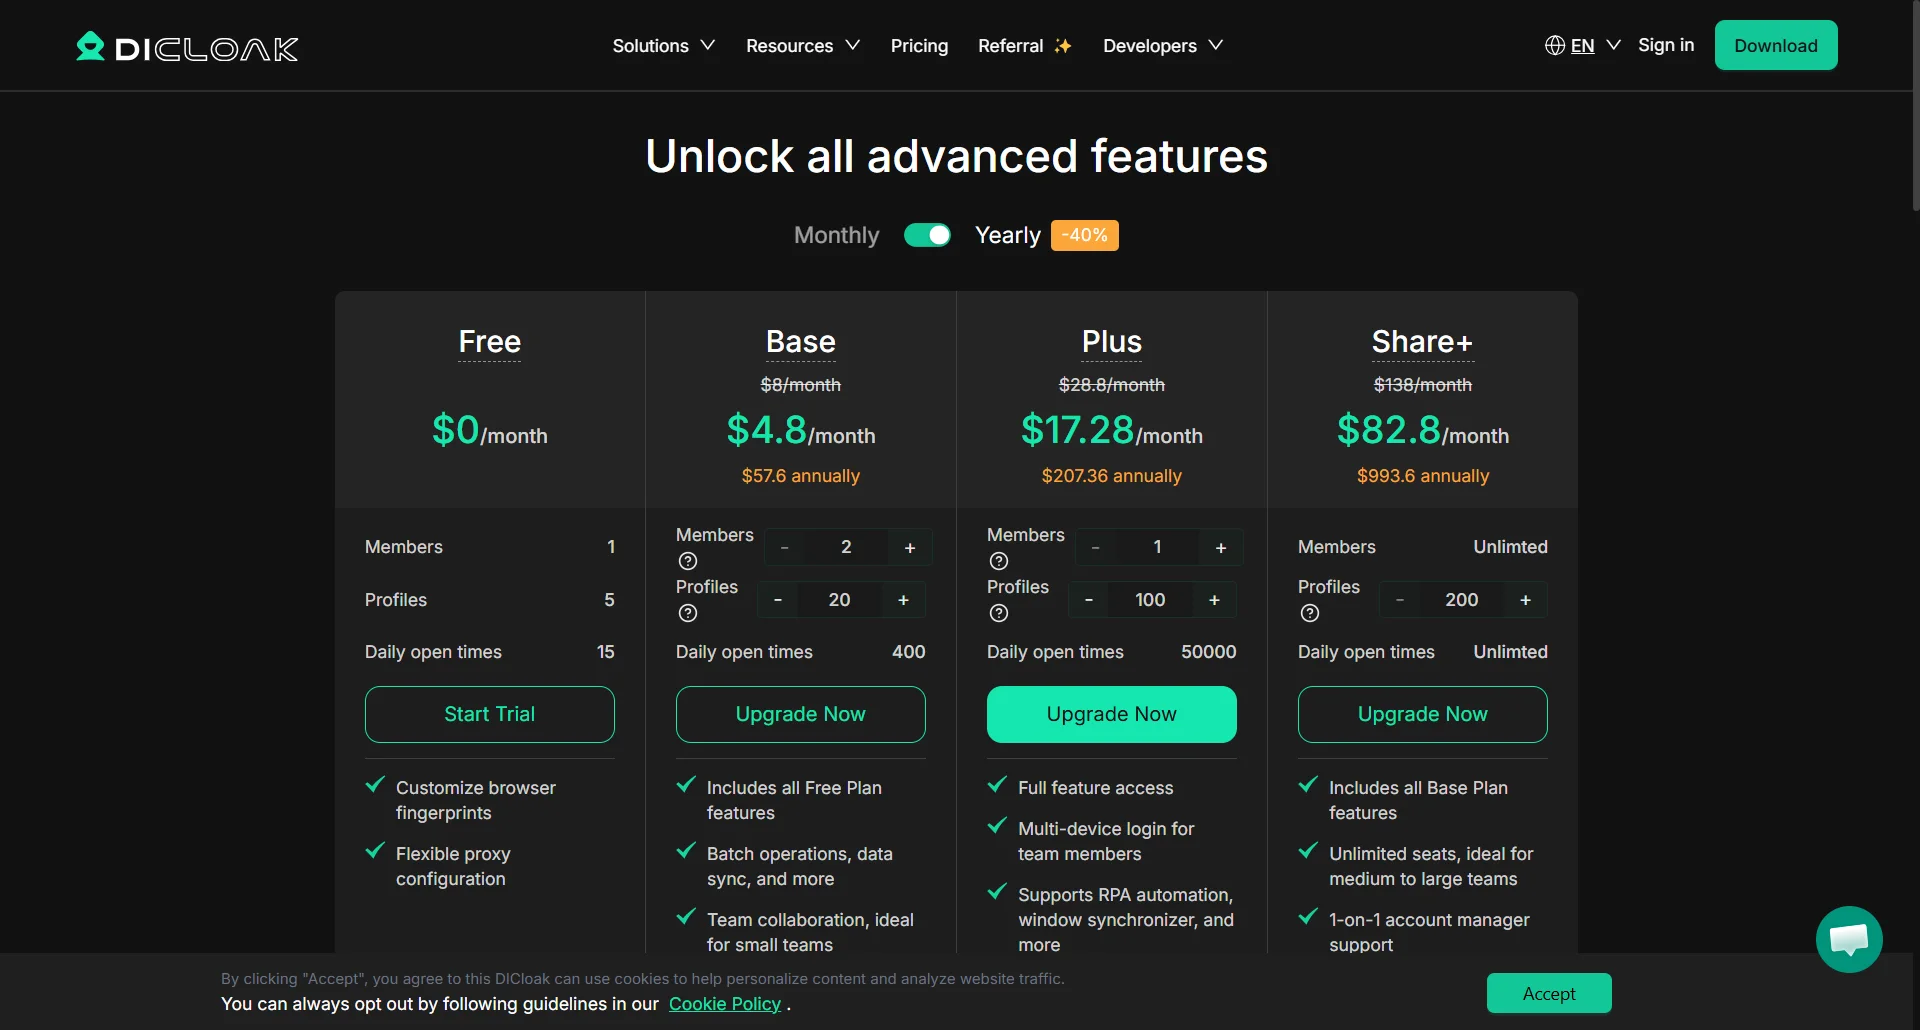
DICloak offers tiered plans tailored to users of all scales, starting with a permanent Free Plan at $0/month, which includes 5 profiles, 15 daily sessions, and core features like fingerprint customization and proxy configuration.
Paid tiers begin with the Base Plan at $4.8/month, offering 20 profiles, 400 daily open times, and team collaboration tools.
The Plus Plan ($17.28/month) unlocks 100 profiles, 50,000 daily sessions, multi-device login, and RPA automation.
For large teams, the Share+ Plan ($82.8/month) provides unlimited members, 200 profiles, and dedicated account management. With annual billing offering up to 40% savings, DICloak delivers scalable options for solo users, small teams, and enterprise operations. For a breakdown of all plan features, check out the pricing table below.
DICloak is highly recommended for social media managers, e-commerce operators, and digital marketers who need secure multi-account management and want to avoid account association or IP bans. If you care about whether Dicloak is safe, rest assured, it performs reliably when paired with high-quality proxies. For stable and anonymous proxy services, IPcook is an ideal choice. Simply follow the step-by-step setup guide in this article to integrate proxies smoothly into DICloak for safer and more efficient account operations.

