
SEO Neo helps SEO professionals manage automation operations in one place, including campaign preparation, content tasks, cloud blog creation, and backlink processes. But to keep everything running smoothly, you also need a reliable network environment with proxies.
In this guide, we’ll show you how to set up proxies in SEO Neo and how to run the SEO Neo automation process.

SEO Neo is SEO software for campaign-based link building. This platform focuses on creating high-quality backlinks on authority websites while supporting multiple platforms.
Beyond link building, SEO Neo also includes cloud blogs, AI-driven content buckets, strategy creation, self-hosted WordPress support, and white-label reports. Instead of working like a simple keyword or rank tracking tool, SEO Neo is closer to an SEO campaign builder for managing content, links, and campaign assets in one place.
Follow these steps to connect proxies with SEO Neo.
Download and install SEO Neo for your Windows or macOS device. Once installed, sign in to your account and open the main dashboard.
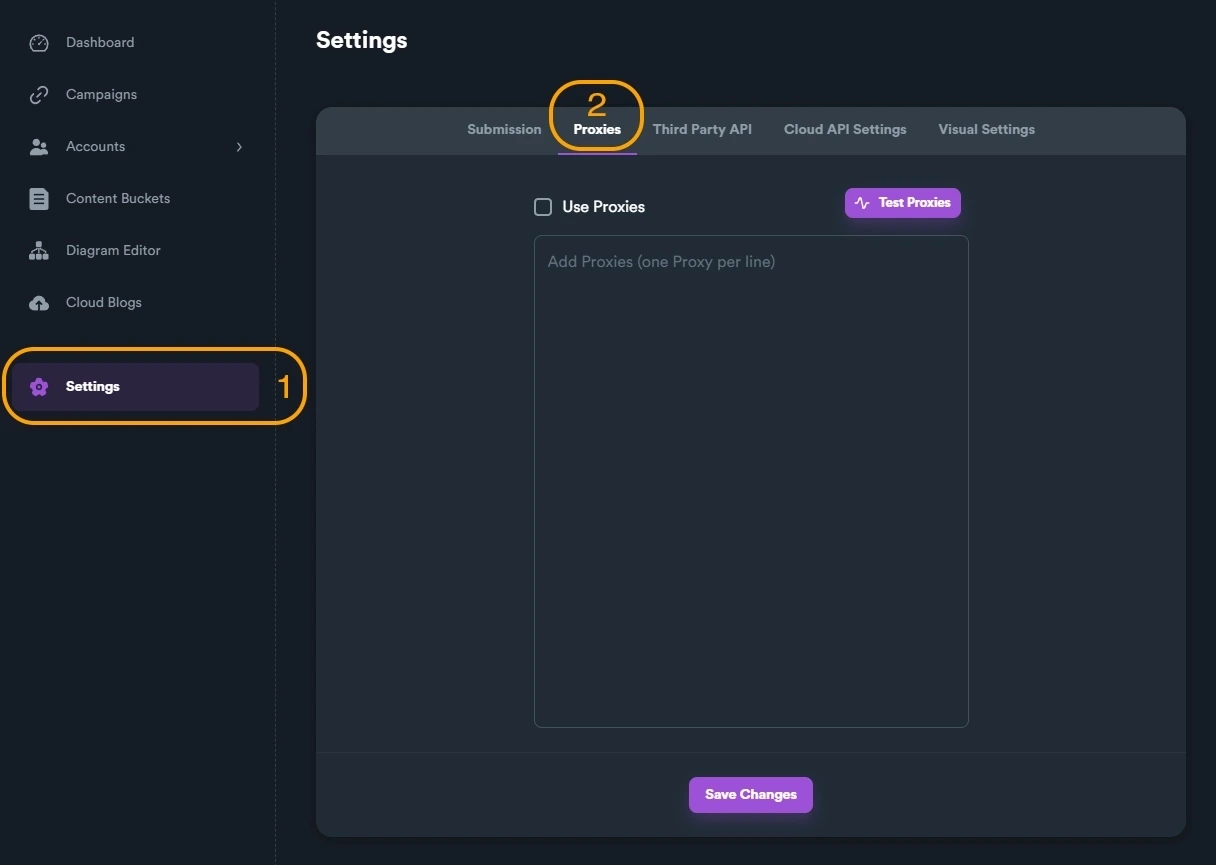
Go to Settings → Proxies and enable Use Proxies. Then add your proxy configuration in the proxy box. SEO Neo requires proxies to be added one per line.
SEO Neo supports these two formats:
[proxy_ip]:[proxy_port]:[username]:[password]
[proxy_ip]:[proxy_port]
IPcook supports both formats, and you can copy your residential, static ISP, or datacenter proxies details. For username/password authentication, choose and paste this format: HOST:PORT:USER:PASS from your dashboard. If you have whitelisted your IP address, use: HOST:PORT.
💡 Make sure to use the correct colon format and enter only one proxy per line. Here’s what each part means:
HOST: Proxy server address,that is proxy_ip, such as geo.ipcook.com or 1.2.3.4
PORT: Proxy port number, that is proxy_port, such as 32345
USER: Proxy username
PASS: Proxy password
See our User Guide for more details on generating your proxies if needed.
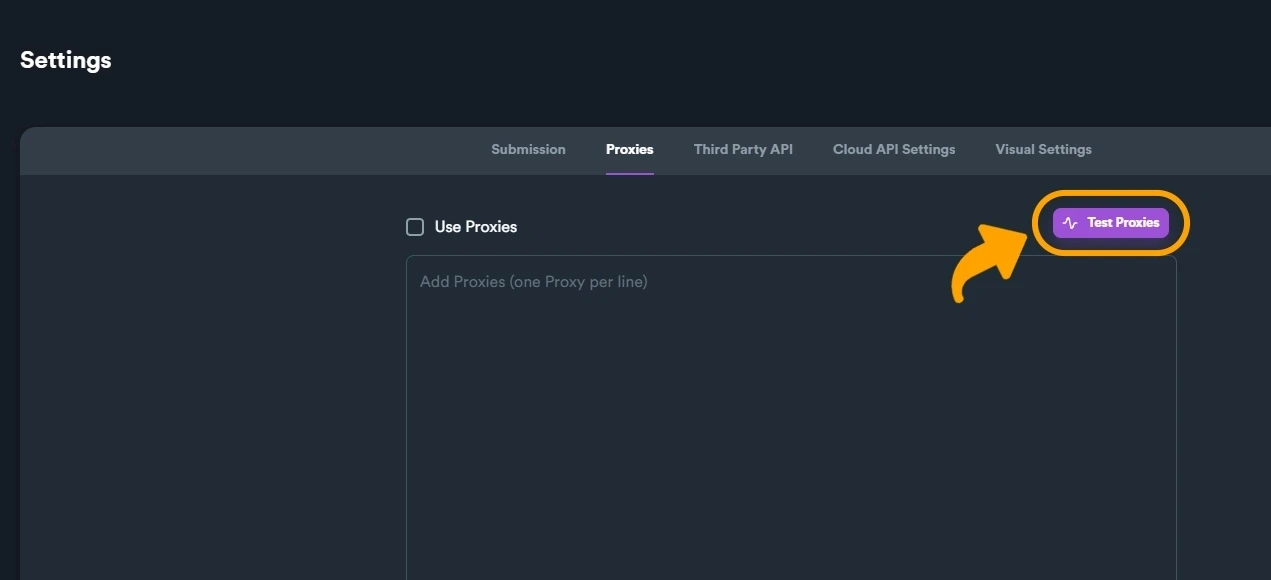
Click Test Proxies and let SEO Neo check the connection. If SEO Neo asks whether to remove non-working proxies after testing, select Yes to keep your list clean.
If the test shows a success message and a green check mark, your proxies are ready to use in SEO Neo campaigns.
Before running a campaign, prepare your URLs, keywords, proxies, content settings, account resources, and API tools.
Now you can start the SEO Neo automation process. A campaign needs several prerequisites, including content buckets, account templates, account buckets, proxies, and third-party API services such as captcha tools.
Prepare target URLs and keywords First, decide which website URLs you want the campaign to target and which keywords you want to use.
Complete basic settings Before creating a campaign, configure the required settings. SEO Neo lists proxies, Captcha API, OpenAI, content tools, spinners, and indexers as common setup items.
Prepare content and accounts Create or select the content buckets and account resources needed for the campaign. These help SEO Neo manage the content and platform assets used during automation.
Create the campaign Once the basic settings are ready, move to campaign creation. SEO Neo will then use your selected settings, content, accounts, and proxies during the campaign process.
Run and check results
Start the campaign, then review the results. If many tasks fail, check your proxies, captcha settings, and content setup first. After reviewing the results, adjust your proxies, content, or account resources before running the next campaign.
Together with IPcook proxies, SEO Neo can better support campaign creation, Web 2.0 tasks, cloud blogs, self-hosted WordPress posting, GBP campaigns, and other automated link-building tasks.
A clean, reliable SEO proxy helps SEO Neo run tasks with steadier connections and fewer network interruptions. Use residential proxies for higher anonymity, and static ISP proxies for stable, long-session tasks.

