
Many users leverage AdsPower for isolated browsing and multi-account management, as it fully supports custom proxy connections. Even so, figuring out how to configure proxies correctly remains a major pain point for most beginners.
To help you avoid these common issues, we’ve created a step-by-step guide. We’ll cover every key detail of setting up IPcook's static ISP proxies, dynamic residential proxies, and batch proxies in Adspower. Let's dive in!
To sustain long-duration sessions and a smooth account workflow, ISP proxies are an excellent practical choice, as they assign a fixed, stable IP to each individual profile. Follow the step-by-step instructions below to configure your static proxy in AdsPower and build optimized profiles that maximize both privacy and operational efficiency.
To unlock the full power of AdsPower and elevate your multi-account management experience, start by securing a reliable, fully functional IPcook account today.
Set up your plan in the IPcook dashboard in just a few clicks. Then go to My Proxy and copy your proxy details, including the IP address, port, username, and password.
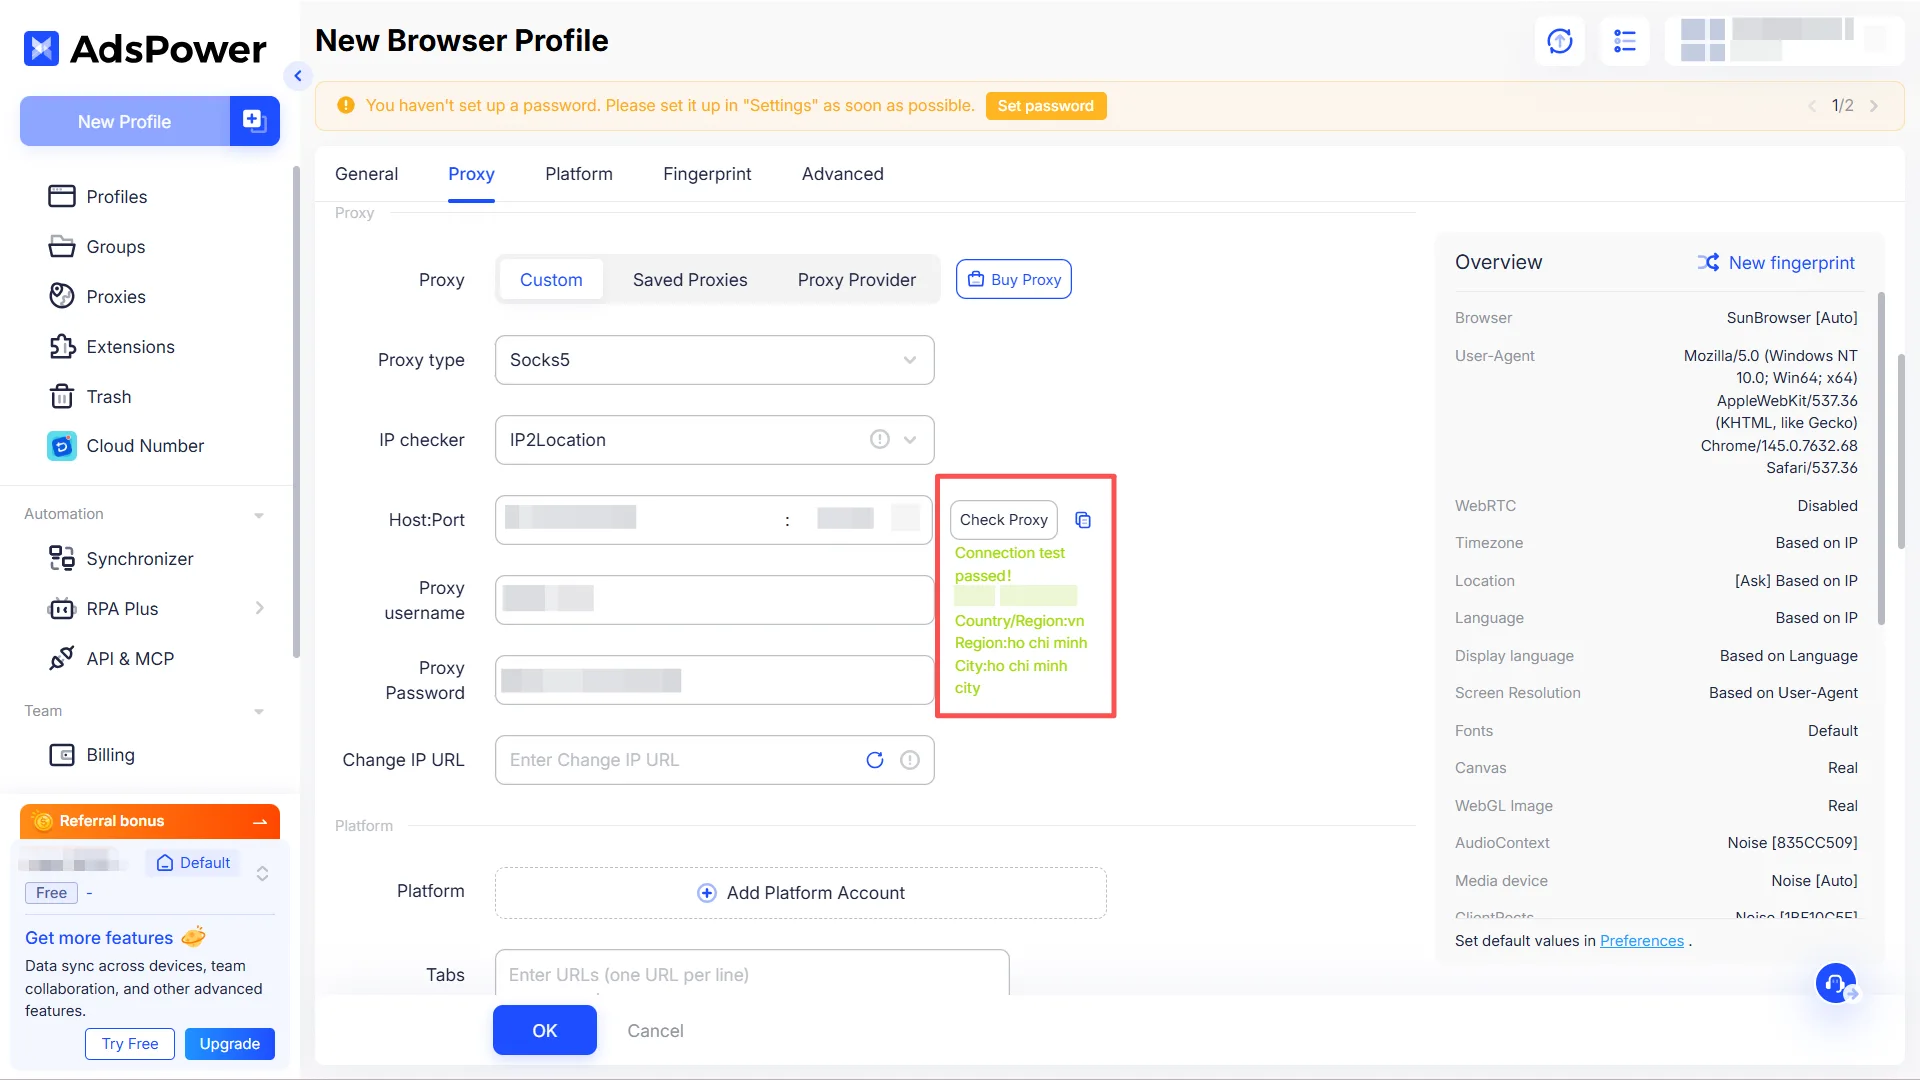
Launch AdsPower and click “New Profile” to create a new profile. Then click the “Proxy” button and select the “Custom” option.
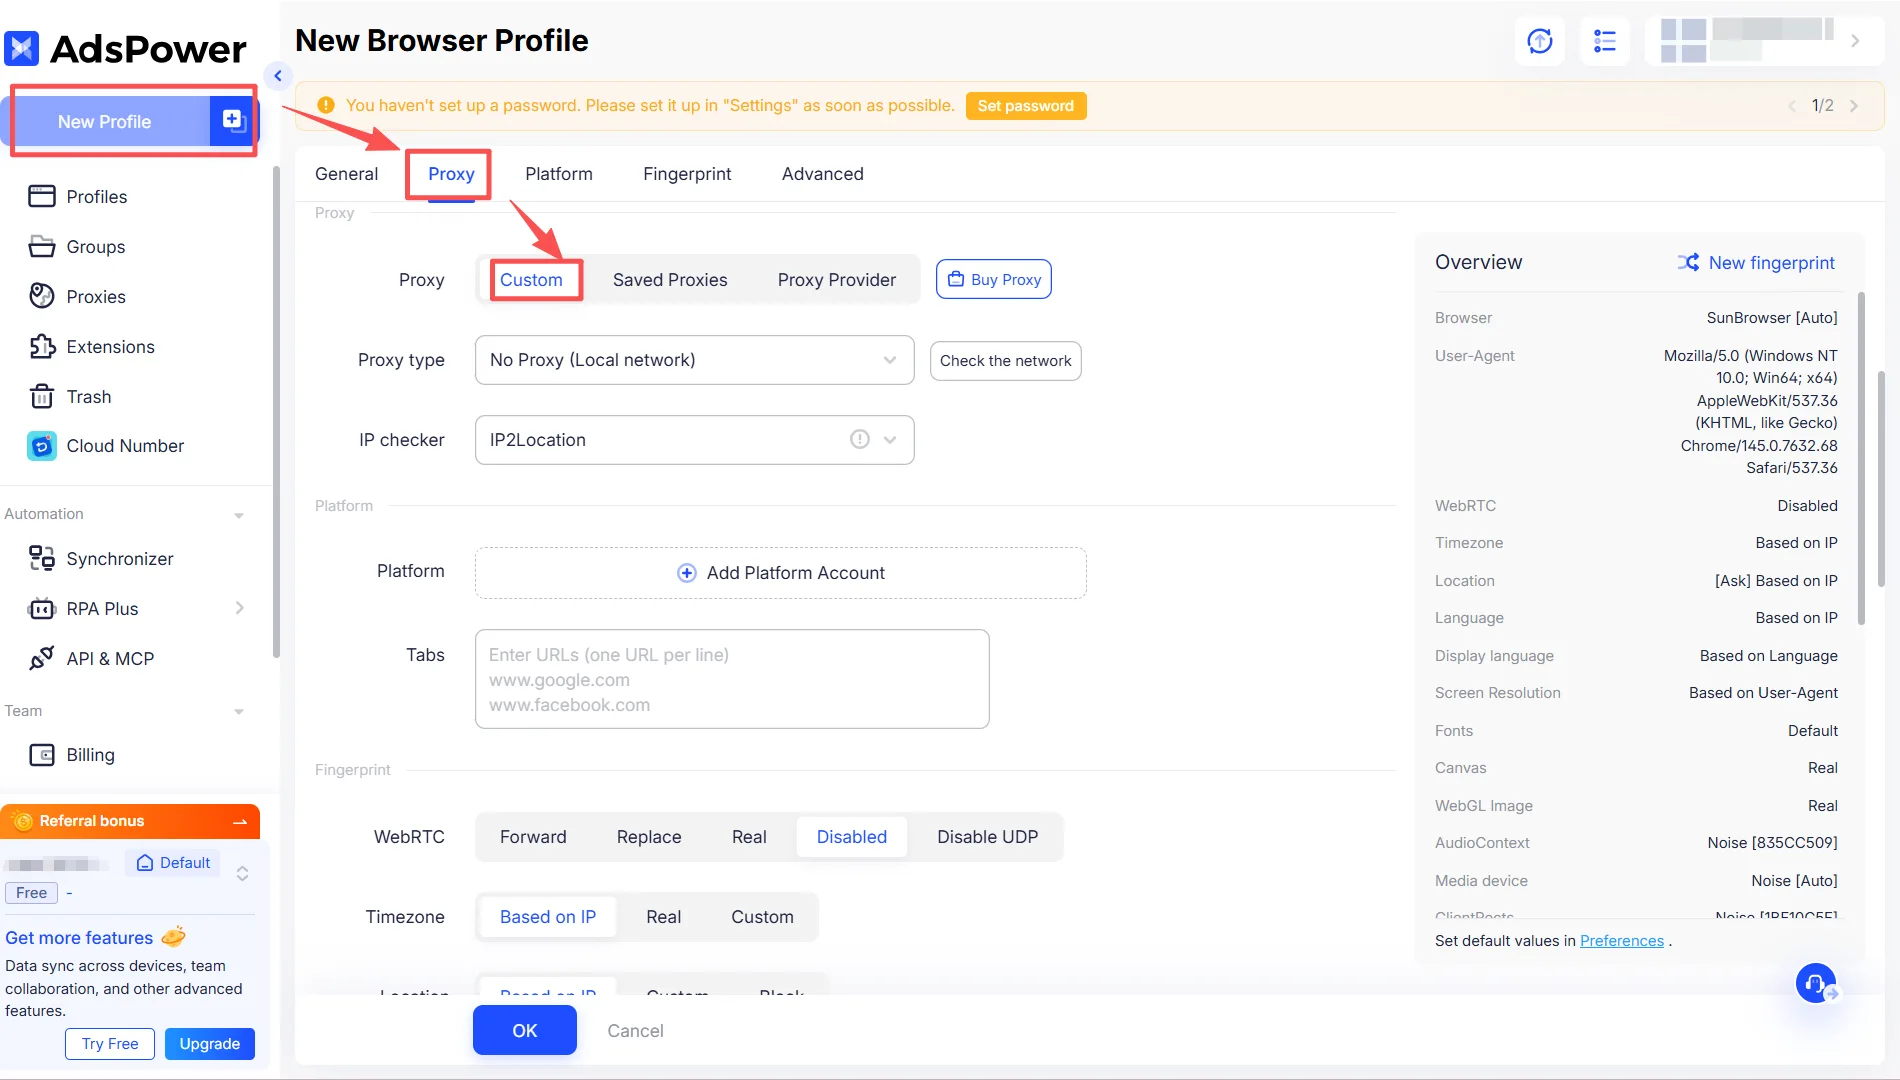
Fill in each field with the proxy information provided by IPcook, including proxy type, host address, port, as well as your login username and password.
Proxy type: HTTP, HTTPS, or SOCKS5
Host: IP address, for example, 1.2.3.4
Port: A number such as 31234
Proxy username: Username
Proxy password: Password
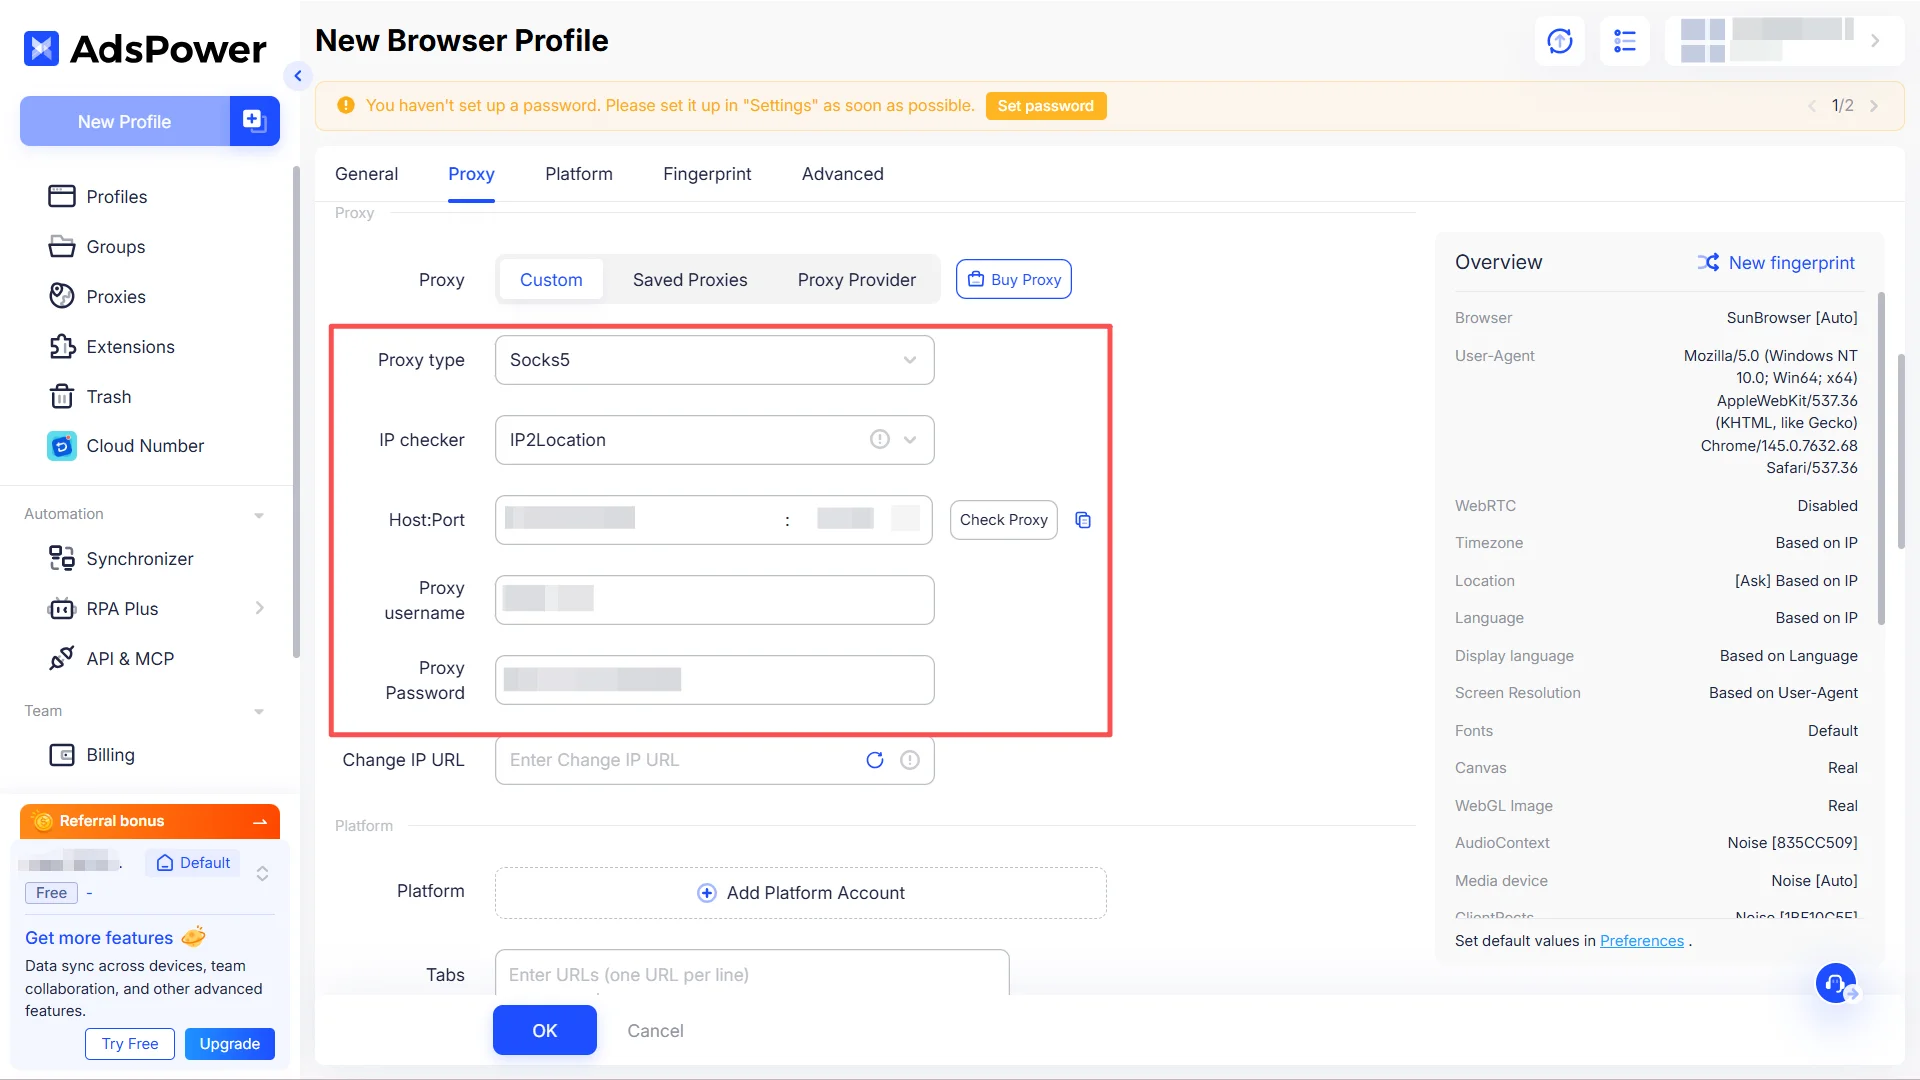
Once you have entered all proxy details, click the “Check Proxy” button to verify if the proxy connection is successful. If the connection works properly, it will display a success message along with your IP address and other related information.
When you’re done adjusting all browser settings, save your configuration by selecting “OK” at the bottom of the window. You’ll then find your new proxy‑enabled profile listed under the Profiles section. To start browsing with your settings active, just select the “Open” button.

For scenarios that require frequent IP changes, such as social media automation and data collection, IPcook's premium residential proxies are an ideal solution. They offer high anonymity and a real IP pool, which effectively reduces the risk of being blocked. You can configure dynamic proxies in AdsPower by following the steps below.
Before starting the configuration, log in to your IPcook account and obtain your residential proxy details.
🔥Join IPcook today and get 100MB of free traffic instantly.
Log in to your IPcook dashboard, pick your desired proxy type, and set your preferred location and session mode. And, you’ll receive a complete set of proxy credentials: proxy hostname/ IP address, port, and your personal authentication details.
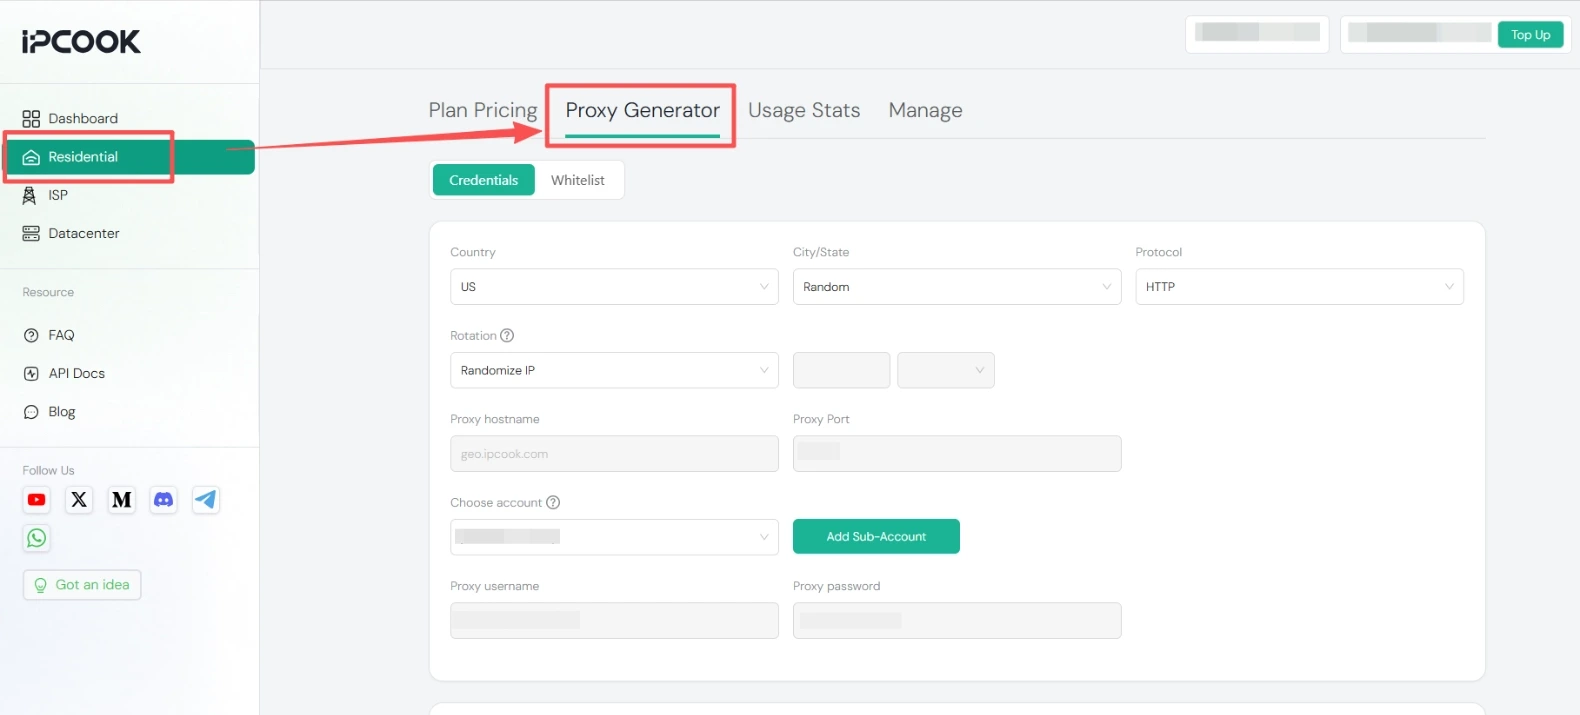
Start by opening AdsPower and creating a brand-new profile using the “New Profile” button. After that, head to the “Proxy” section and set the type to “Custom”.
Fill in each field with the proxy information provided by IPcook, including proxy type, host address, port, as well as your login username and password.
Proxy type: HTTP, HTTPS, or SOCKS5
Host: geo.ipcook.com
Port: A number such as 32345
Proxy username: Username
Proxy password: Password
After filling in all your proxy information, run a connection test by selecting the “Check Proxy” button. If everything is set up correctly, a confirmation will appear showing your current IP address and additional connection details.
Once the configuration is complete, click the “OK” button at the bottom. Return to your dashboard, where you’ll see the new proxy-enabled profile. Simply click the “Open” button to start using it.
If you need to use or manage multiple profiles across different sessions, batch proxy setup lets you import multiple proxies at once, making it easy to efficiently access and manage a large number of accounts.
First, you’ll need to export a proxy list from IPcook that includes IP address, port, username, and password.
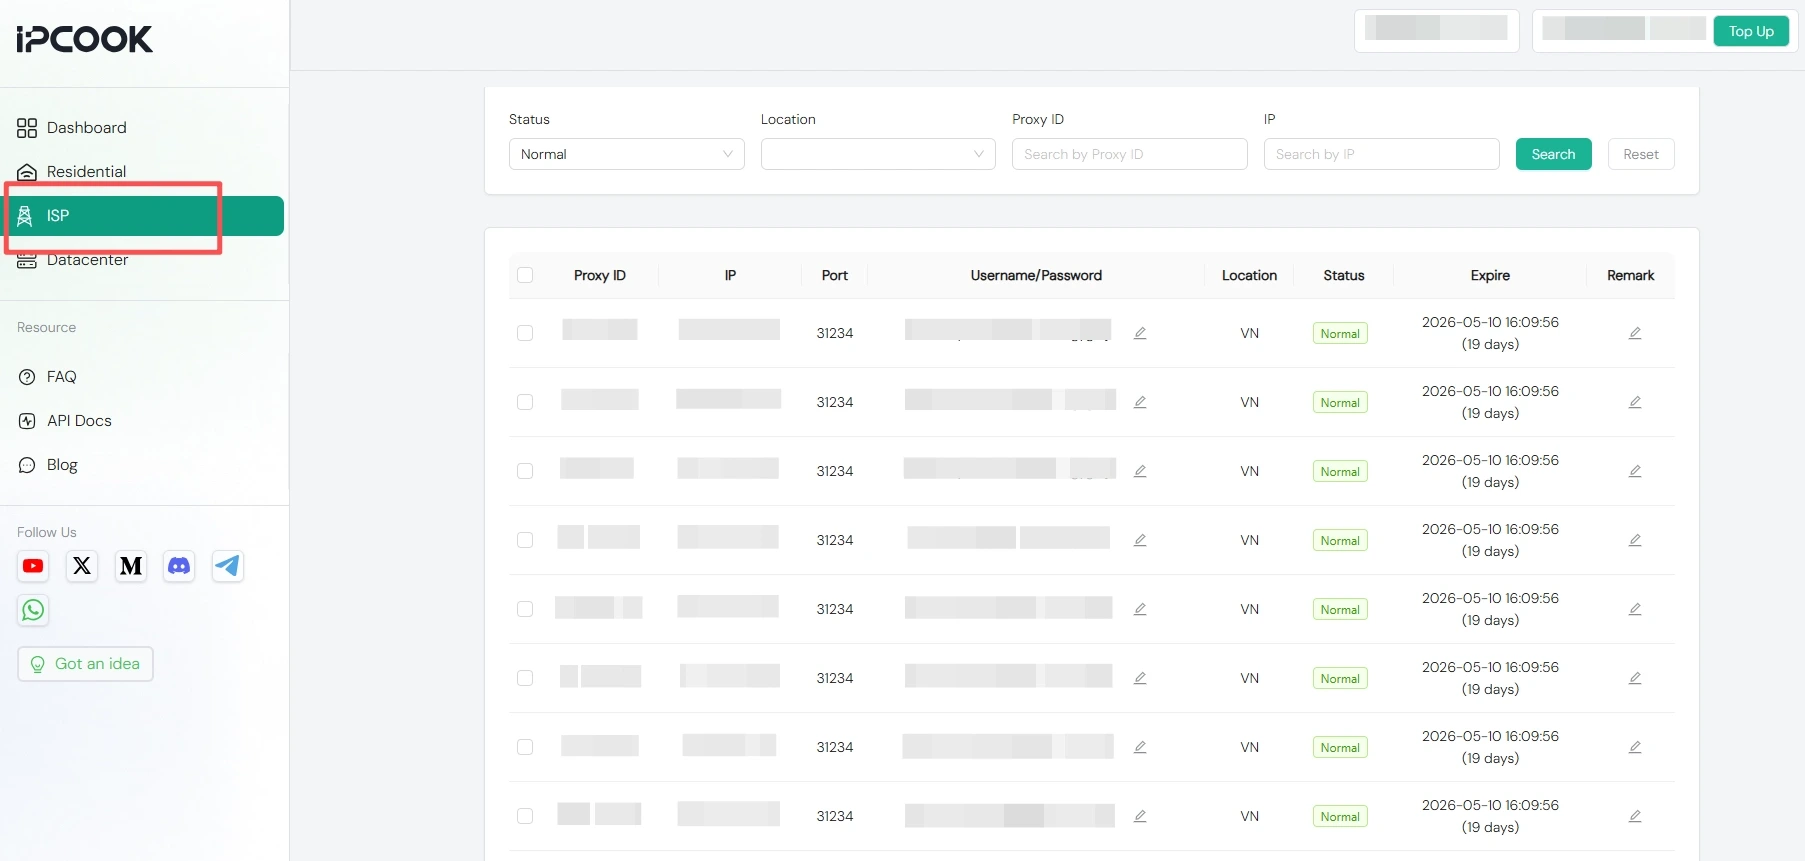
For bulk static residential proxy setup, navigate to “ISP” and select “My Proxy”.
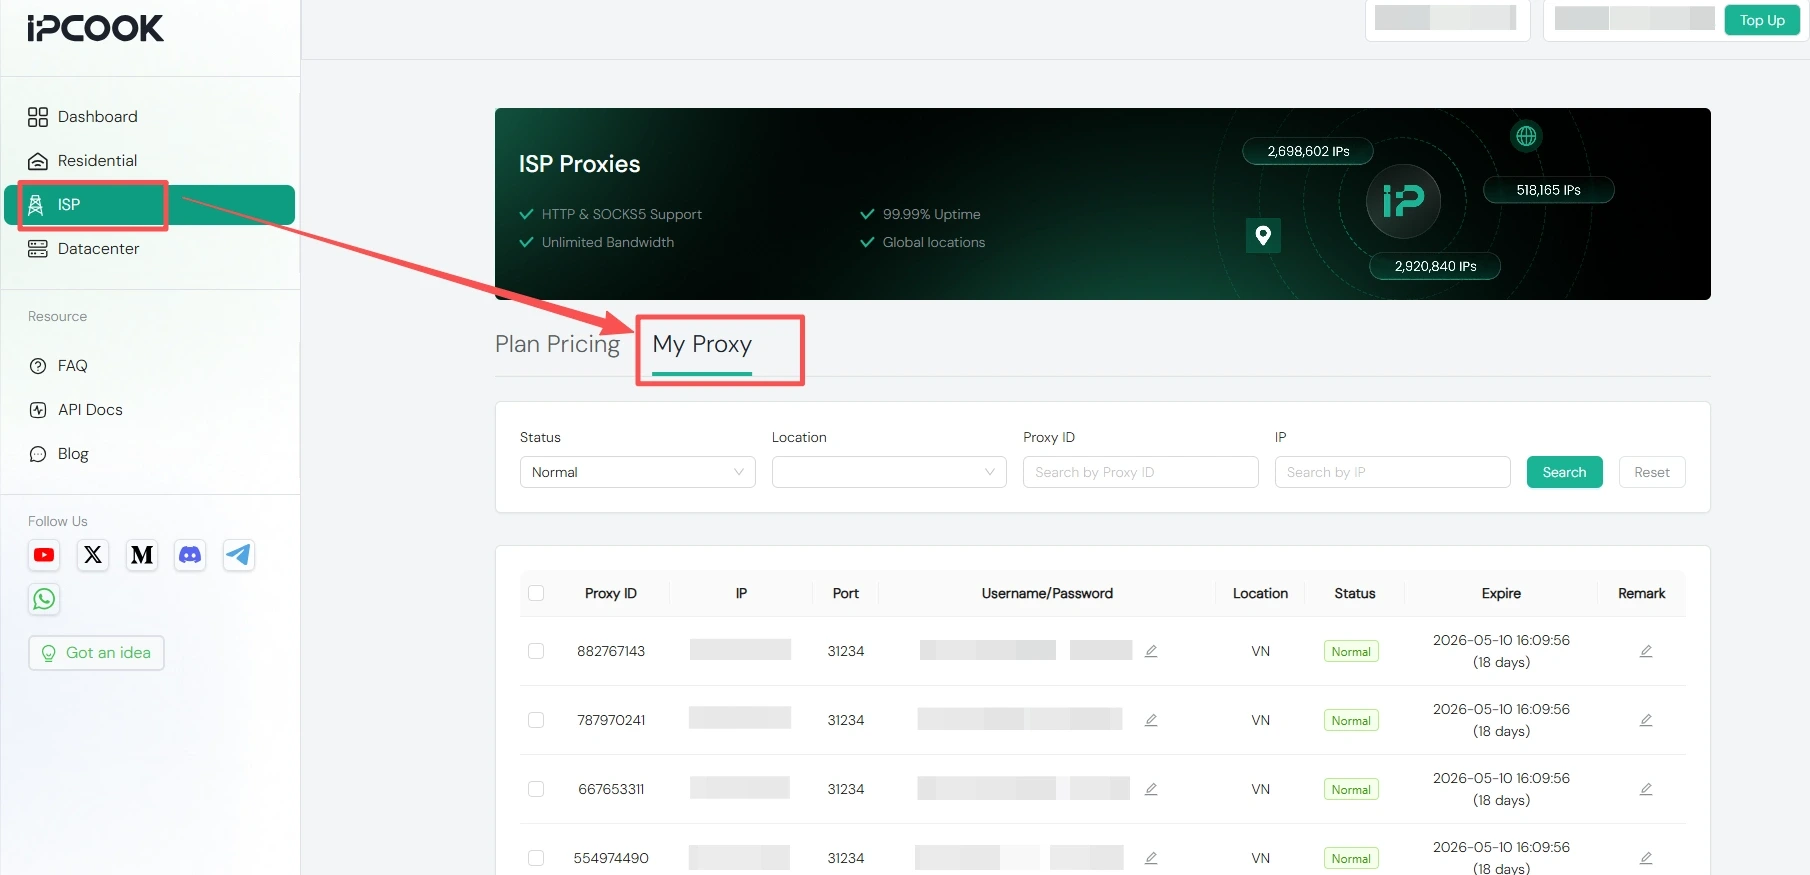
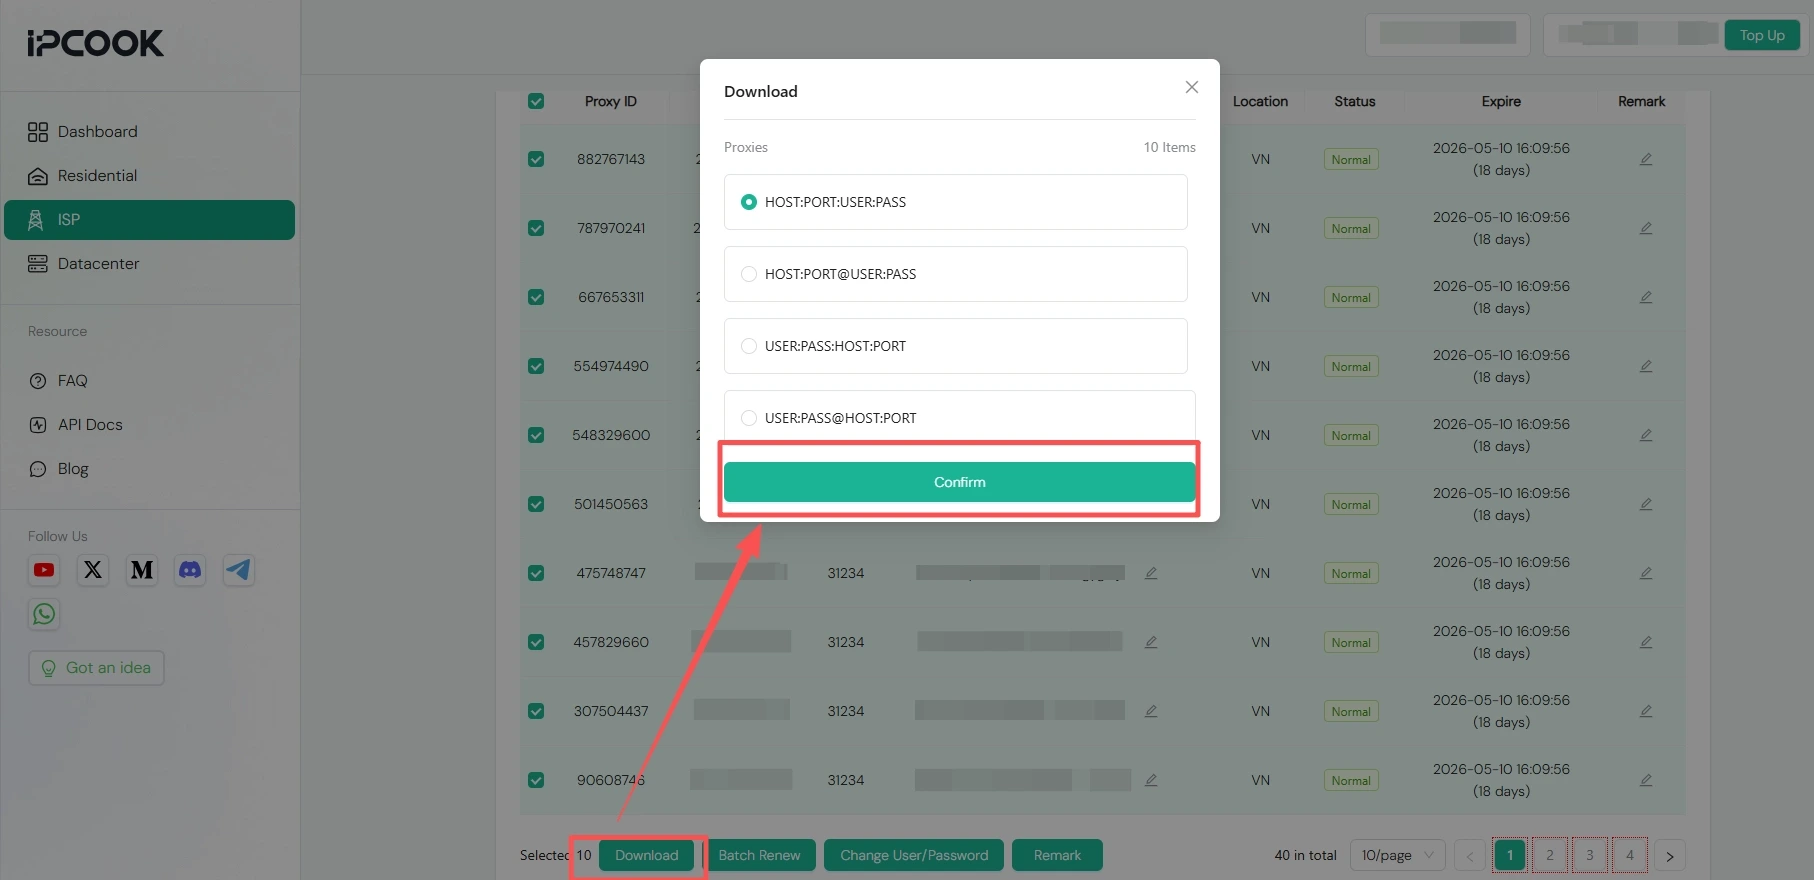
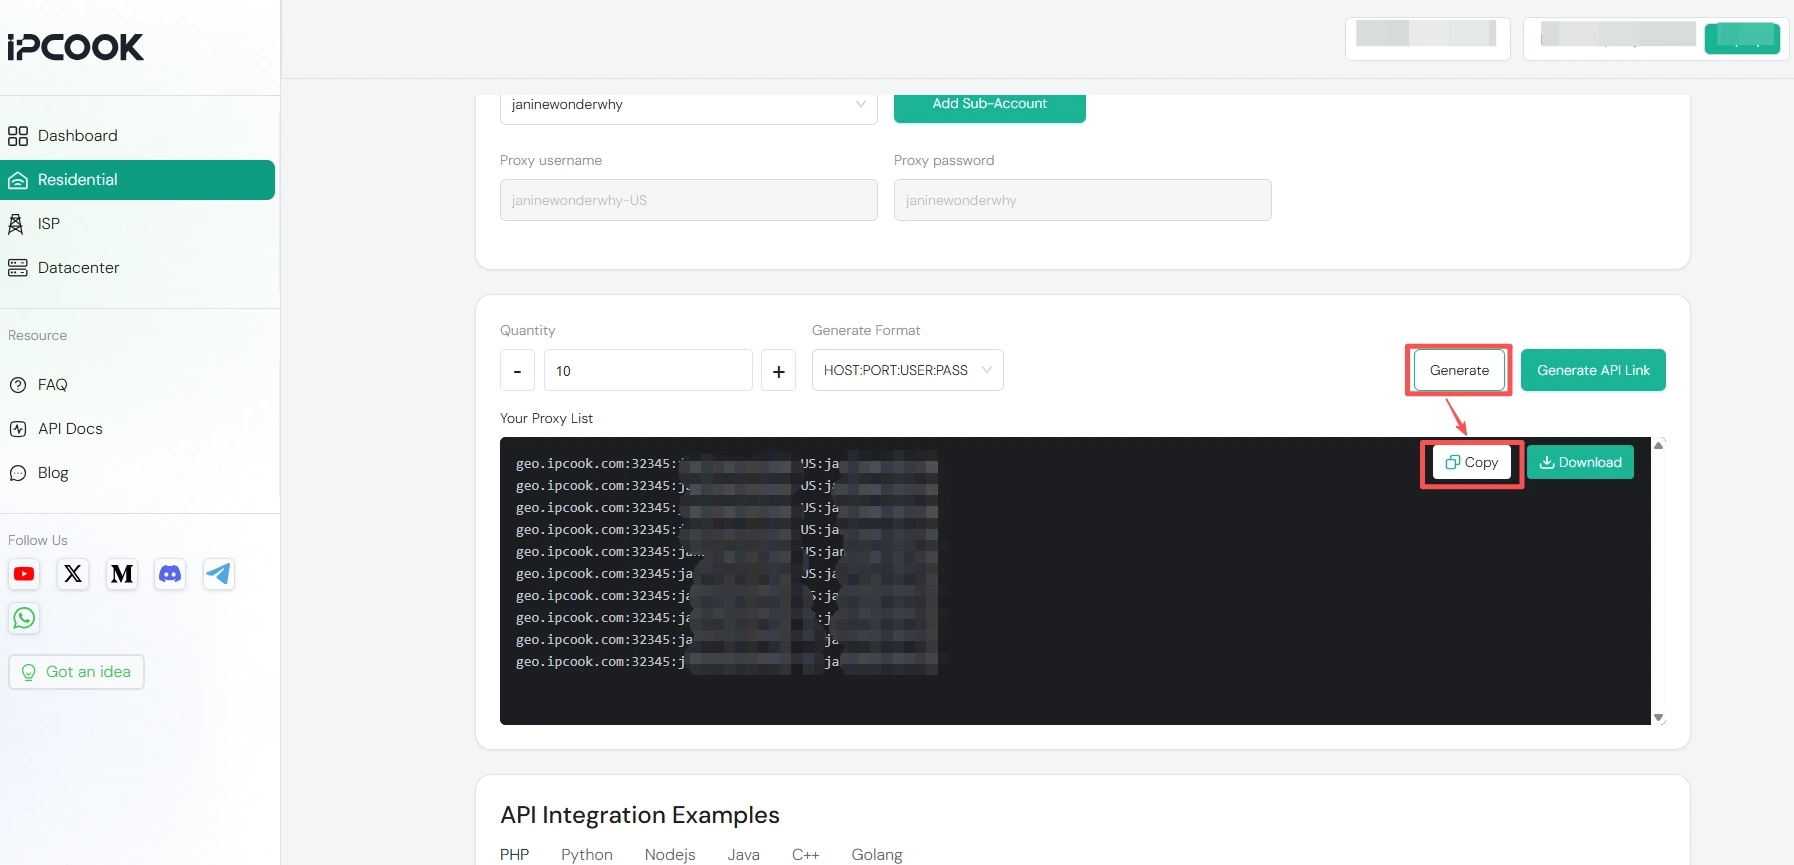
Scroll down to find the batch download option in your generated IPcook proxy list. Choose your preferred format, generate the TXT file, and copy the content.
To set up dynamic residential proxies in bulk, go to “Residential” and open “Proxy Generator”. Configure your preferred IP location, proxy protocol, and other relevant settings.
Once finished, scroll down to specify the number of proxies and the file format you need, then generate and copy the information.
Paste the copied information into AdsPower to complete the import.
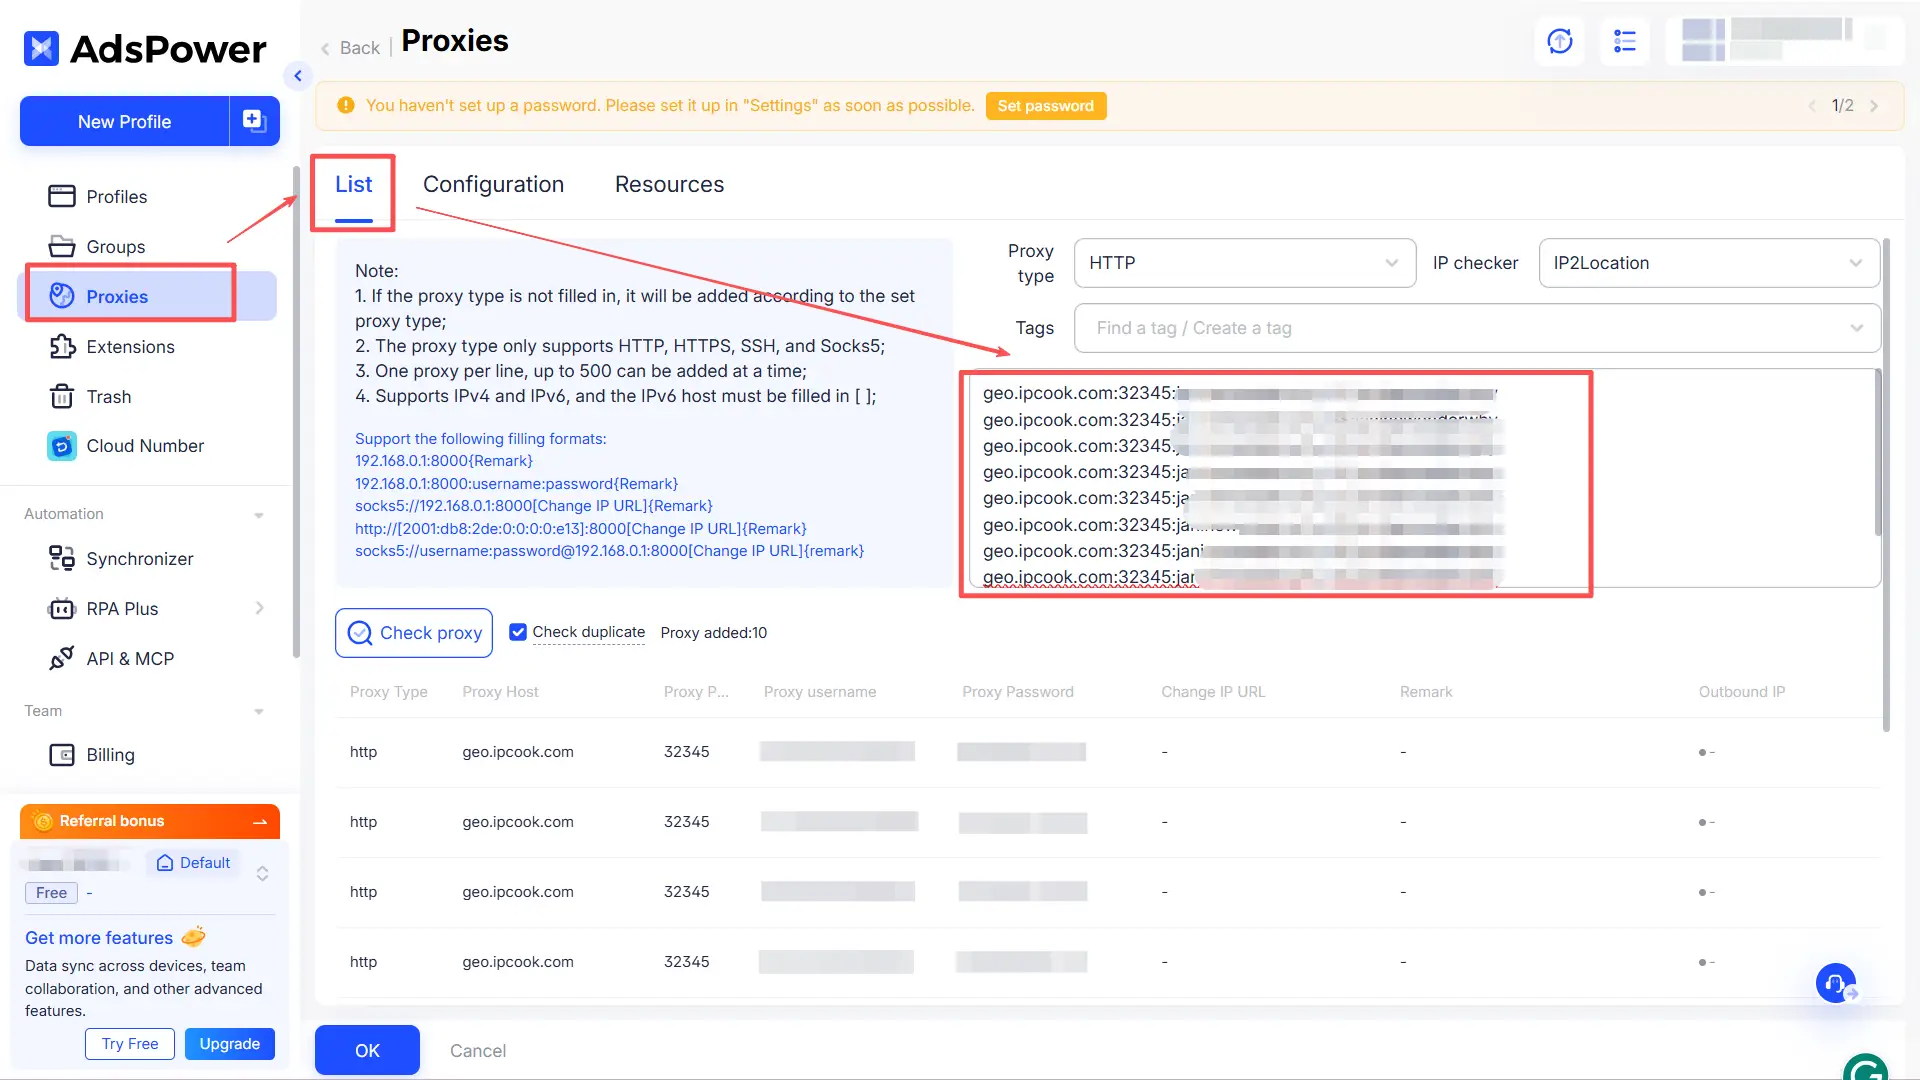
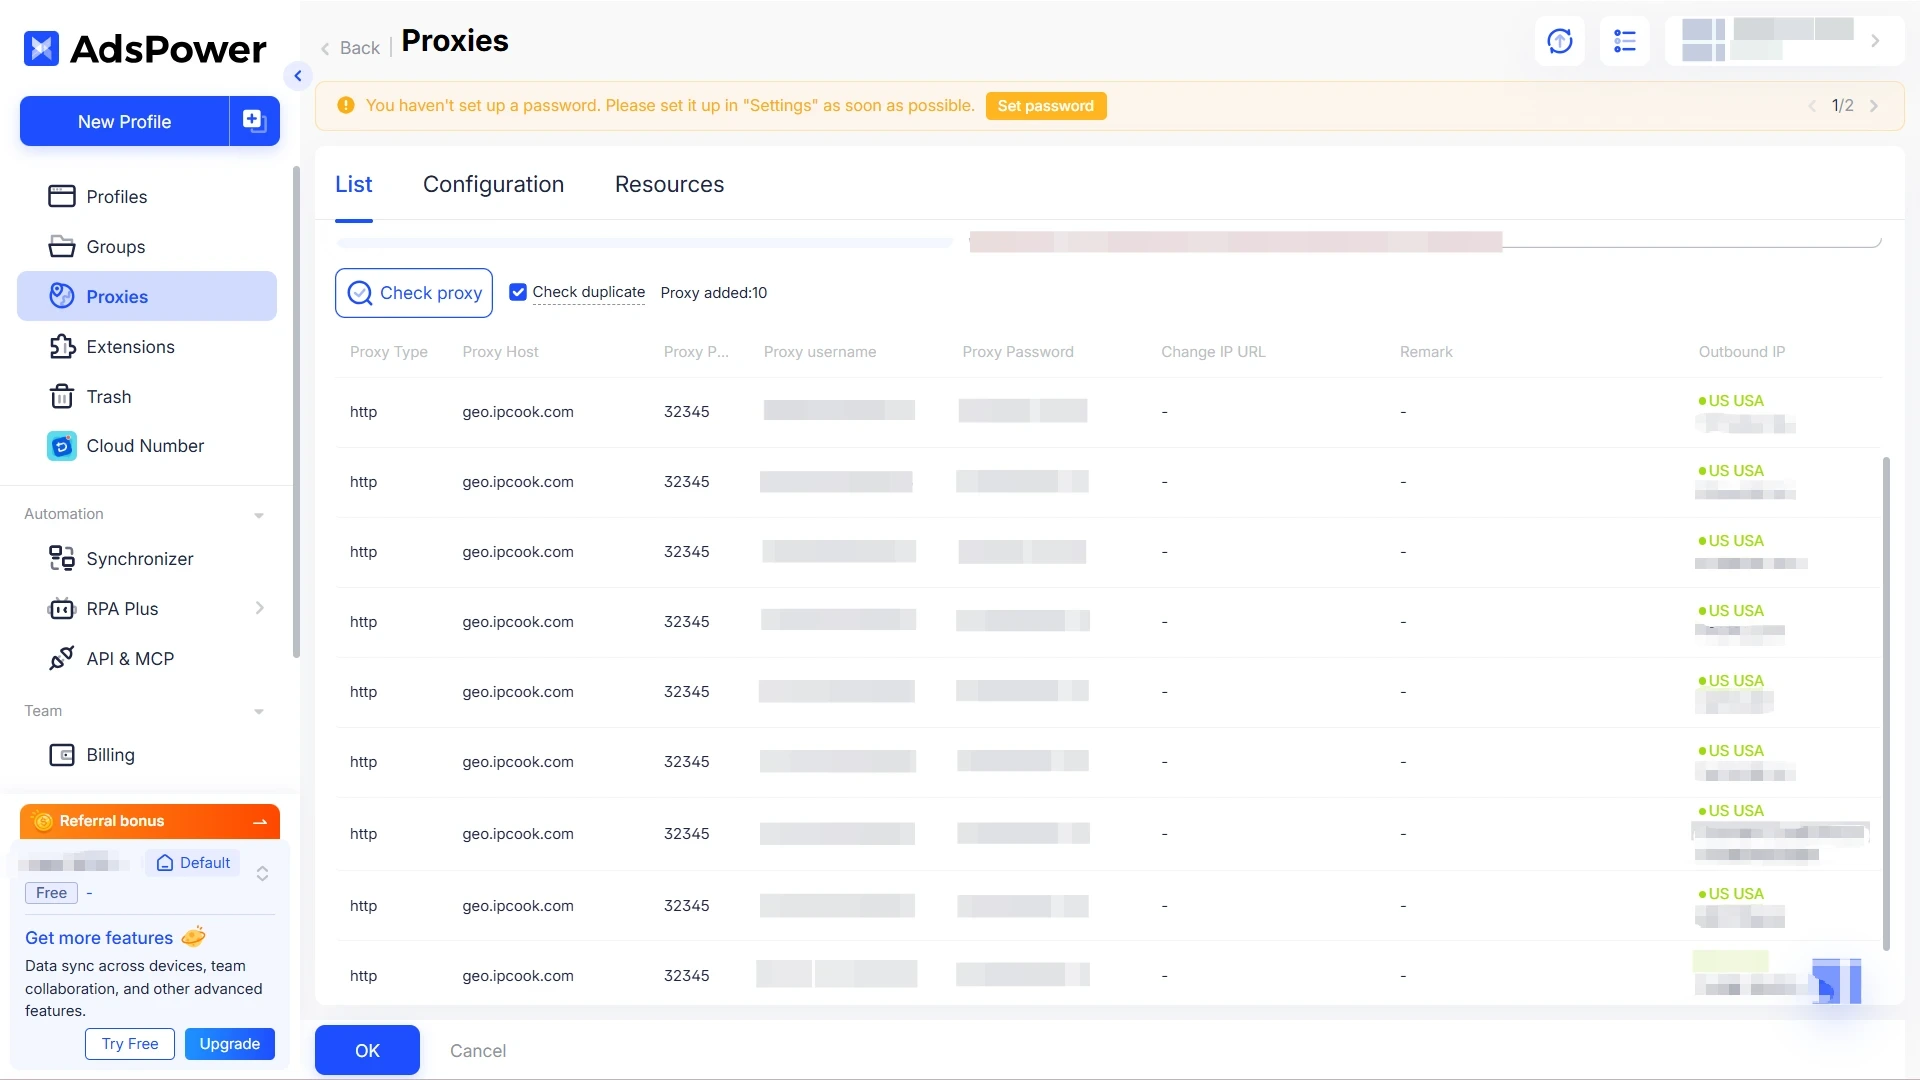
Click “Check Proxy” to quickly verify the connection status of your proxies. Finally, click “OK” to complete the setup.
For multi-account management, standard browsers fail to properly isolate device fingerprints. Platforms can easily detect repeated users through signals like Canvas, WebGL, time zone, and language, leading to linked bans or restrictions.
As a professional anti-detect browser, AdsPower eliminates this risk by generating unique, customizable digital fingerprints for each profile. When combined with properly configured proxy IPs, AdsPower is highly effective for managing multiple Facebook accounts while lowering the risk of IP bans on Facebook.
The core advantages of choosing AdsPower include:
Full fingerprint customization: Supports dozens of adjustable parameters, including fonts, screen resolution, audio context, and media devices, creating genuine user environments and greatly reducing detection risks.
Stable multi-account control: Offers account grouping, tagging, and batch operations for efficient scaling. Perfect for e-commerce, social media matrices, and ad accounts, all managed independently with no cross-contamination.
Flexible proxy support: Works with HTTP, HTTPS, SOCKS5, and residential proxies. Supports single or bulk imports and integrates smoothly with proxy providers such as IPcook for easy IP rotation and location switching.
Built-in automation tools: Includes RPA and scripting to automate repetitive tasks, such as liking, following, posting, and data scraping, improving efficiency while reducing manual mistakes.
It is worth noting that, unlike Multilogin, AdsPower does not provide proxies on its own. Its fingerprint customization options are relatively basic, and it supports only one saved profile template, which may limit advanced users. Additionally, performance can become strained under heavy automation workloads.
🔥If you're still looking for another anti-detect browser to choose from, read the page below.
Once you have completed the steps above, you will have mastered how to properly set up proxies in AdsPower. You are now ready to run your multi-account operations safely and efficiently using proxies within the browser. For consistent and stable performance, be sure to rely on IPcook as your trusted proxy provider.

