How to Use a Proxy on iPhone and iPad: Setup Guide

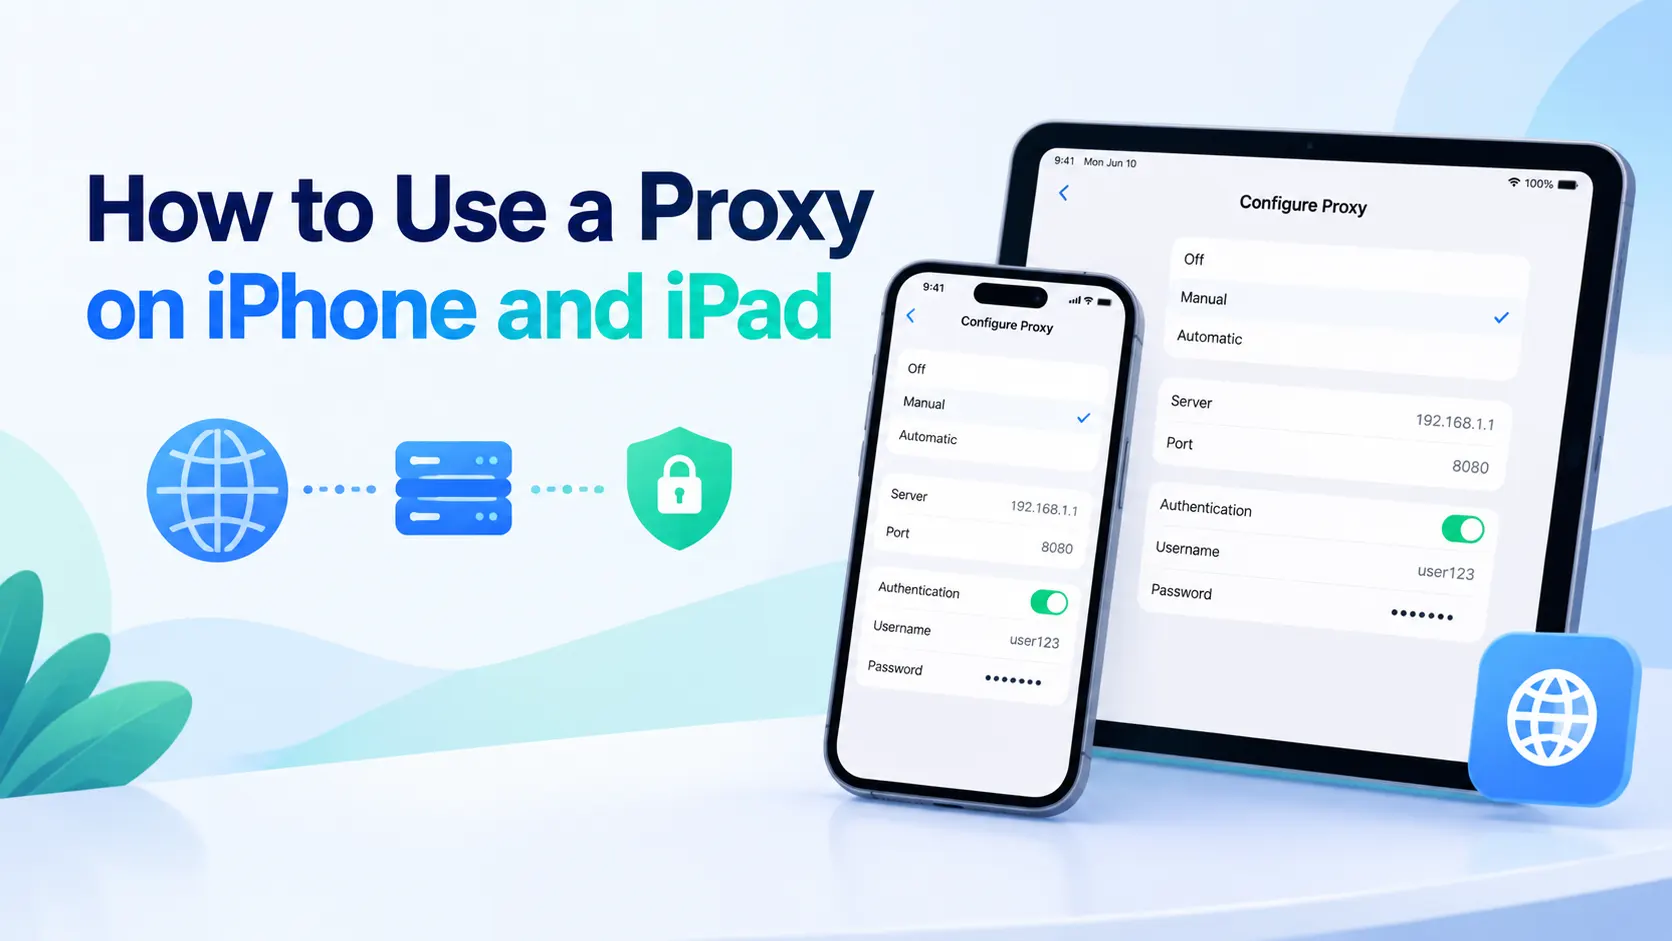
A proxy can be useful on an iPhone or iPad when you need to access region-specific content, test network behavior, or route connections through a different IP address. How you set it up depends on the proxy protocol, the network you are using, and how your apps handle proxy connections.
This guide covers choosing a proxy, configuring it on Wi-Fi or cellular data, checking that it works, and fixing common connection issues.
How to Choose a Proxy for iPhone and iPad
Before configuring a proxy, it helps to distinguish between the proxy protocol and the type of IP address you are using.
HTTP/HTTPS Proxy: This is the most straightforward option for the built-in iPhone and iPad Wi-Fi proxy settings. You can configure it through Configure Proxy → Manual.
SOCKS5 Proxy: iOS and iPadOS do not provide a direct SOCKS5 field in the standard Wi-Fi proxy settings. A compatible third-party app is generally required.
Residential/ISP Proxy: These refer to IP types rather than proxy protocols. ISP Proxy is suitable for stable use cases, such as streaming, extended web browsing, and social media account sessions. Residential Proxy is more suitable when you need IP flexibility, such as accessing content from a particular region, testing results in different locations, or changing exit IPs.
✨Once you have identified the protocol and IP type you need, the next step is choosing a provider that supports them. IPcook is one option that covers both ISP Proxy and Residential Proxy.
IPcook ISP Proxy supports unlimited traffic and fixed IPs, while IPcook Residential Proxy supports 185+ locations, city-level targeting, IP rotation, and sticky sessions of up to 24 hours.
How to Set Up a Proxy on iPhone or iPad
Proxy setup on an iPhone is not the same for every configuration. The setup method depends on the proxy protocol and the type of network connection. The steps below cover the standard Wi-Fi configuration and other common proxy setups.
Note: The steps in this guide are based on iOS 26.5.2. Settings and menu names may vary slightly in other iOS versions.
Set Up an HTTP Proxy on Wi-Fi
For a standard HTTP proxy, iPhone and iPad provide a built-in configuration option for the connected Wi-Fi network. This is the main system-level option for configuring an HTTP proxy on an iPhone and is usually the simplest way to set up a proxy without installing another app.
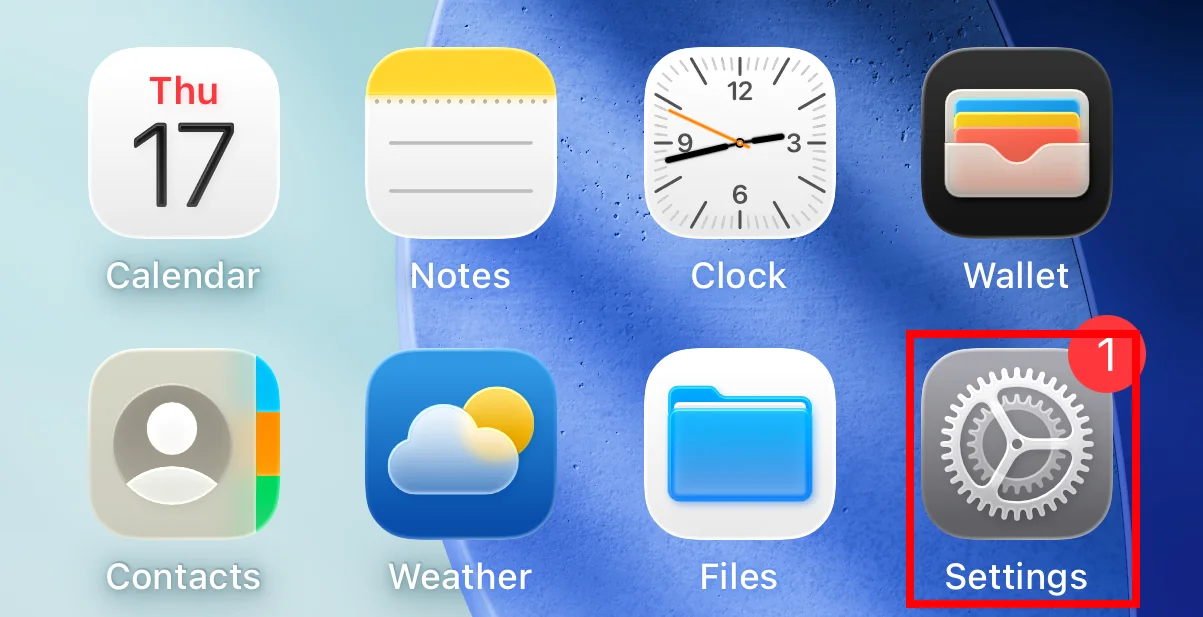
Open Settings on your iPhone or iPad.
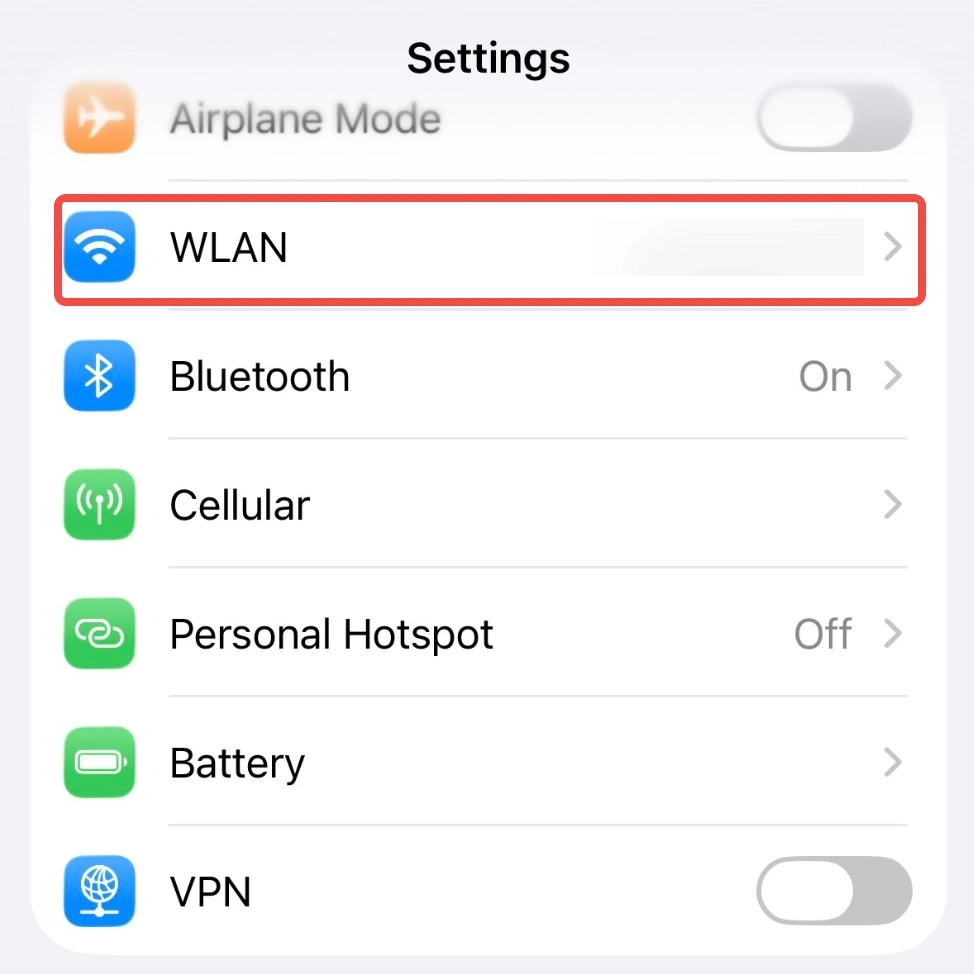
Tap Wi-Fi.
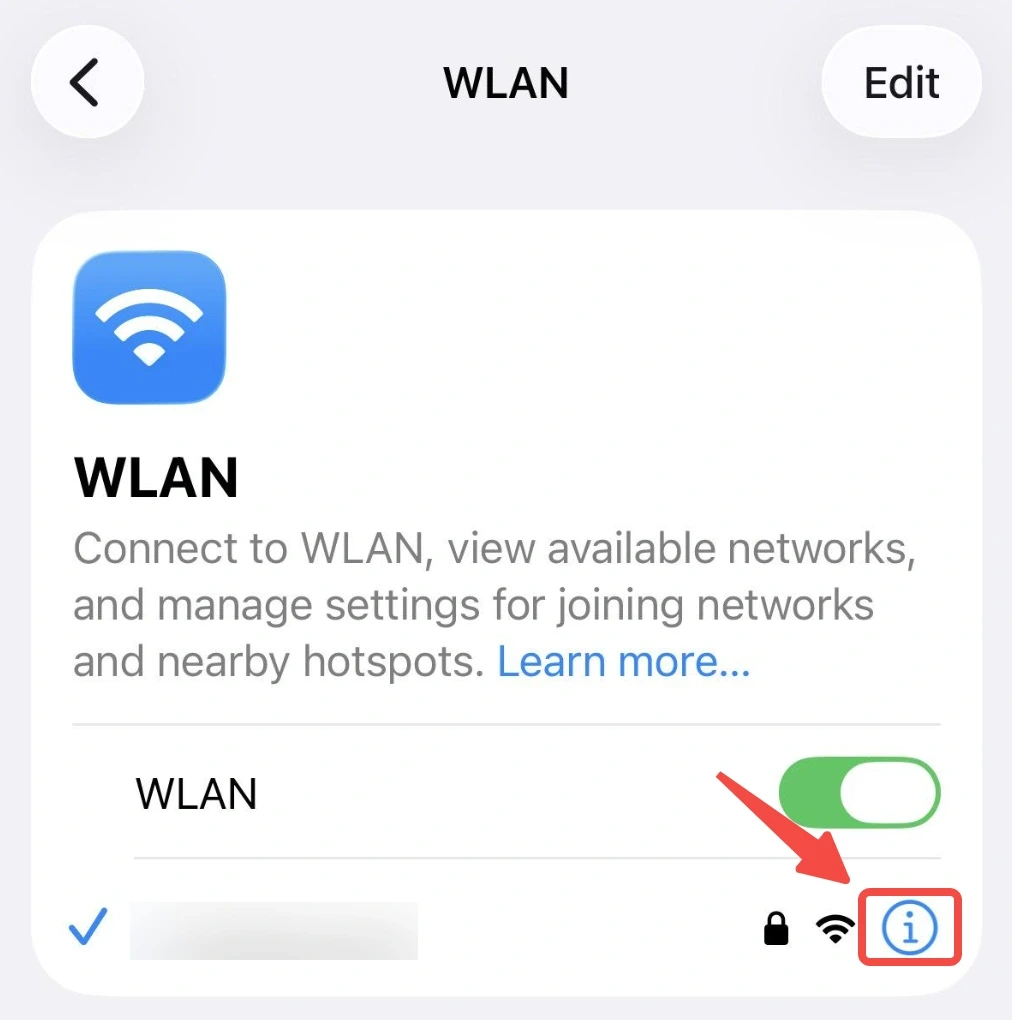
Find the Wi-Fi network you are currently connected to and tap the Info button next to it.
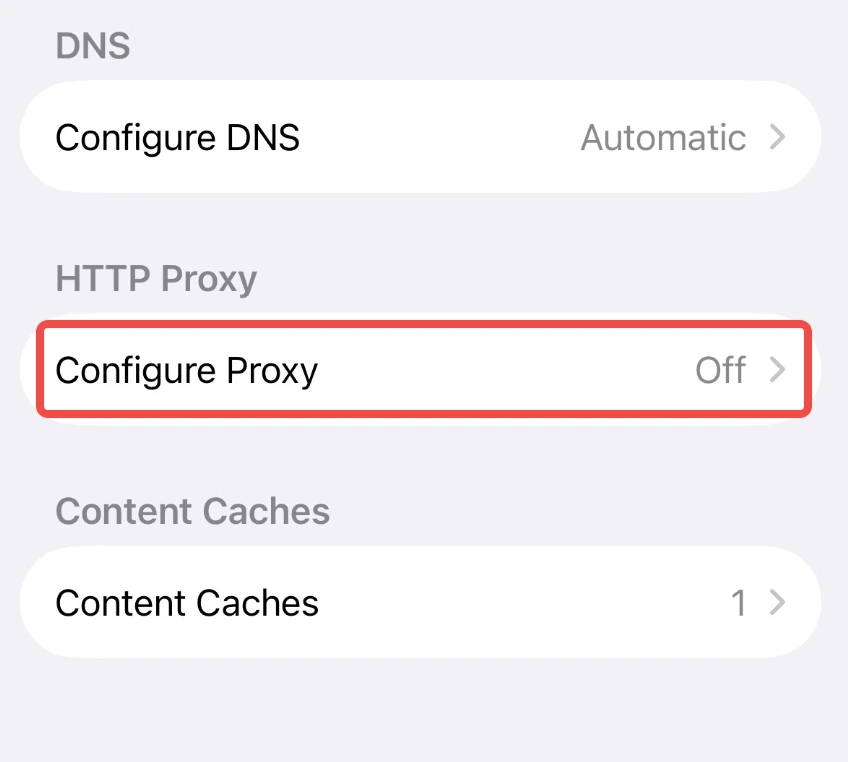
Scroll down to HTTP Proxy and tap Configure Proxy.
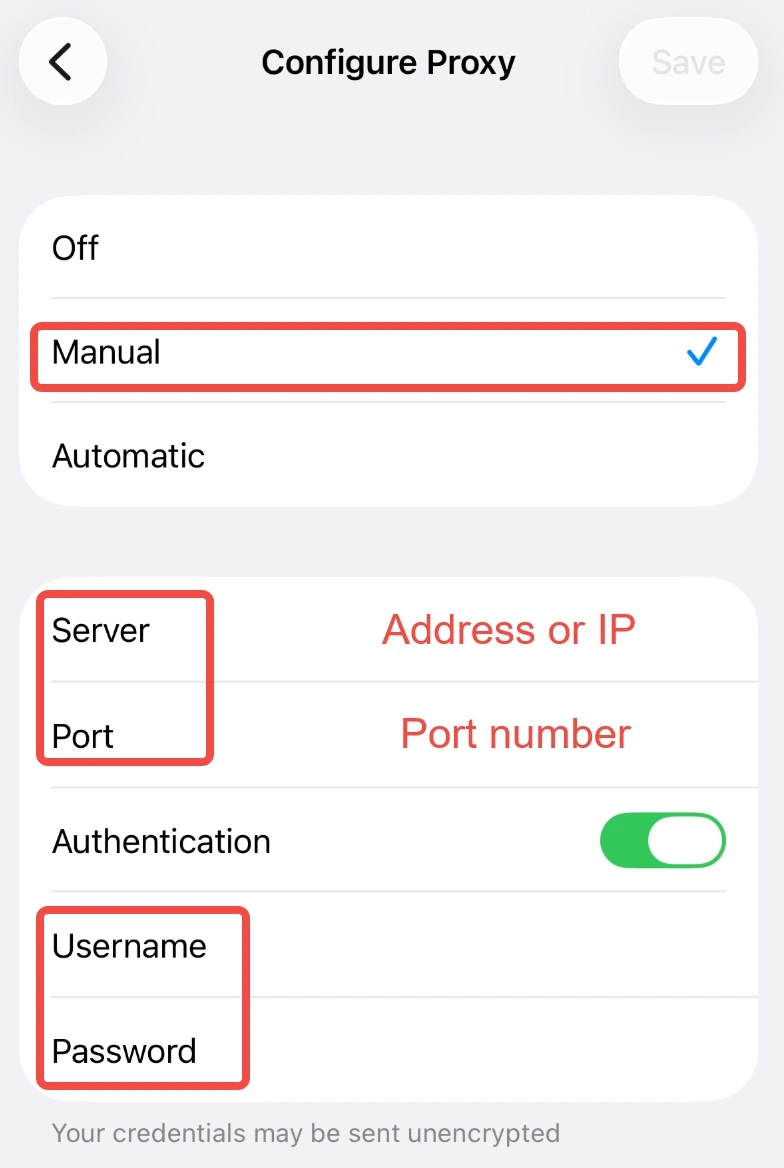
Select Manual, then enter the proxy Server and Port. If authentication is required, enter the proxy Username and Password.
Tap Save and reconnect or test the connection.
The Server and Port fields should contain the connection details supplied by your proxy provider. If the proxy uses authentication, the username and password must match the credentials assigned to that proxy.
This configuration applies to the selected Wi-Fi network. It does not mean that the same proxy will automatically be used whenever the iPhone or iPad connects to another Wi-Fi network or switches to cellular data.
If the proxy does not connect after saving the settings, check the server address, port, and authentication details first. These are also the main details you will need when troubleshooting a failed proxy connection later.
Configure an Automatic Proxy with a PAC URL
A PAC, or Proxy Auto-Configuration, URL allows the device to obtain proxy configuration automatically from a specified file instead of entering a single proxy server manually.
To use it, open Settings → Wi-Fi, tap the Info button for the connected network, and open Configure Proxy under HTTP Proxy. Select Auto, enter the PAC URL provided by your network administrator or proxy service, and save the configuration.
The main difference is that Manual configuration specifies the proxy server directly, while Auto uses the PAC file to determine the proxy configuration. Use the method supported by your network or proxy provider.
Set Up a SOCKS5 Proxy with a Third-Party App
The standard Wi-Fi proxy settings on iPhone and iPad do not provide a direct field for entering a SOCKS5 proxy. To use SOCKS5 on an iPhone, a compatible third-party proxy app is generally needed.
The basic process is:
Obtain the SOCKS5 server, port, and authentication details from your proxy provider.
Use a SOCKS5-compatible app or tool to configure the proxy.
Create a new proxy profile or connection.
Enter the server, port, username, and password if authentication is required.
Enable the proxy connection.
Check your public IP address to confirm that traffic is being routed through the proxy.
The exact menus vary between apps, so follow the app's own configuration options for the final setup.
Use a Proxy with Cellular Data
If you want to use a proxy on iPhone with mobile data, there is an important limitation to keep in mind: the built-in proxy settings on iPhone and iPad are tied to individual Wi-Fi networks. A proxy configured for Wi-Fi will not automatically apply when you switch to Cellular Data.
To use a proxy over cellular data, you generally need a compatible third-party tool or another supported configuration method. Make sure the solution supports both your proxy protocol and cellular connections.
After configuring the proxy, test the connection over cellular data to make sure the proxy works as expected.
How to Check if Your Proxy Is Working
After configuring the proxy, verify the connection instead of assuming that saving the settings was enough.
Check your public IP: Use an IP lookup service, such as IPinfo, to check your current public IP address. Compare it with the IP address you had before enabling the proxy.
Check the IP location: If the proxy was selected for a particular country or city, check whether the reported location matches the expected region. Keep in mind that IP-based geolocation is approximate and may not always identify the exact location.
Test the target website or service: Open the website or service you actually need to access and make sure it works normally.
💡Need a More Detailed Test? Learn How to Test a Proxy.
If your public IP has not changed, check the proxy server, port, username, and password first. Also confirm that the device is connected to the Wi-Fi network where the proxy was configured.
How to Fix Common iPhone Proxy Problems
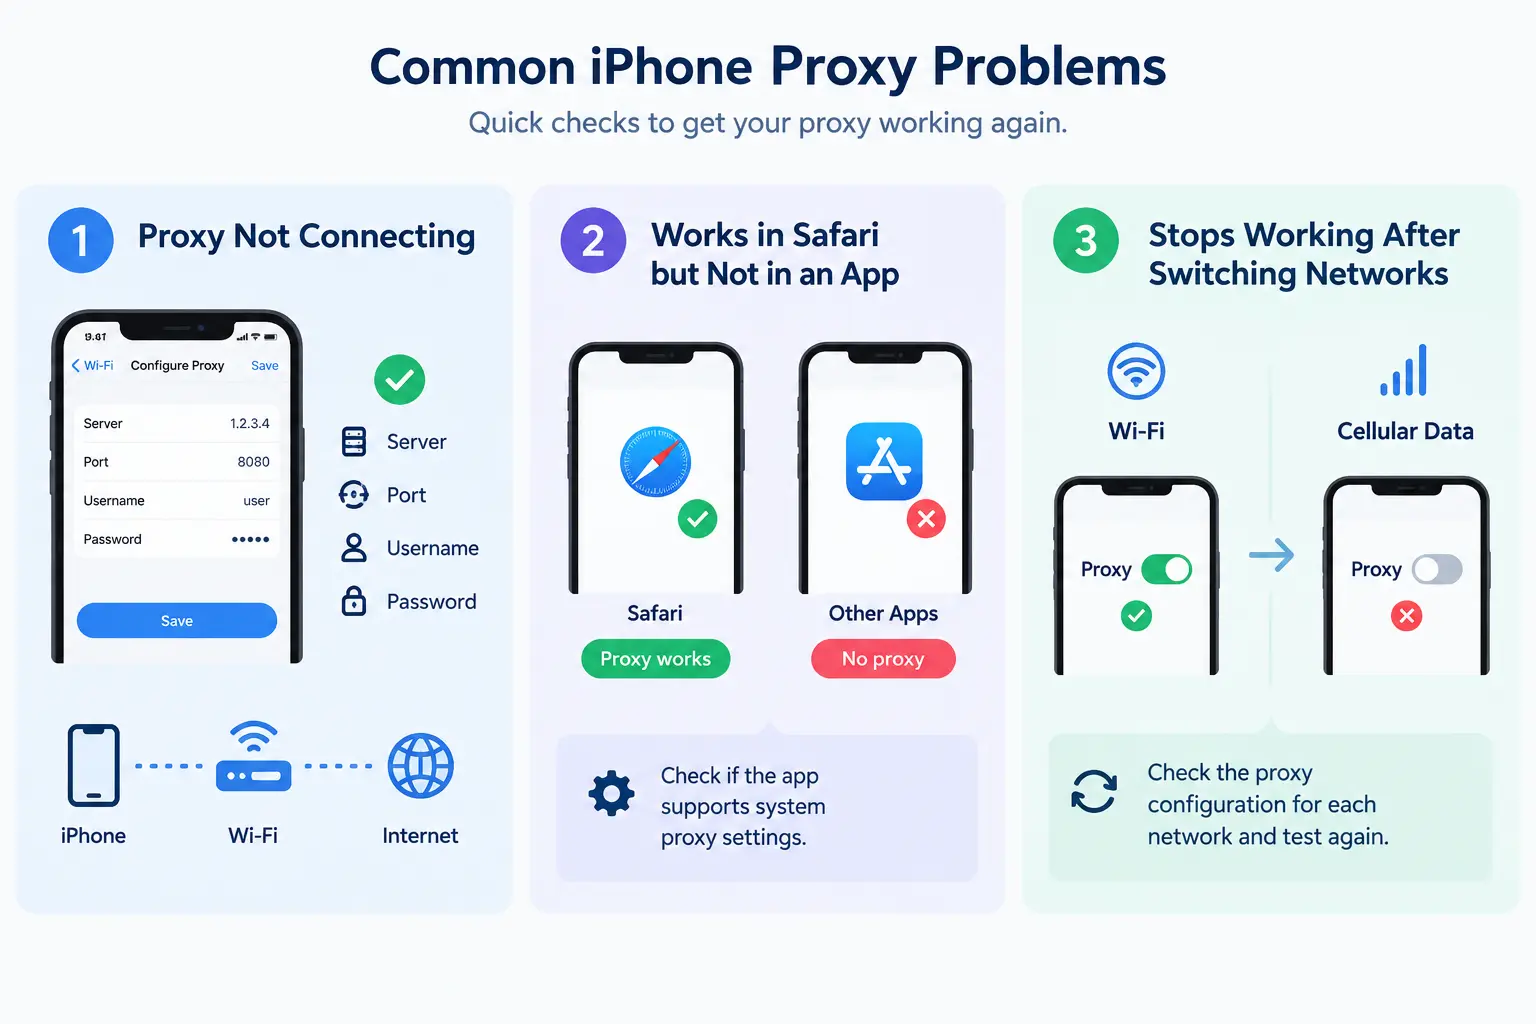
Proxy problems on iPhone and iPad are often caused by incorrect connection details, network changes, or differences in how individual apps handle proxy traffic.
Proxy Not Connecting
Start with the basic connection details. Check that the Server and Port match the information from your proxy provider and that the username and password are correct if authentication is required. If those details are correct, check whether the proxy server is reachable and whether the Wi-Fi network has normal internet access. Reconnecting to the Wi-Fi network and saving the proxy configuration again can also help isolate a temporary connection issue.
Proxy Works in Safari but Not in an App
A working proxy connection in Safari does not necessarily mean every app will route traffic through the same proxy. Some apps may use their own networking behavior or may not follow the device's system proxy configuration.
If a particular app needs to use a proxy, check whether it supports system proxy settings. If not, a compatible third-party proxy solution with the required routing capabilities may be necessary.
Proxy Stops Working After Switching Networks
A proxy configured for one Wi-Fi network does not automatically apply to every other network. If you connect to a different Wi-Fi network, check its proxy configuration separately. Switching from Wi-Fi to Cellular Data also changes the network path, so the previous Wi-Fi proxy setting will not continue to apply in the same way.
Conclusion
Using a proxy on an iPhone or iPad mainly comes down to matching the configuration method to your proxy and network. Wi-Fi HTTP proxies can be configured directly, while PAC, SOCKS5, and cellular connections may require different approaches. After setup, checking your IP address and location can help confirm whether the proxy is working as expected.
For users who do not already have a proxy provider, options such as IPcook include ISP Proxy from $0.05/IP/day and Residential Proxy from $0.30/GB, with 100 MB of free residential traffic for new users.